


On Launch Day, one of the best ways to set your congregation up for success with Givelify is to show your members and supporters how to download the giving app and make their first gift.
Once they’ve downloaded the app and created a Givelify account, they’ll experience how easy and joyful it is to give to your place of worship at any time and from anywhere.
We’ve included step-by-step instructions on how to walk your members through downloading the app and making their first gift through Givelify.
Download and print the How to Make Your First Gift With Givelify flyer to hand out to your congregation on Launch Day and include it in your other communication channels.
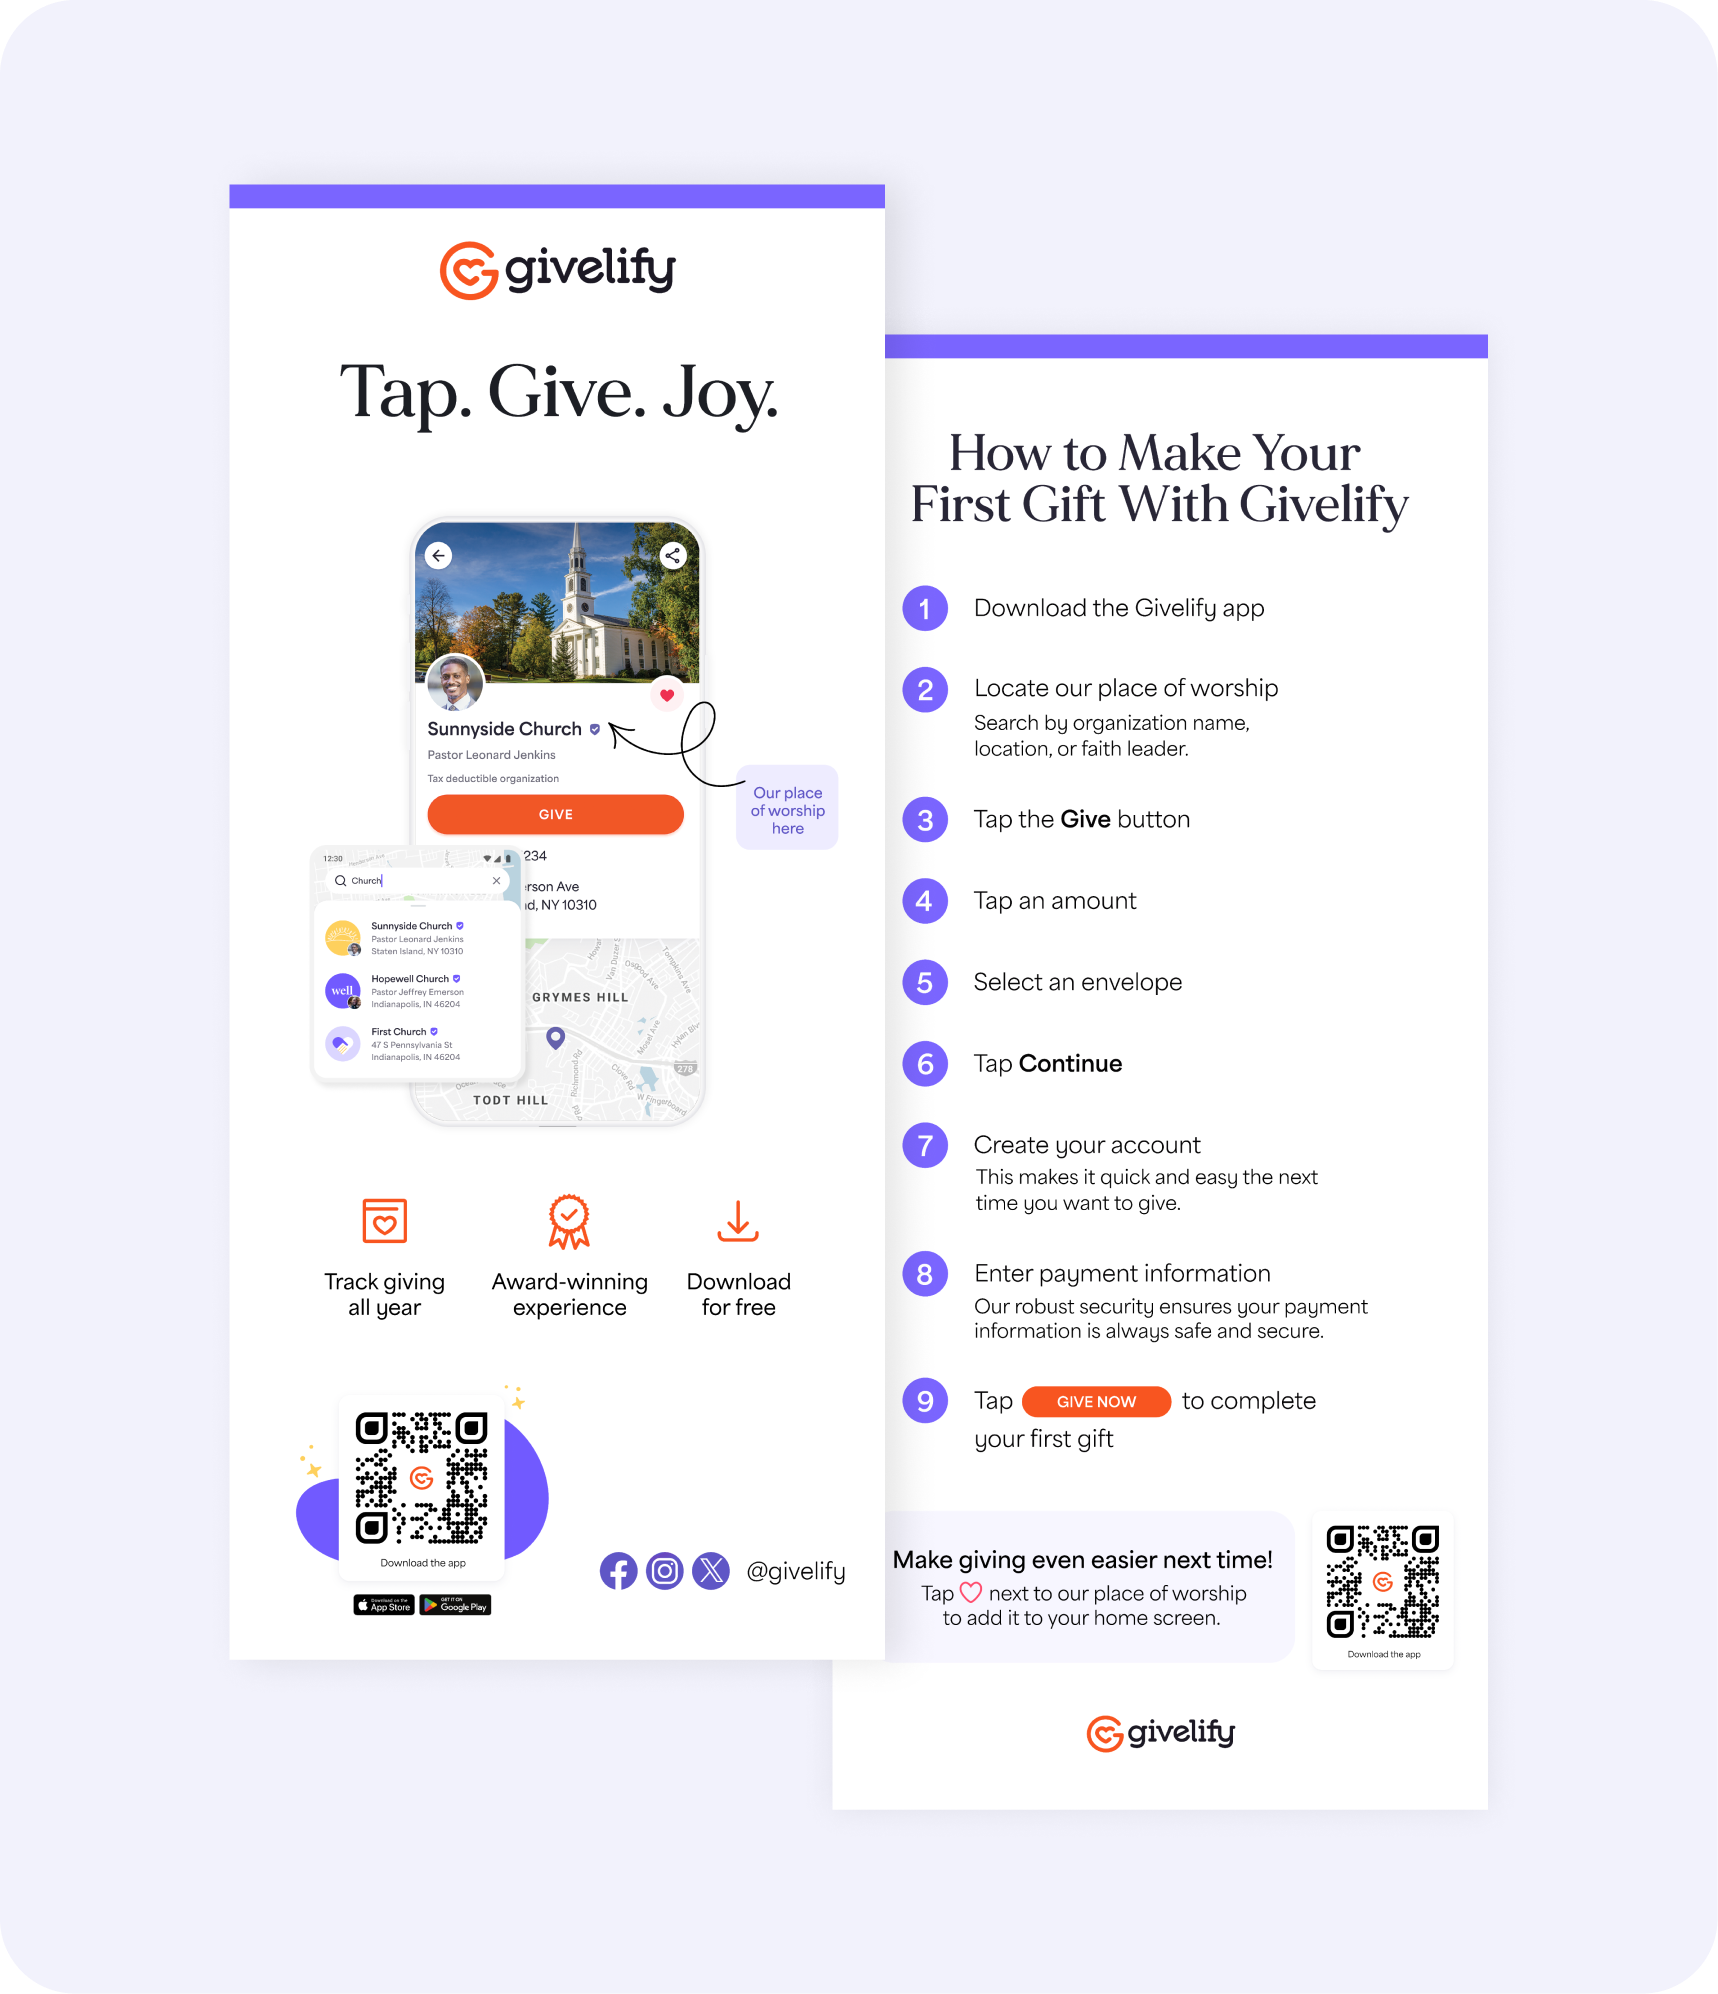

How your members can make their first gift with Givelify
Share these steps with your congregation.
Download the Givelify app
Download the free mobile giving app from the App Store (iOS) or Google Play (Android). Open the app.
Locate your place of worship
Search by organization or faith leader name or use the map to locate your organization based on its physical location.
On your phone, tap the Search tab at the bottom of your screen.
To search by name:
1. Enter the name of your place of worship, your faith leader, or the city or state where your place of worship is located in the search bar at the top of the screen.
2. Find and select your place of worship in the list of search results.
To search using the map:
1. Your device must have location services turned on and the Givelify app must have permission to access your location.
2. Only organizations within a two-mile radius of your location will appear on the map. Zoom in and maneuver the map with your fingers to find your place of worship.
3. Once you’ve found your place of worship on the map, tap the location pin next to it.
Tap the Give button
Once you find your place of worship, tap the orange Give button. Then, follow these steps:
1. Select your gift amount or select Other to enter a different amount. Tap OK.
2. Select an envelope.
3. On the Gift Summary screen, you’ll have the option to make additional contributions to other envelopes, add a message to your gift, or set the gift as recurring.
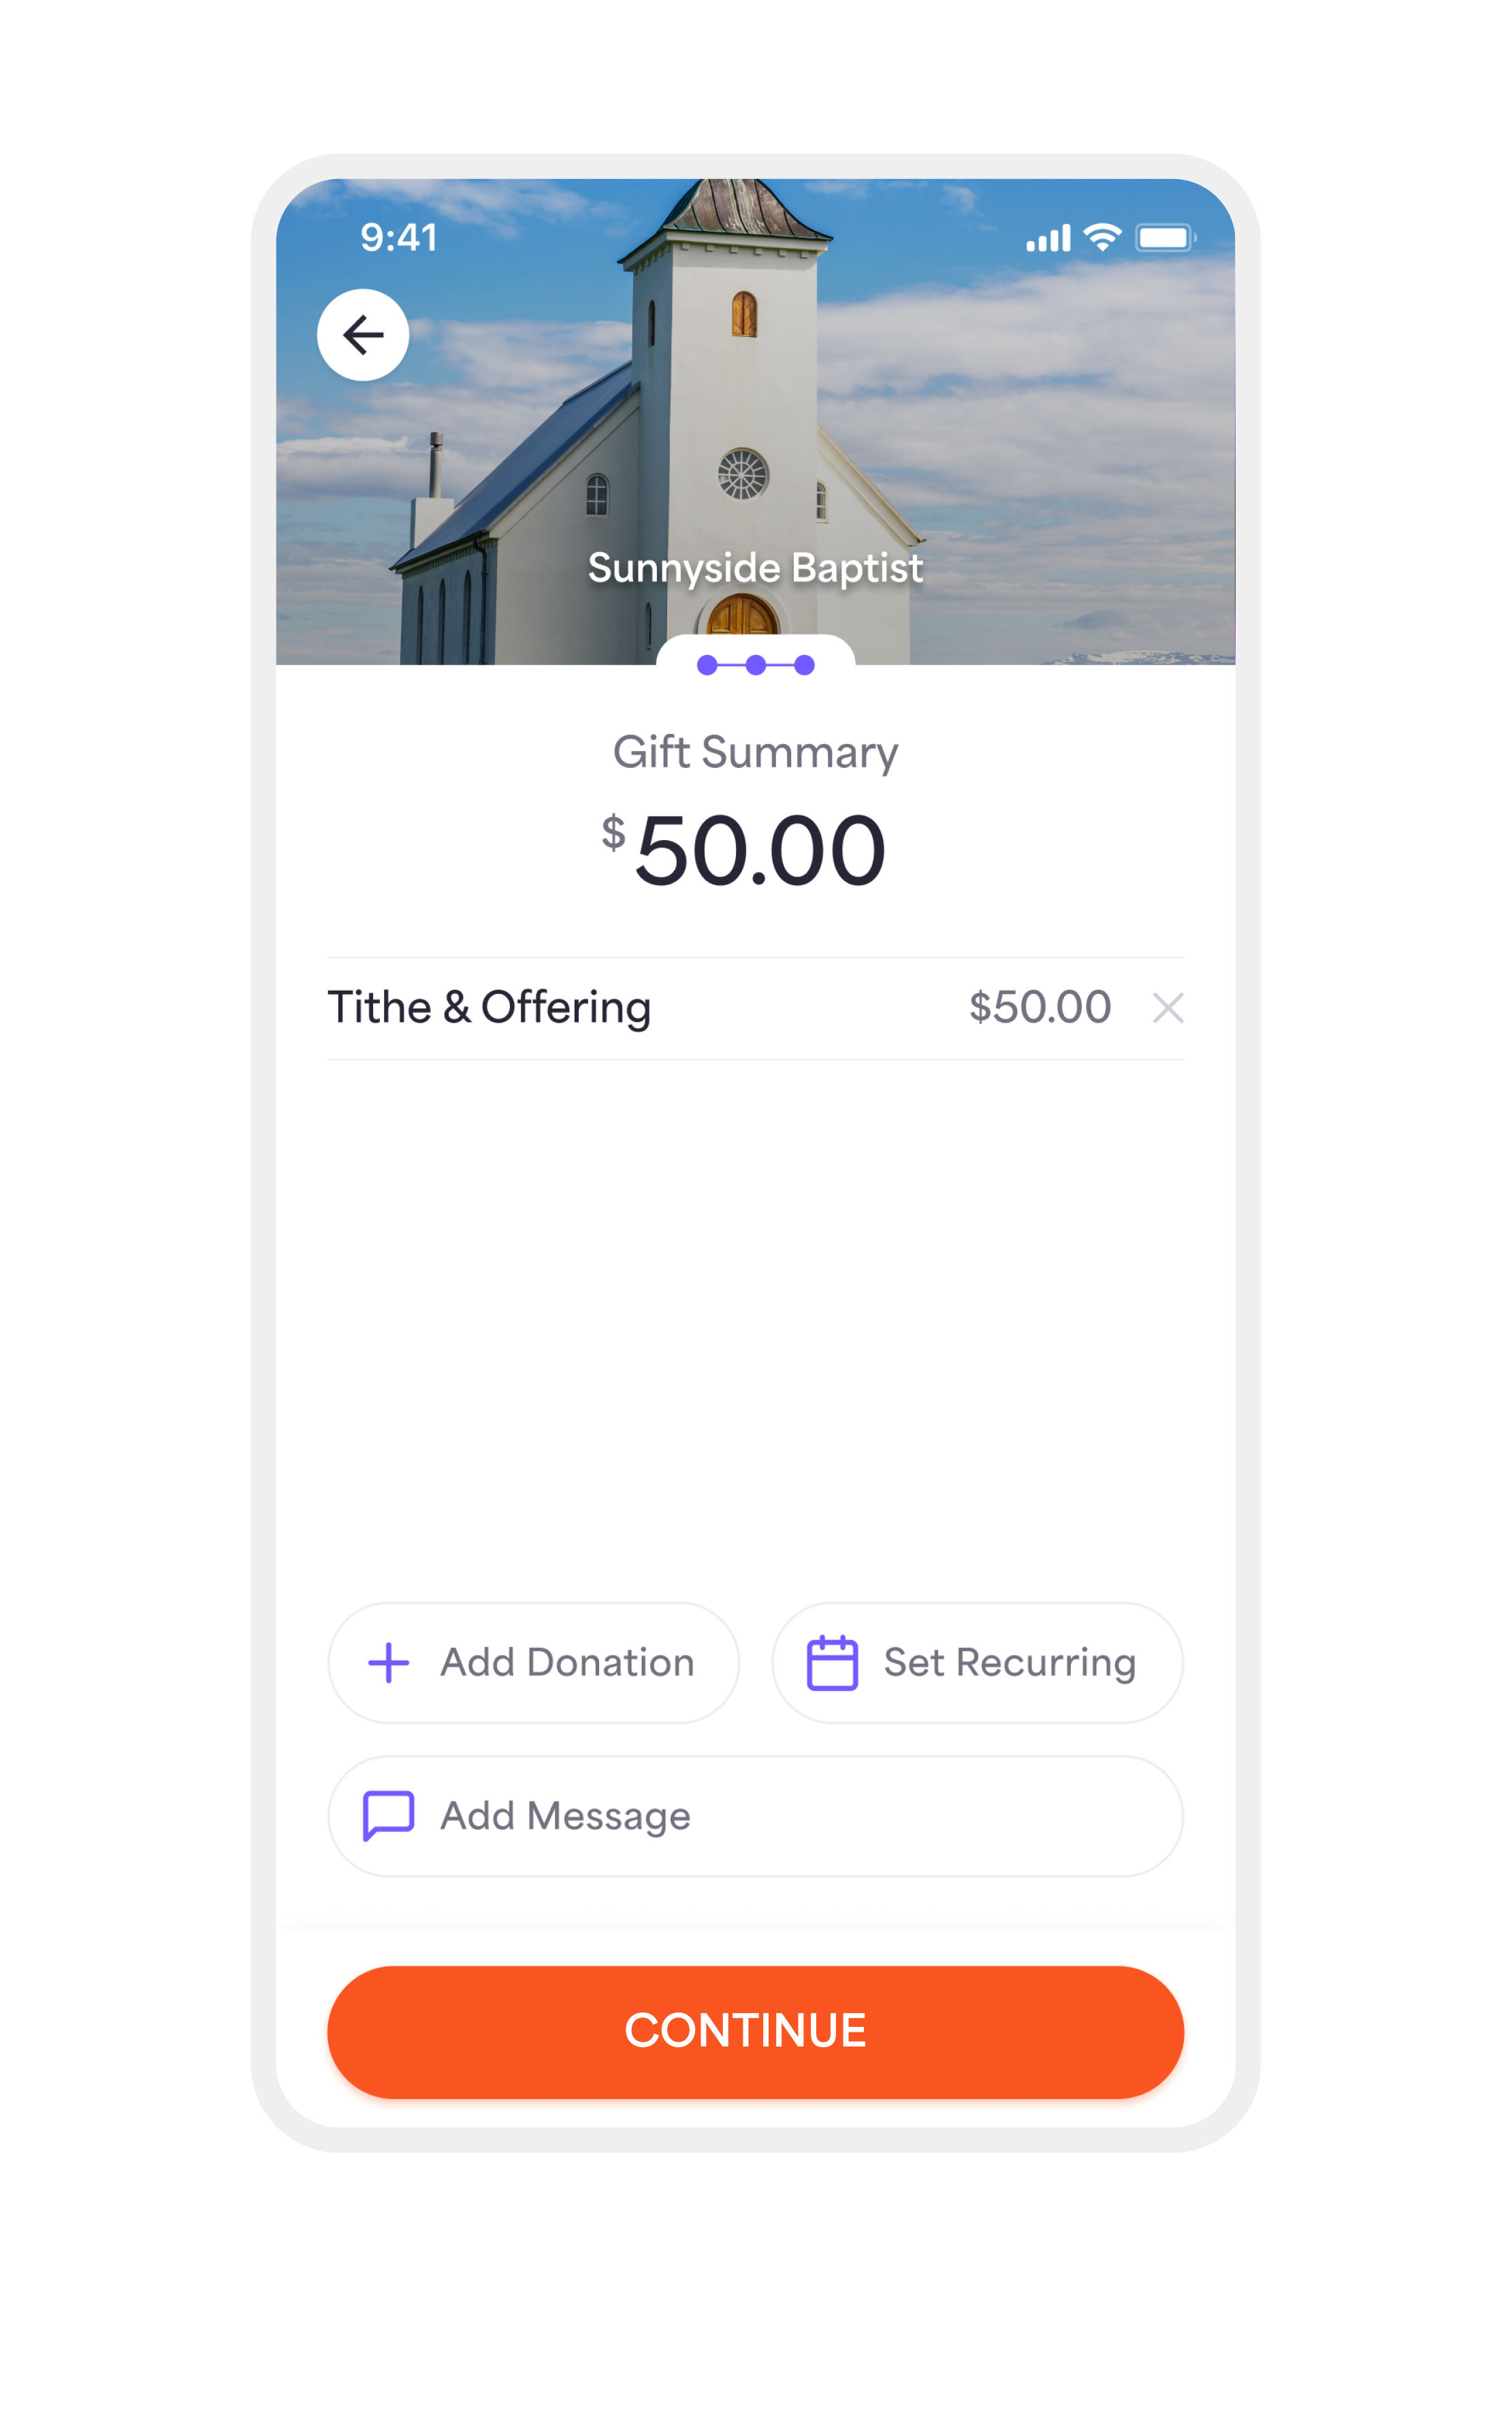
- To contribute toward more envelopes, tap Add Donation, select a gift amount, then select an envelope. For instance, you can make contributions to your place of worship’s “Tithe” and “Building funds” envelopes in the same gift. The gift summary screen will update with the additional contribution.
- To set the gift as recurring, tap Set Recurring and choose how often you’d like to send the gift. Recurring gifts will be automatically withdrawn with the designated payment method.
- To include a message with your gift to your place of worship, tap Add Message. You can choose from pre-set messages like “In memory of” or “In honor of” or write a personalized message of your own. Tap Done.
4. Tap Continue.
5. Because this is the first time sending a gift on Givelify, you will receive a pop-up screen asking you to create an account.
Create your Givelify account
Create a Givelify account to complete your first gift.
1. On the pop-up screen, select the desired login method you’ll use to sign into your account:
- Continue with Facebook – Use your Facebook login information to sign in and access your account. Select Next.
- Continue with Apple ID - For iOS devices only. Use your Apple ID login information to sign in and access your account. Select Next.
- Continue with Email – Use your email and create a password to sign in and access your account. Select Next.
Add your payment information
Now that you've created an account, you can add your payment information to complete your gift.
1. Enter the name associated with your credit or debit card and select Next.
2. Enter your credit or debit card information and select Next. This information will be securely saved in your profile under Wallet.

3. Enter the billing address associated with your card and select Next.
4. If you're signing up with email, create a password for your account and select Next.
5. Tap the Give button.
6. If you set up your account using an email and password, an activation link will be sent to your email address. To activate your account, click the link in the email.
7. You can complete your first gift without having to click the activation link. You will not receive an activation link if you sign up using a Facebook or Apple ID login.
Save your place of worship
To make giving to your place of worship even easier, save your organization as a Favorite or My Place of Worship.
1. Open your place of worship’s app profile.
2. Select the Heart icon next to its name and then select Favorite (tap the star) or My Place of Worship (tap the heart).
- If you select Favorite, it will be displayed on your Home screen under Favorites.
- If you select My Place of Worship, it will be displayed in the upper portion of your Home screen so you can easily access and give to your place of worship as your heart desires.
Note: You can only have one organization designated as My Place of Worship, but you can add multiple organizations as Favorites.
Congratulations! Your members have successfully made their first gift using Givelify. Future giving will be fast and easy. They can now give in just three taps without any prompts to create an account or enter payment information.


