


When a donor includes a message with their gift, you can view and reply to the message from the Donations page in the Givelify Analytics Studio.
When you reply to a message, the donor will receive an email with your reply. Donors cannot respond to your reply so be sure to include your contact information if you'd like a response.
To view and reply to a message, follow these steps:
1. On your computer, log into your organization’s account at analytics.givelify.com.
2. Select Donations from the left-hand navigation menu.
3. At the top of the page, use the Messages drop-down menu to filter. Uncheck the All donations box. Then, check the Unreplied messages box.
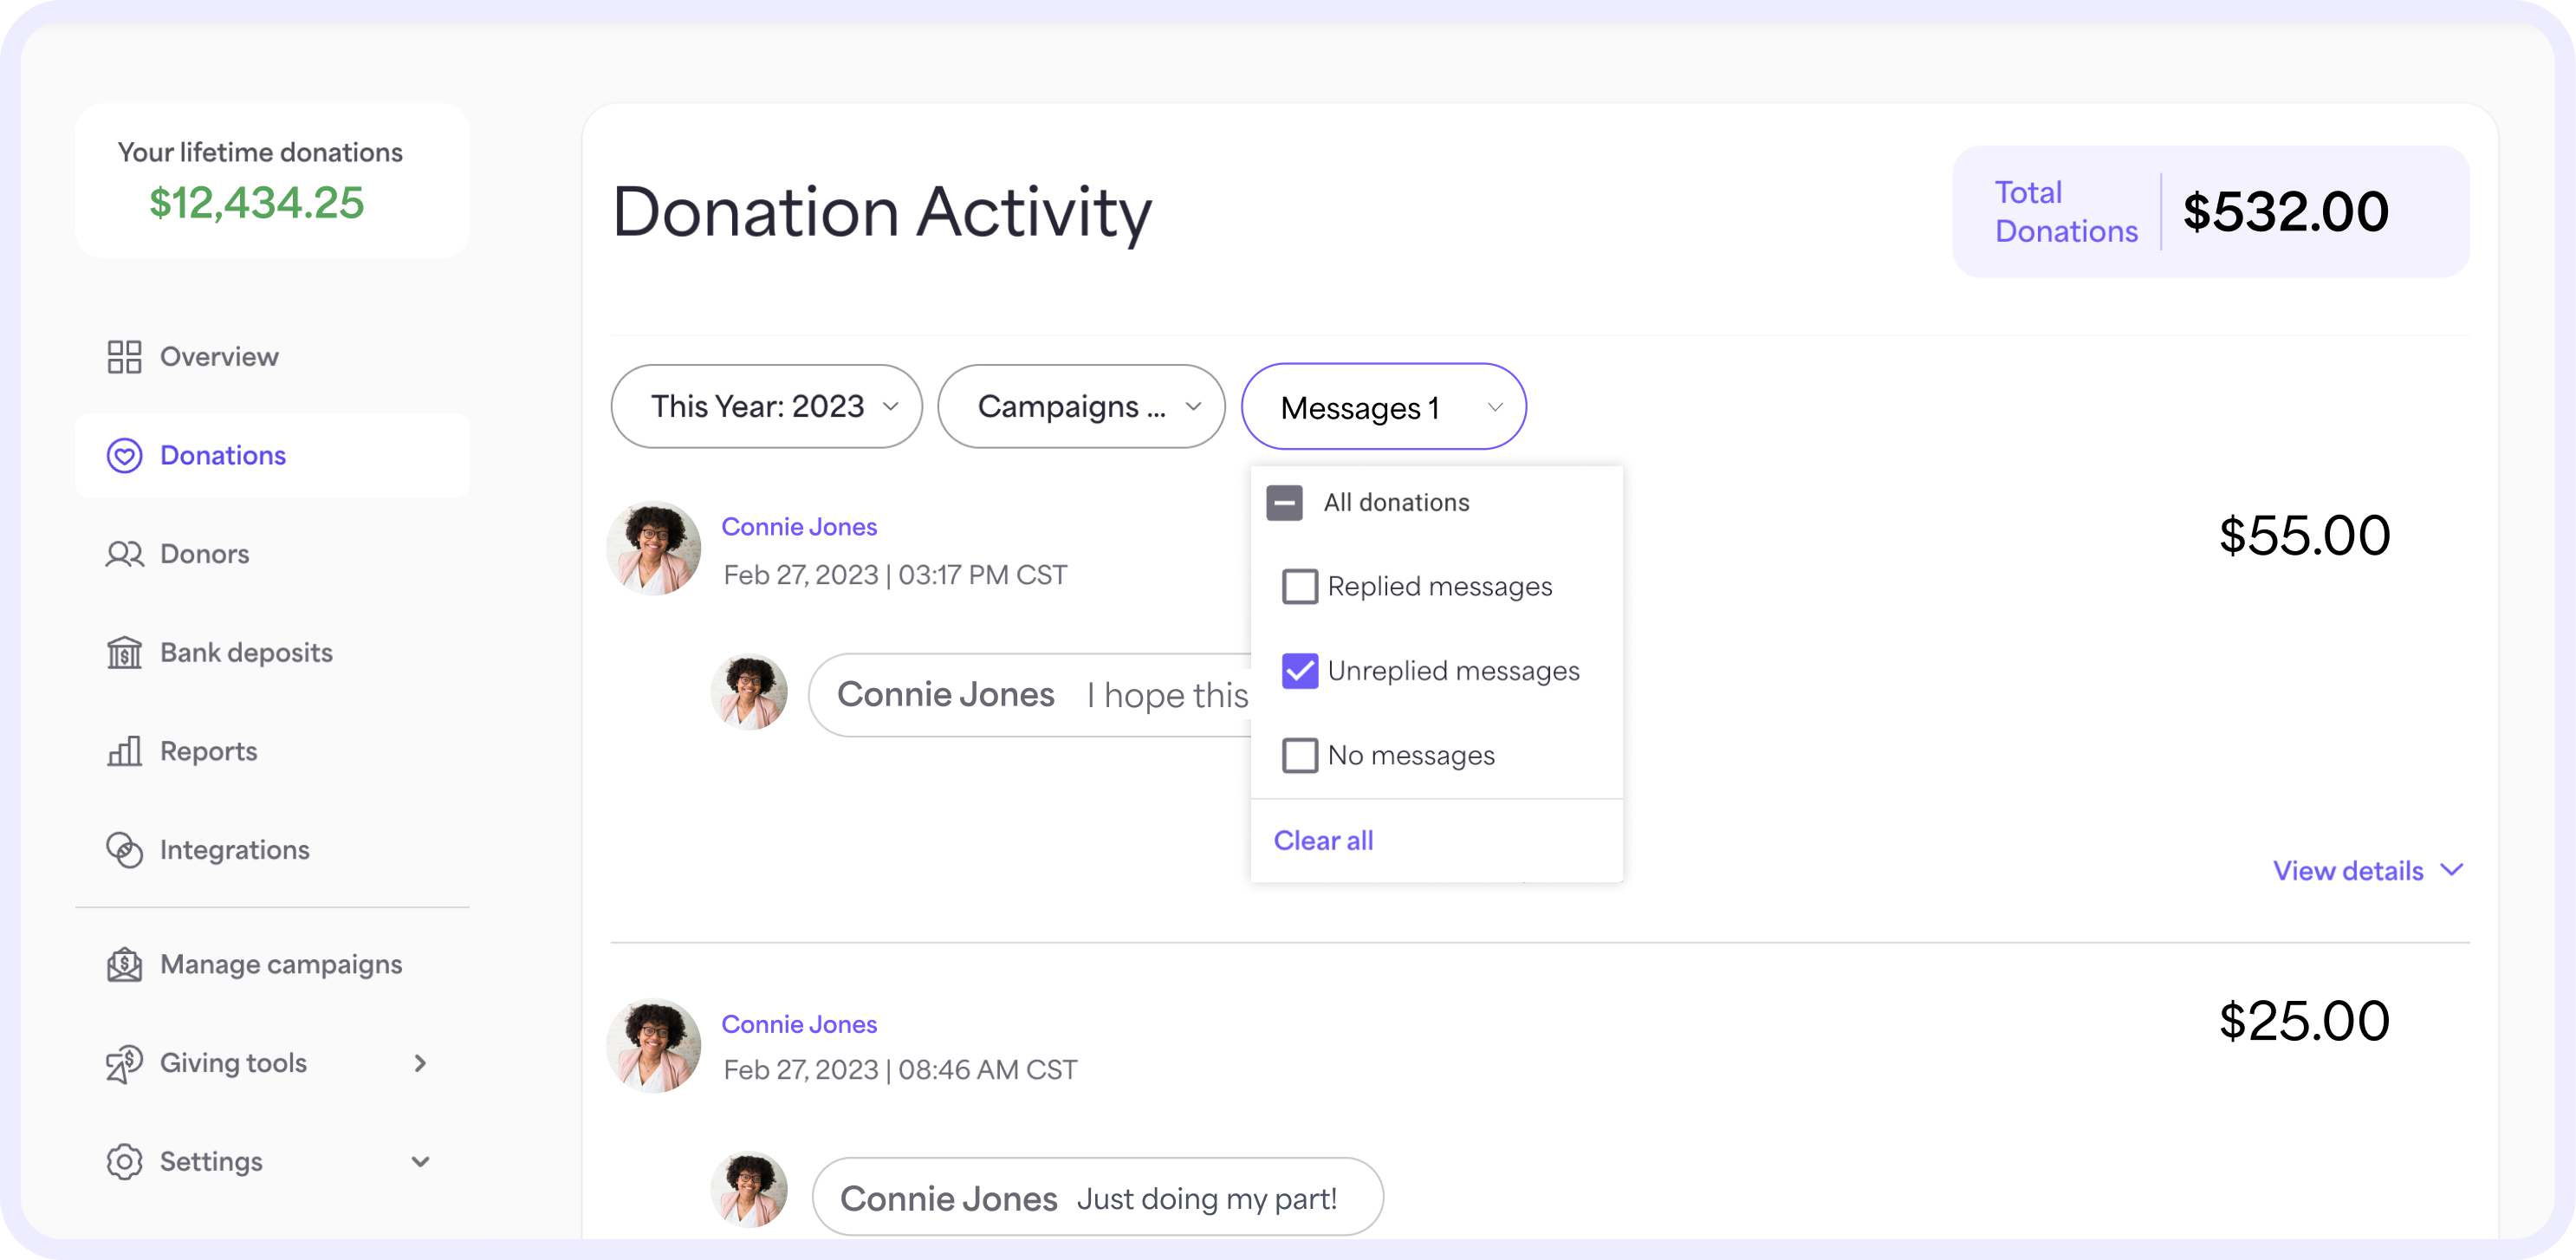
4. You’ll see any donations that include a message but haven’t received a reply. The list will show the donor’s name, donation date, and donation amount. Messages are sorted chronologically, with the newest appearing at the top of the list.
5. View the message included with the donation.
6. Select the Send a message text box. You can send a personalized reply or choose from pre-set messages like “Thank you!” or “Thank you for your donation!”
7. Choose or type your message. There is a 255-character limit for each response. To add another line to the reply, press Shift+Enter (PC) or Shift+Return (Mac) on your keyboard.

8. Press Enter (PC) or Return (Mac) to send your response.
9. The donor will receive an email with your reply. Donors cannot respond to your reply so be sure to include your contact information if you'd like a response.
10. You can reply more than once to a message. An email will be sent to the donor for each reply sent.
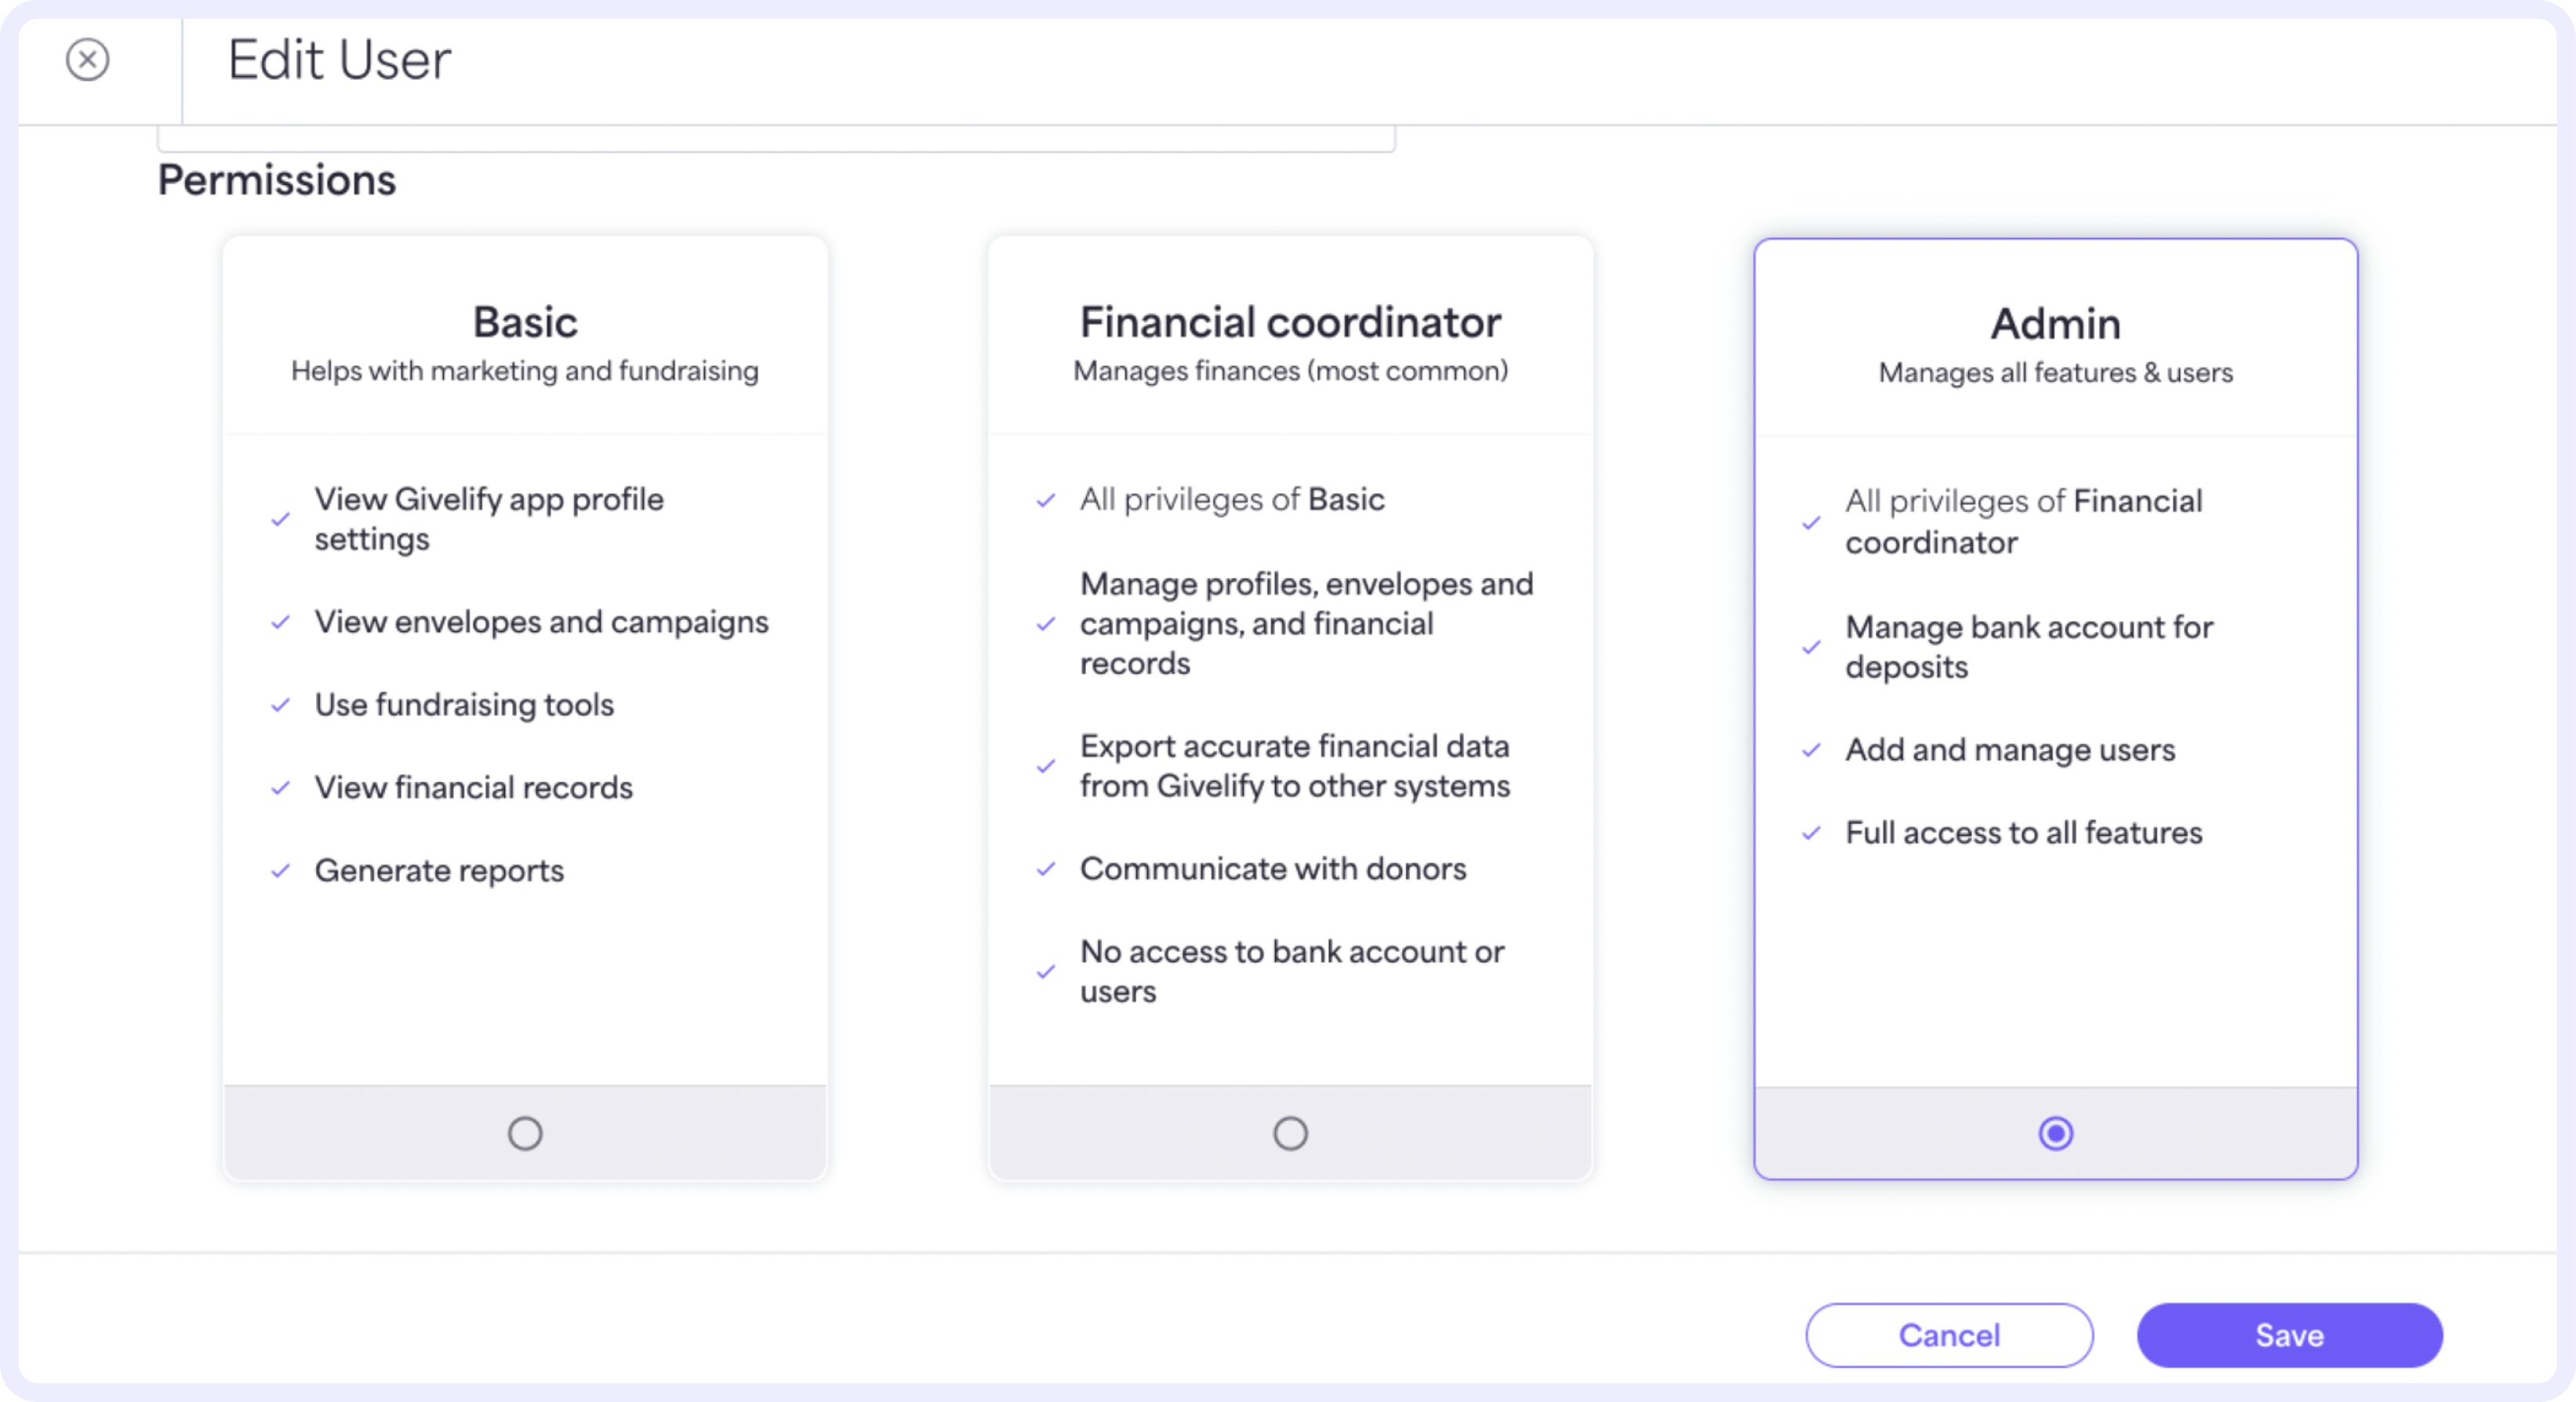
Settings for admins
Only admins of your nonprofit’s account can view and reply to messages. The account owner will have access by default.
To grant a user admin permission, follow these steps:
1. On your computer, log into your organization’s account at analytics.givelify.com.
2. Select Settings > Users.
3. Find the user whose permissions you’d like to update. To the right of their name, under Actions, select the three dots and choose Edit User.
4. Under the Permissions section, select Admin. Then, select Save.
How to download reports with donation messages
To download and view a report containing the text of your supporters’ donation messages, follow these steps:
1. On your computer, log into your organization’s account at analytics.givelify.com.
2. Select Reports from the left-hand navigation menu.
3. On the Generate reports tab, under Data exports, find the Donations report. Then, select Get report.
4. From the drop-down menu, select the time frame for the information you want to collect. You can choose from: This Week, Last Week, This Month, Last Month, This Year, Last Year, Lifetime, or Custom dates.
5. If you choose Custom dates, select the calendar icon and specify the Start and End dates.

6. Select your preferred file format for the report: Comma-Separated Values (.csv) or Excel (.xlsx).
7. Select Generate Report.
8. A message bar is displayed in the upper portion of the Generate reports page. Once the report has been generated, the message indicates the report has been successfully exported.
9. Select the View Report History link in the message banner on the Reports page or select the Report history tab to download the report.
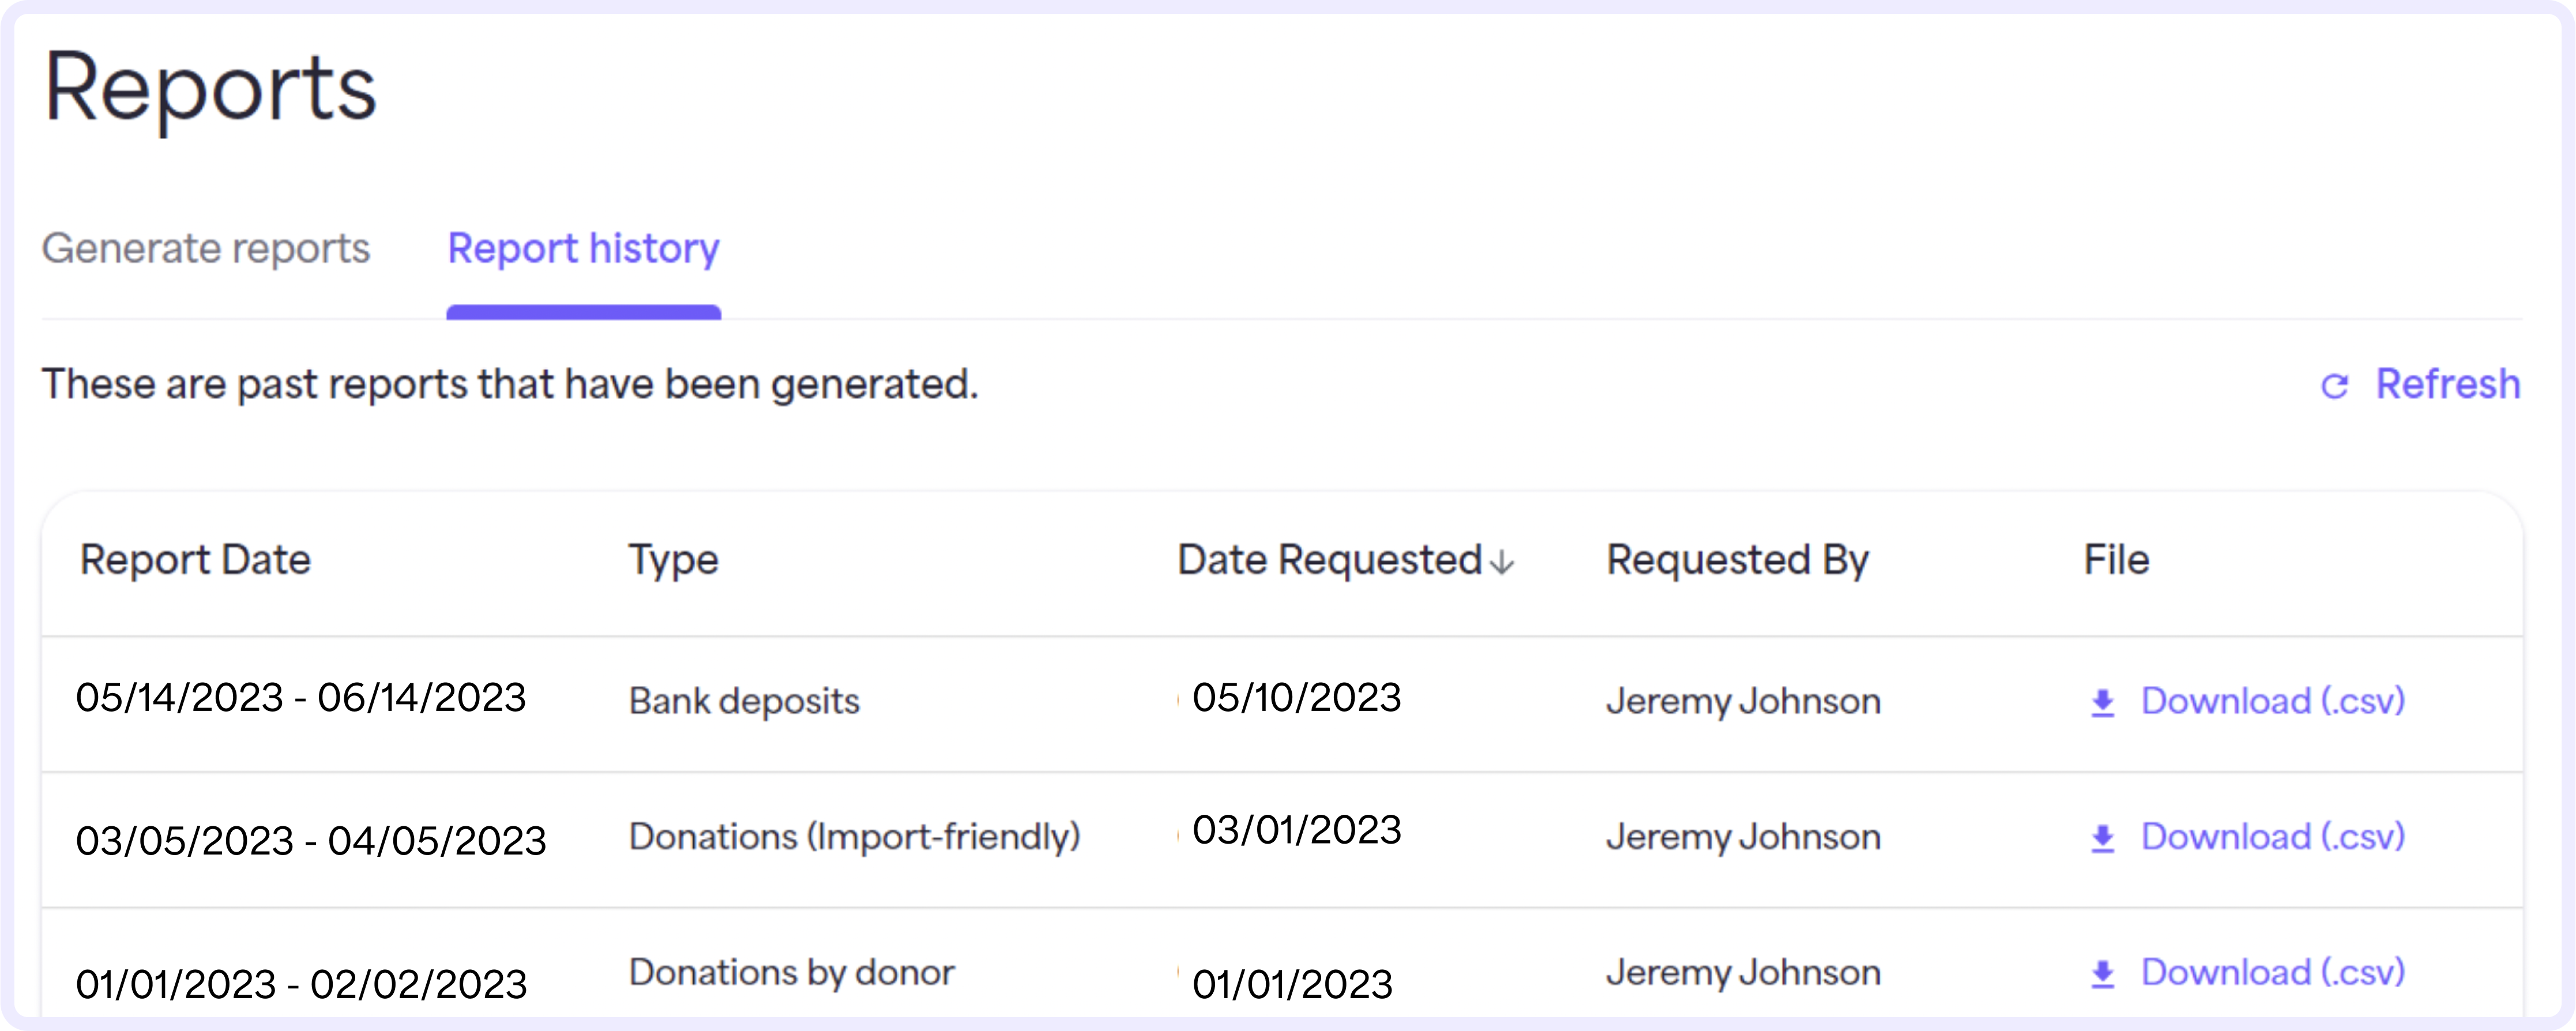
10. Find the report in the list. The most recent report will show at the top. Select the purple download link to download the report to your computer.
11. You can then import this report into your financial management software if you desire.
All messages you've received will appear in the far-right column of the report, next to the corresponding donation.


