


The Givelify Analytics Studio offers many valuable tools for your organization. It allows your charity or nonprofit to view detailed information about your donors and their contributions.
For full Analytics Studio functionality, you will need to use a computer and web browser. These reports are not found in the Givelify giving app itself.
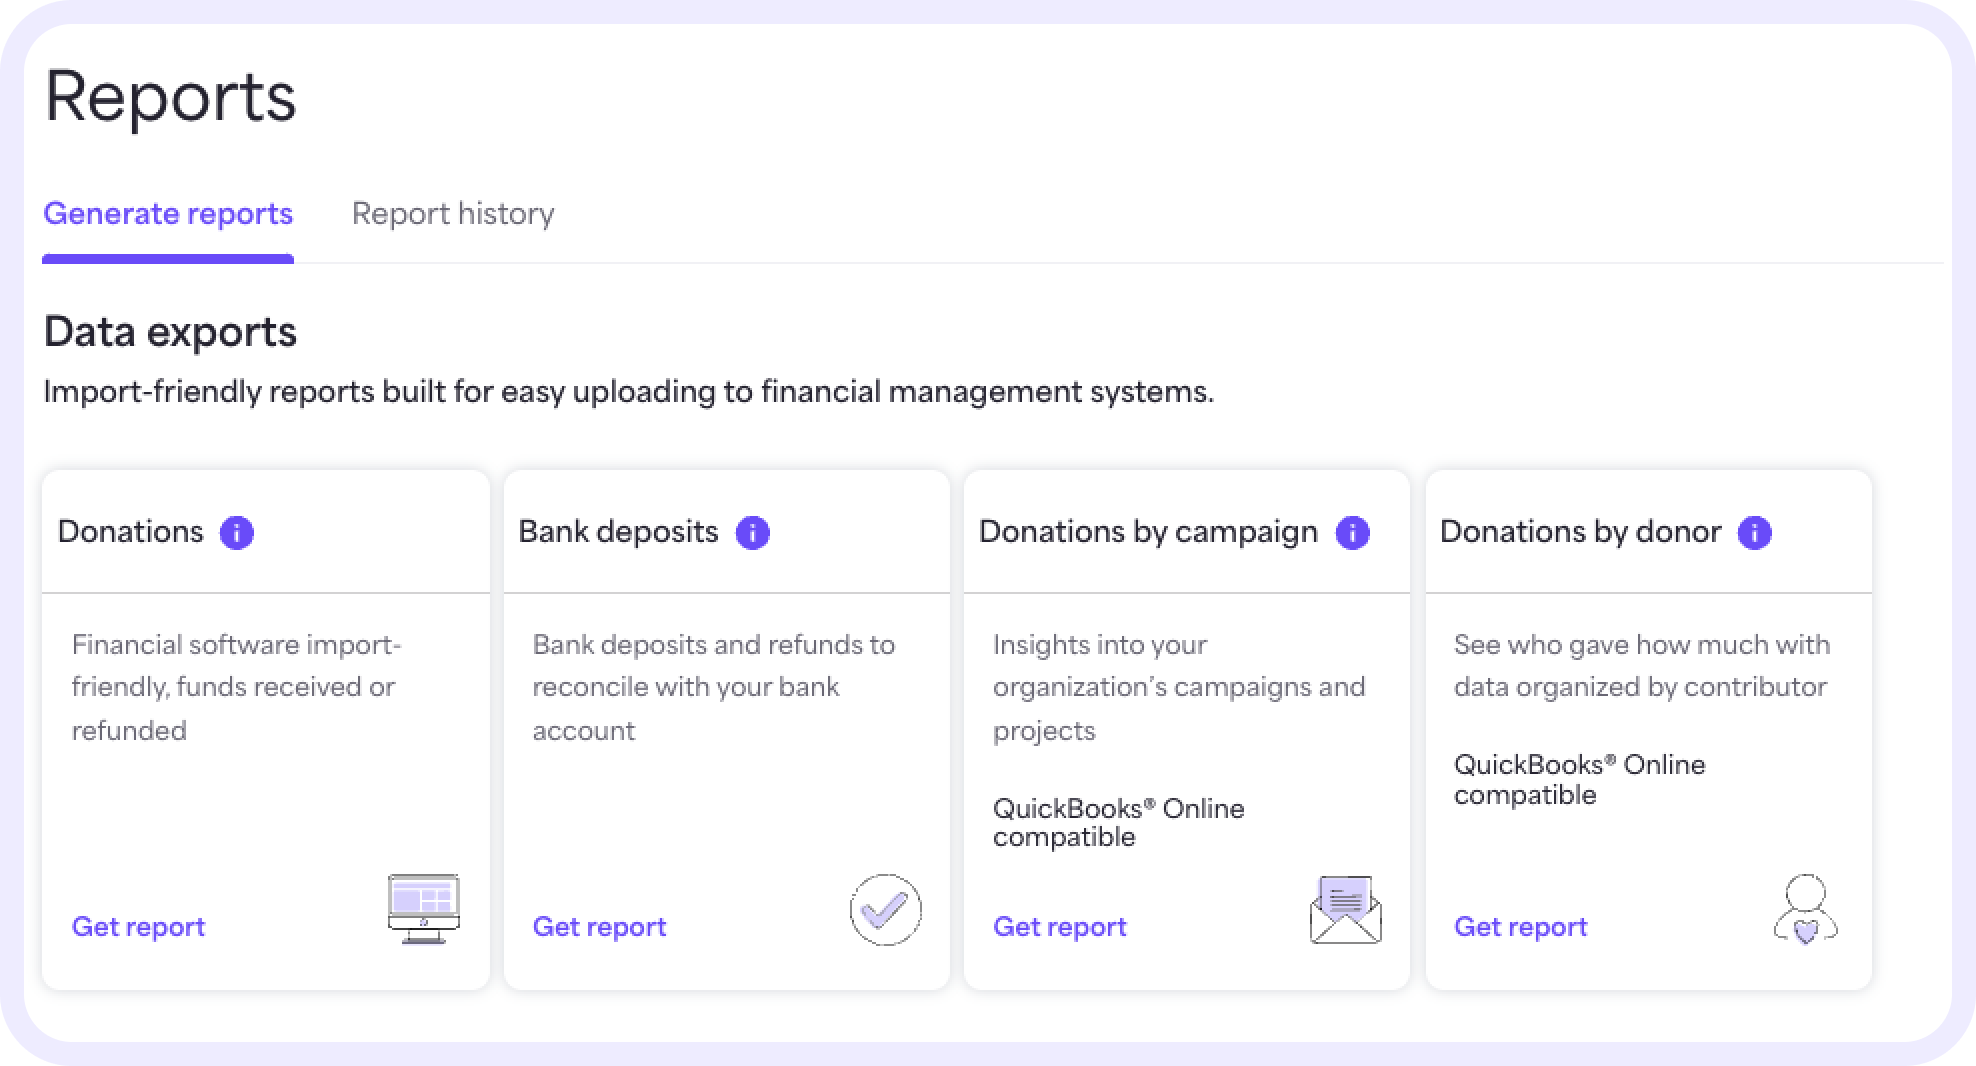
On the Reports page in the Analytics Studio, you can generate reports using Data exports.
Data export reports
These are import-friendly reports built for easy uploading to financial management systems. You can generate four types of data export reports:
- Donations - This report shows all donations made during the specified time frame. It includes donation and fee amounts broken down by campaign, donor details, external member ID, and external fund info for matching with other systems.
- Bank deposits – This report shows all the deposits made to your organization’s bank account during the specified time frame. It’s formatted by date so you can easily match the deposits to your bank statement.
- Donations by campaign - This report shows disbursement dates, and gross and net campaign donation amounts made during the specified time frame. It provides insights into your organization's campaigns and projects. It’s also compatible with QuickBooks Online.
- Donations by donor - This report shows disbursement dates, and gross and net campaign donation amounts and fees made during the specified time frame. It allows you to see who donated how much, with data organized by donor. It’s also compatible with QuickBooks Online.
Generating a report
To generate a report, follow these steps:
1. On your computer, log into your organization’s account at analytics.givelify.com.
2. Select Reports from the left-hand navigation menu.
3. On the Generate reports tab, find the report you’d like to generate. Then, select Get report.
4. From the drop-down, select the time frame for the information you want to collect. You can choose from: This Week, Last Week, This Month, Last Month, This Year, Last Year, Lifetime, or Custom dates.
5. If you choose Custom dates, select the calendar icon and specify the Start and End dates.
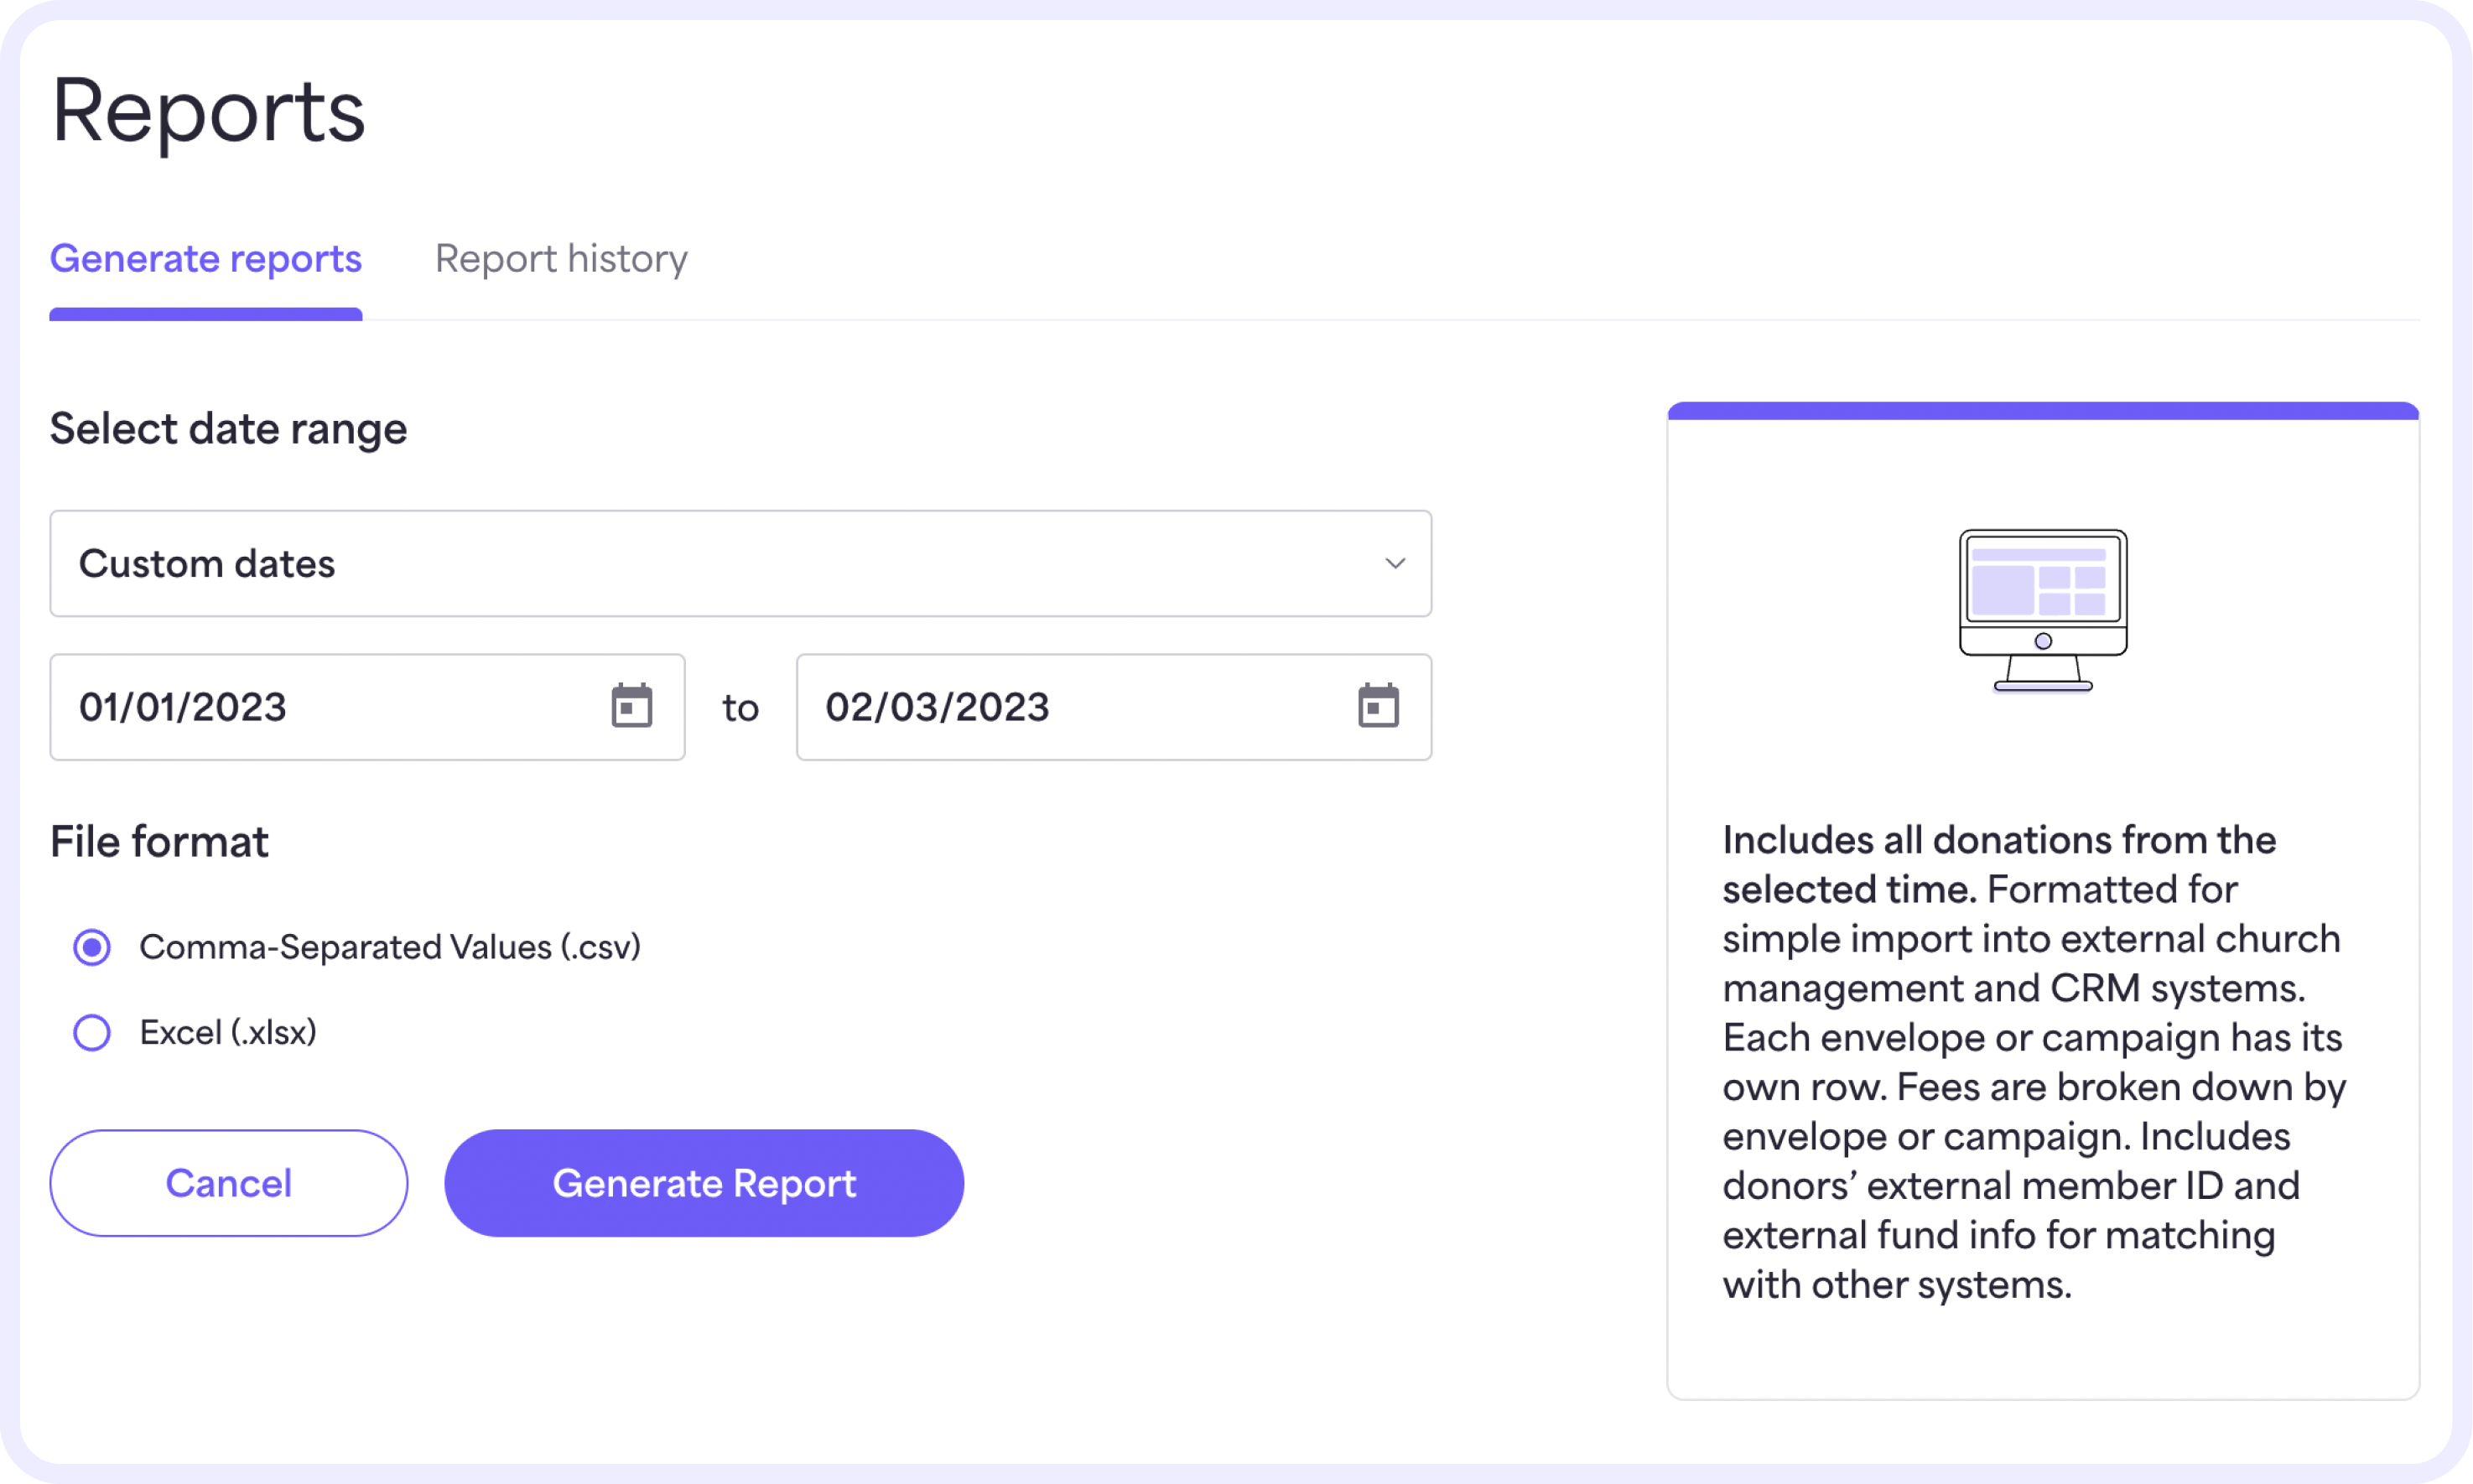
6. For some reports, you may be prompted to choose a file format. Select your preferred file format for the report: Comma-Separated Values (.csv) or Excel (.xlsx).
7. Select Generate Report.
8. A message bar is displayed in the upper portion of the Generate reports page. Once the report has been generated, the message indicates the report has been successfully exported.
9. Select the View Report History link in the message banner on the Reports page or select the Report history tab to download the report.
10. Find the report in the list. The most recent report will show at the top.
11. Select the purple download link to download the report to your computer.
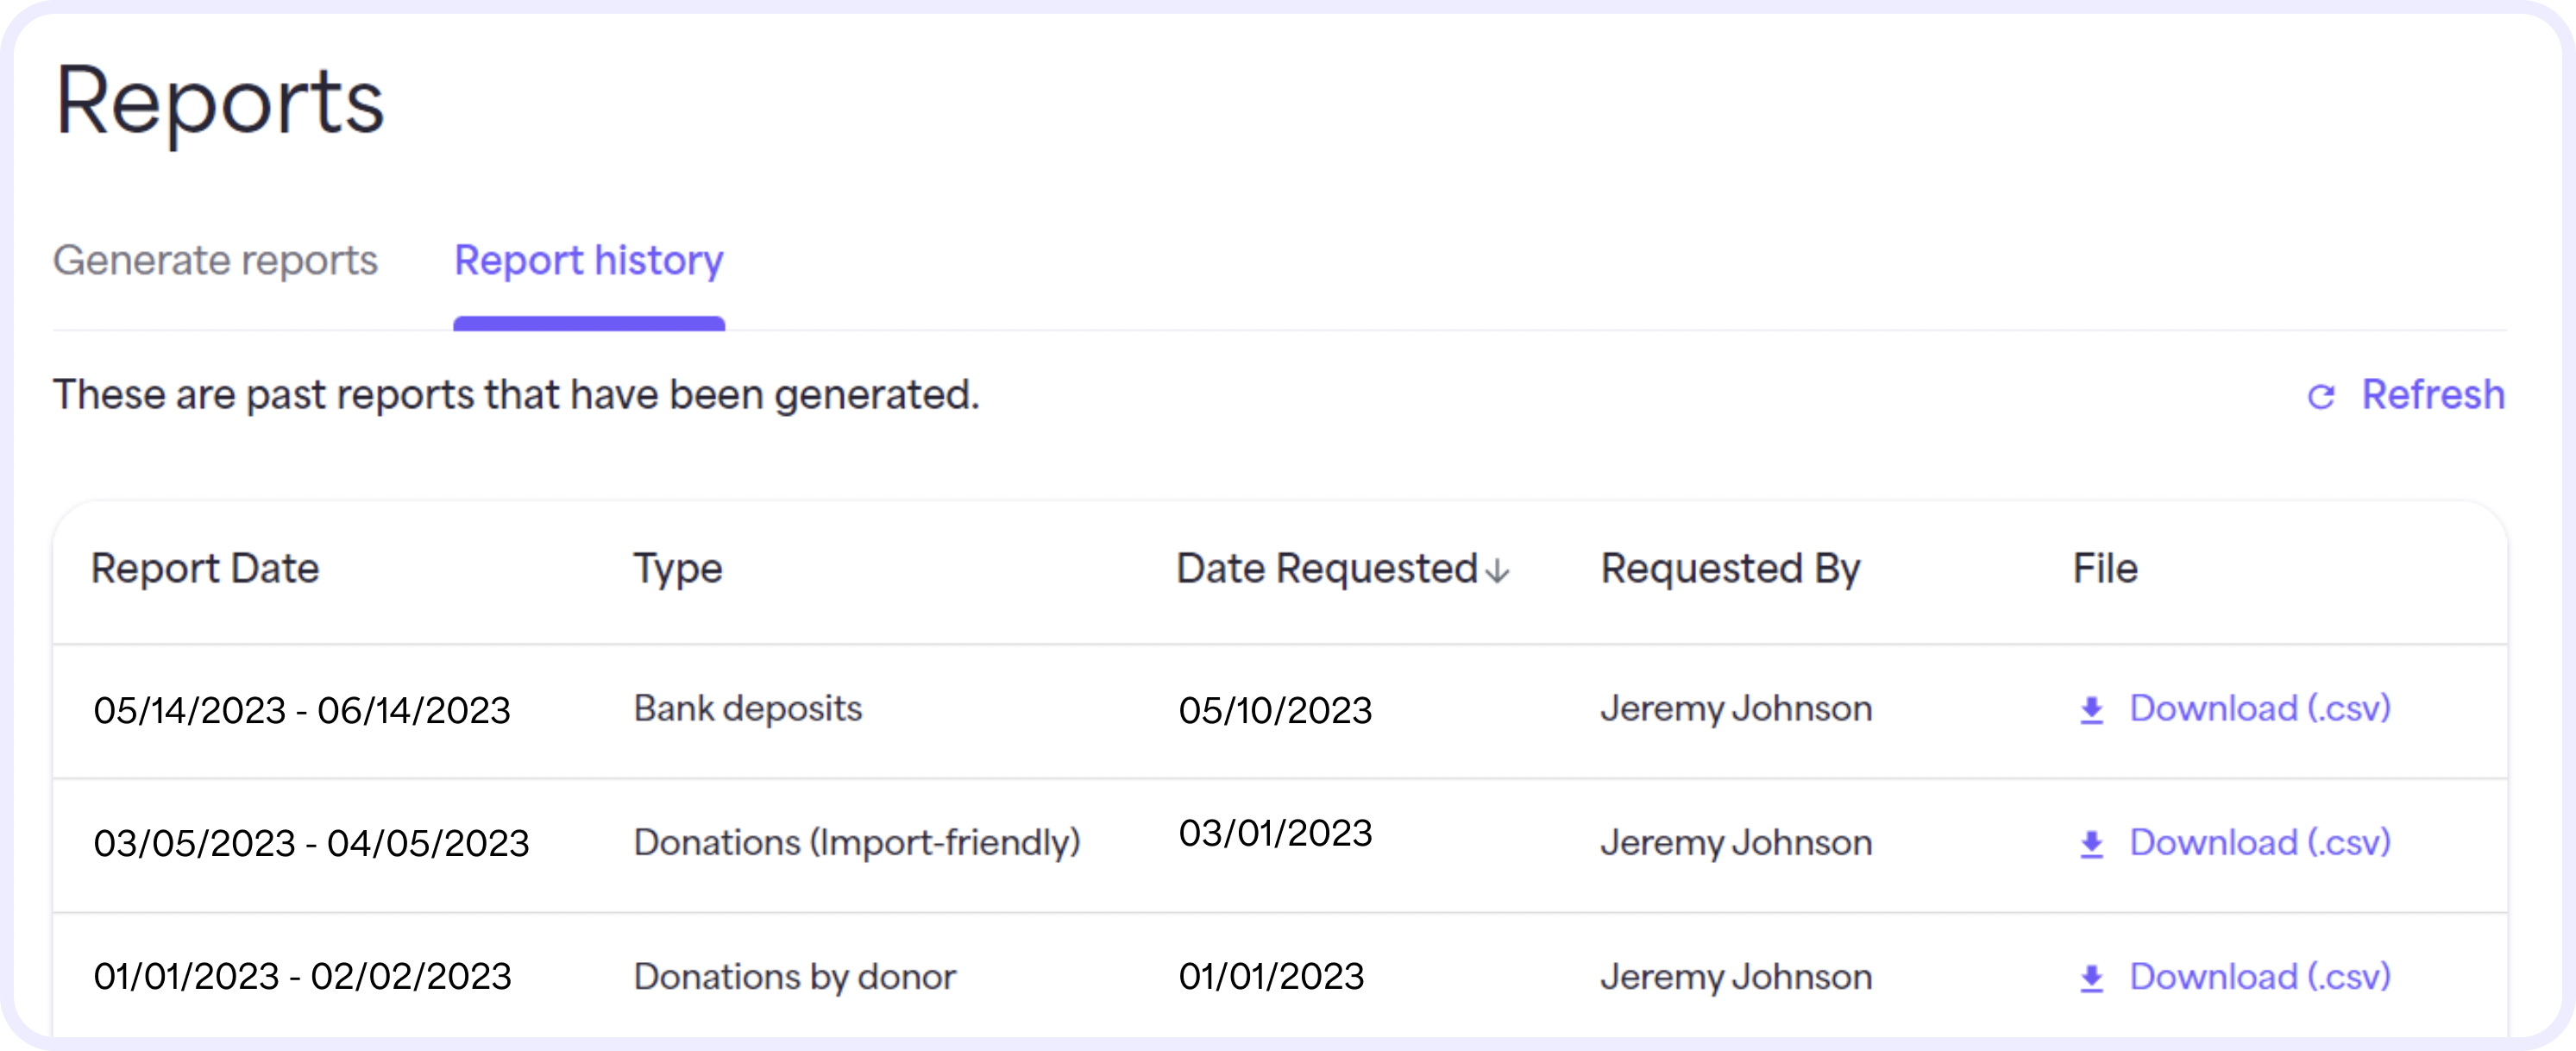
View your report history
On the Report history page, you can view a record of all the reports that have been generated. This includes the report date range, type, date requested, who requested it, and a link to download the report file.
To view all the reports that have been generated, select Reports > Report history.
Questions? Contact Customer Support at support@givelify.com or (317) 663-3088. You can also visit the Support Center for answers to frequently asked questions.


