


Now that your charity or nonprofit has signed up for a Givelify account, you have access to a powerful tool: the Givelify Analytics Studio. This dashboard lets you view all your donations, see who’s donating to your nonprofit, update your organization’s profile, and more.
The person who originally signs your organization up is automatically set as the account owner. As a best practice, you should add at least one additional user. This allows you to enlist the help of your team in managing your account, like setting up campaigns and reconciling finances.
Adding an additional user is also important for security reasons. Only active account users can discuss your organization's account details with the Givelify team.
You can assign specific permission levels for each user you invite. This will allow users to access as much or as little of your organization’s account as desired.
Adding additional users
On your computer, log into your organization’s account at analytics.givelify.com. Then follow these steps to invite users to your account:
1. Select Settings > Users.

2. Select Invite New User.
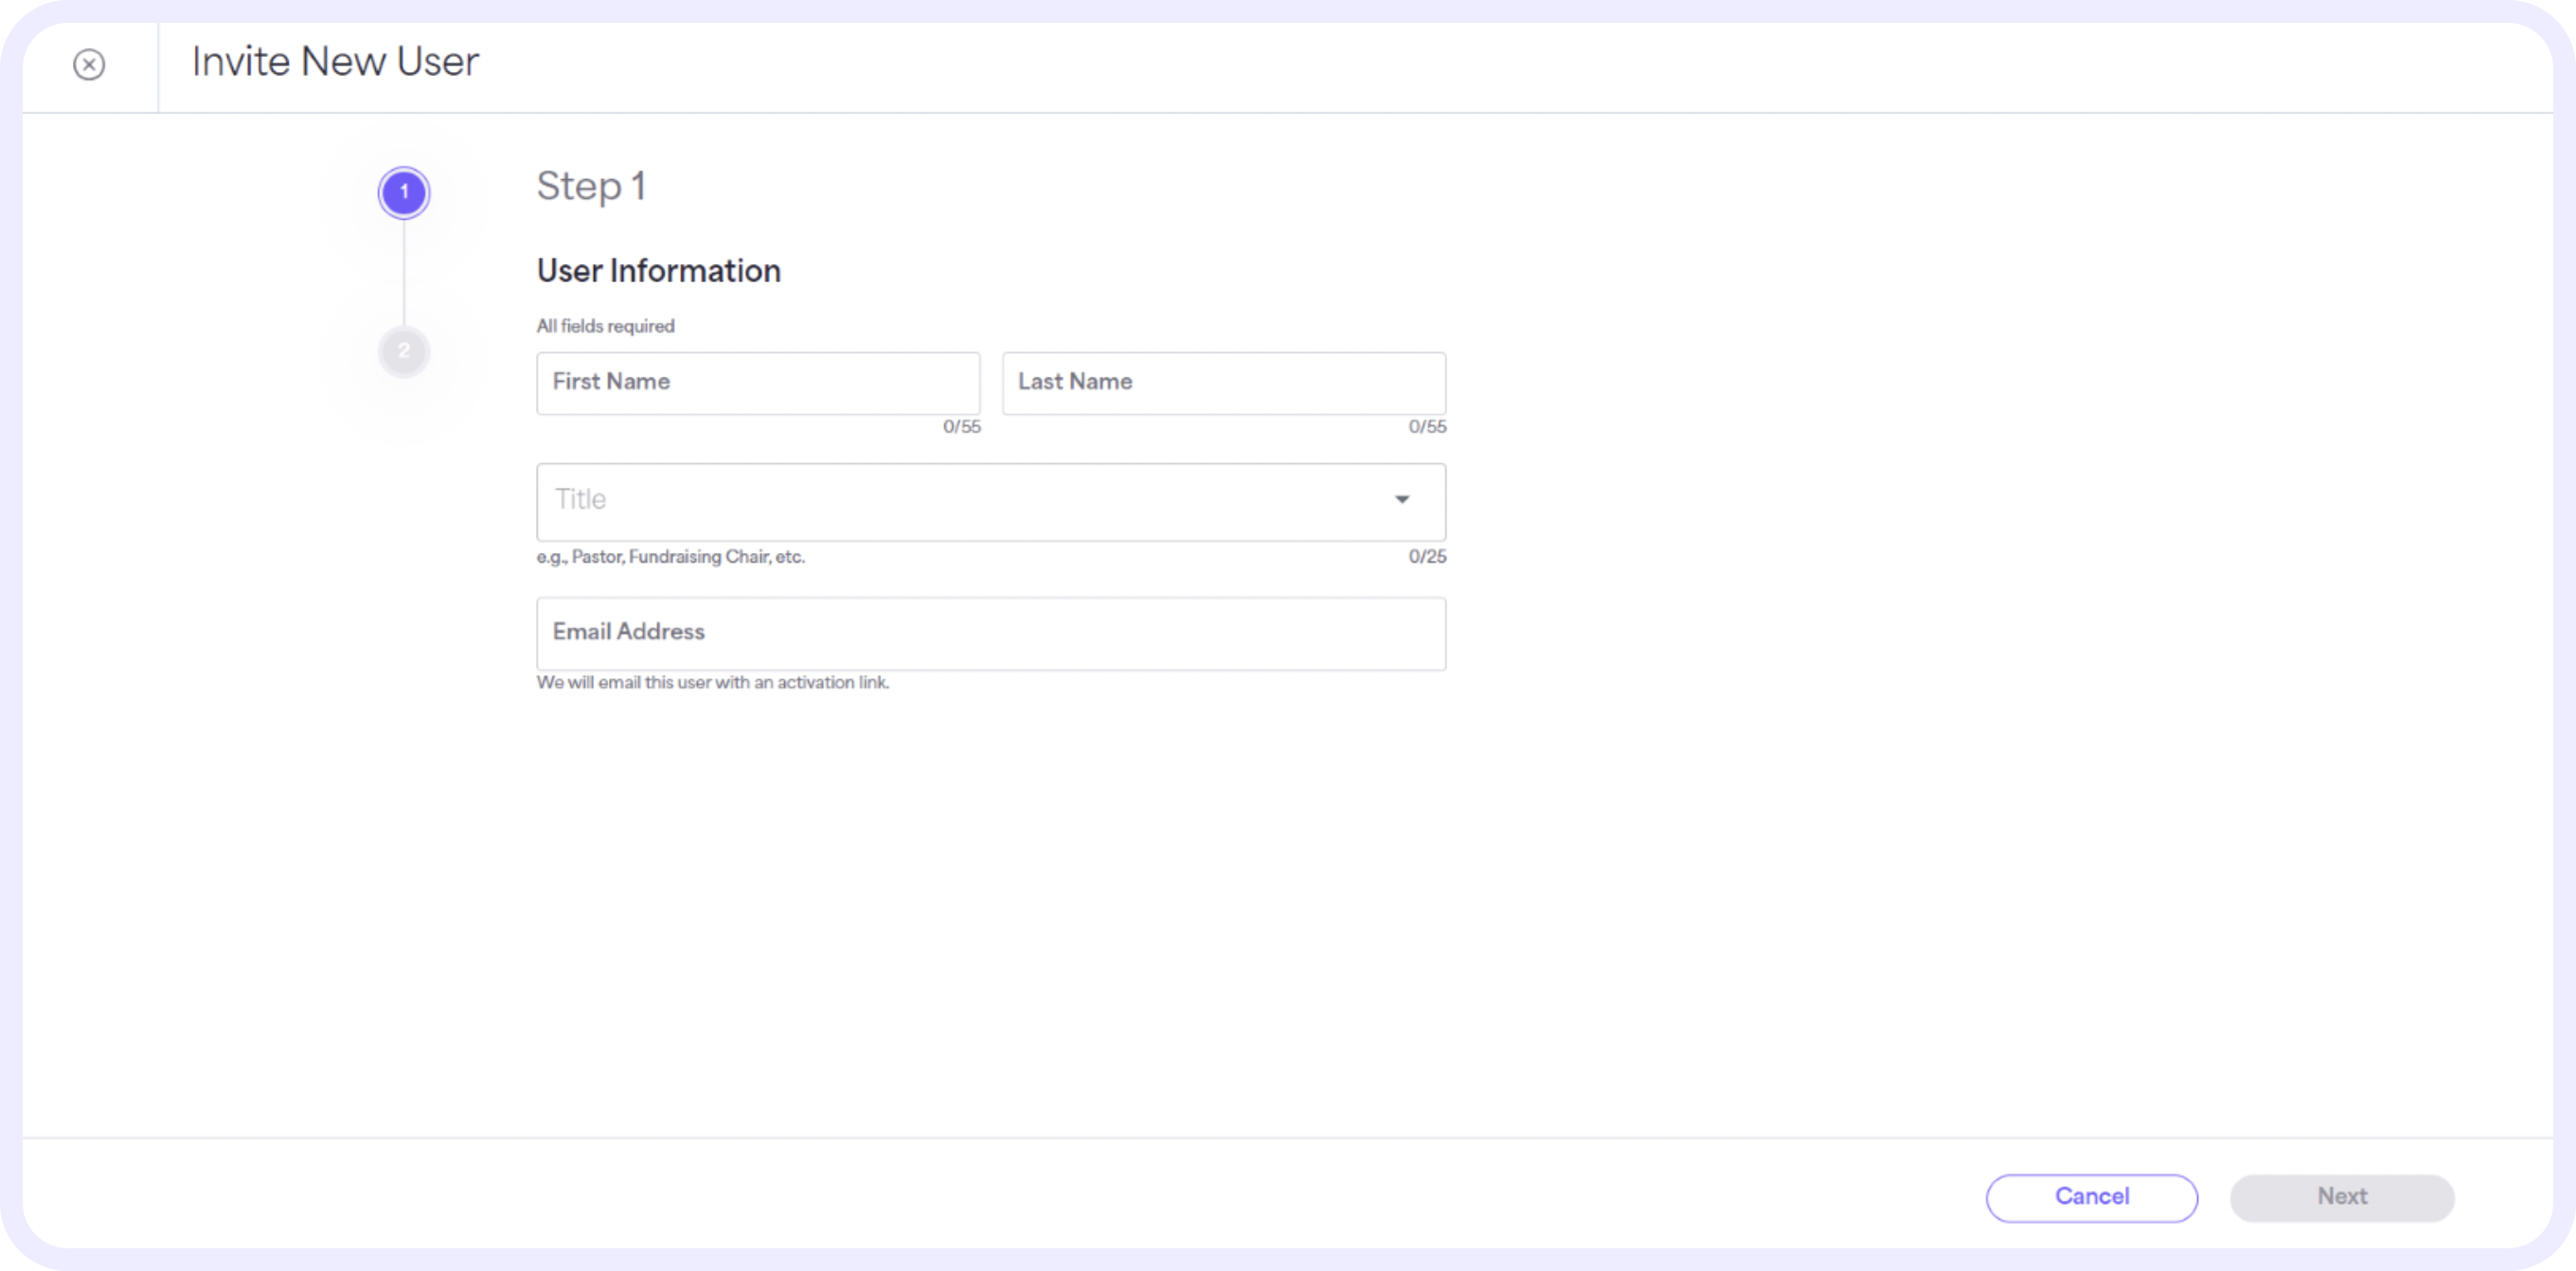
3. Enter the new user’s First name, Last name, Title, and Email address. Then, select Next.
4. Select the permission level for the new user:
- Basic – This permission is typically given to users involved with marketing and fundraising activities. They can manage app profile settings, set up campaigns, and use the giving tools. They cannot access financial records.
- Financial coordinator – This permission is typically given to users who manage finances for the organization. They’ll have all the privileges of the basic user. Plus, they can export data, ensure the accuracy of reconciled finances, and communicate with donors. They cannot access bank accounts and are unable to add or remove users, change user permissions, or designate an account owner.
- Admin – This permission grants the user full access to all features in the Analytics Studio.
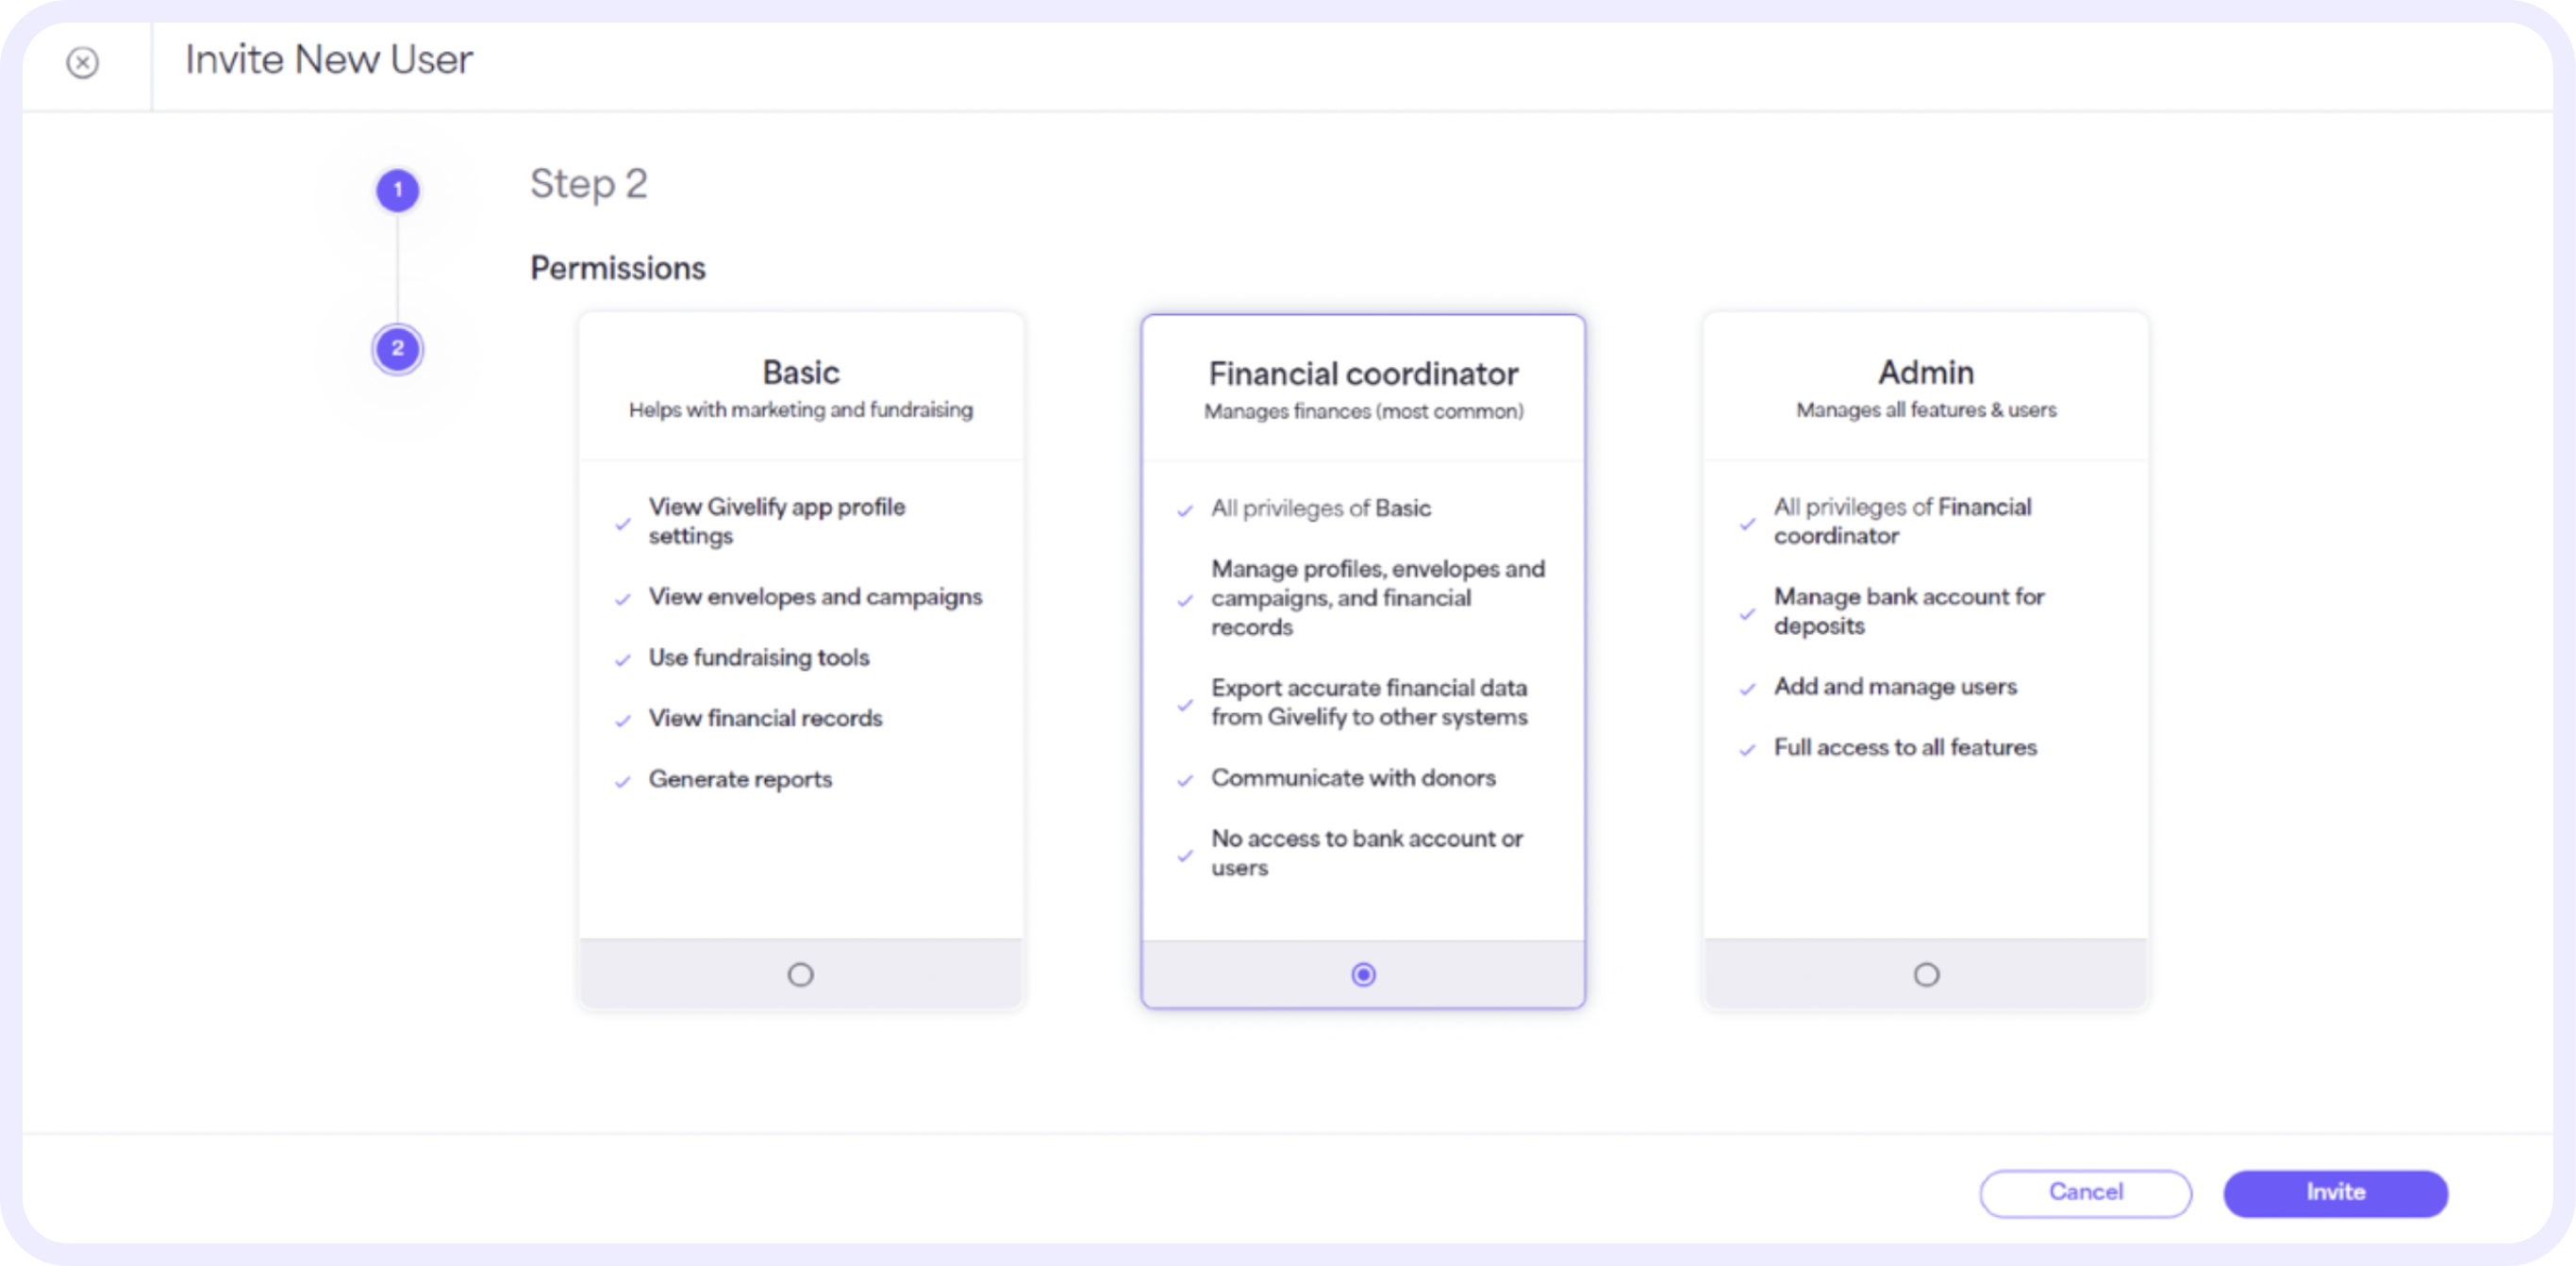
5. Select Invite.
Users will receive an email with an activation link that expires after 24 hours. If the link expires, an admin can select Resend invitation on the Users page.
On the Success screen, select Add Another User and repeat the above steps, or exit the dialog. You can also select Back to Users to return to the Users page.
Managing permission levels
Do you need to limit what certain users can see? No problem! The account admin can change permission levels for individual users.
On your computer, log into your organization’s account at analytics.givelify.com. Then, follow these steps:
1. Select Settings > Users.
2. Select the Actions (...) menu next to the user you want to change and choose Edit User.
3. On the Edit User page, navigate to Permissions and select the permission to be granted to the user (basic, financial coordinator, or admin).
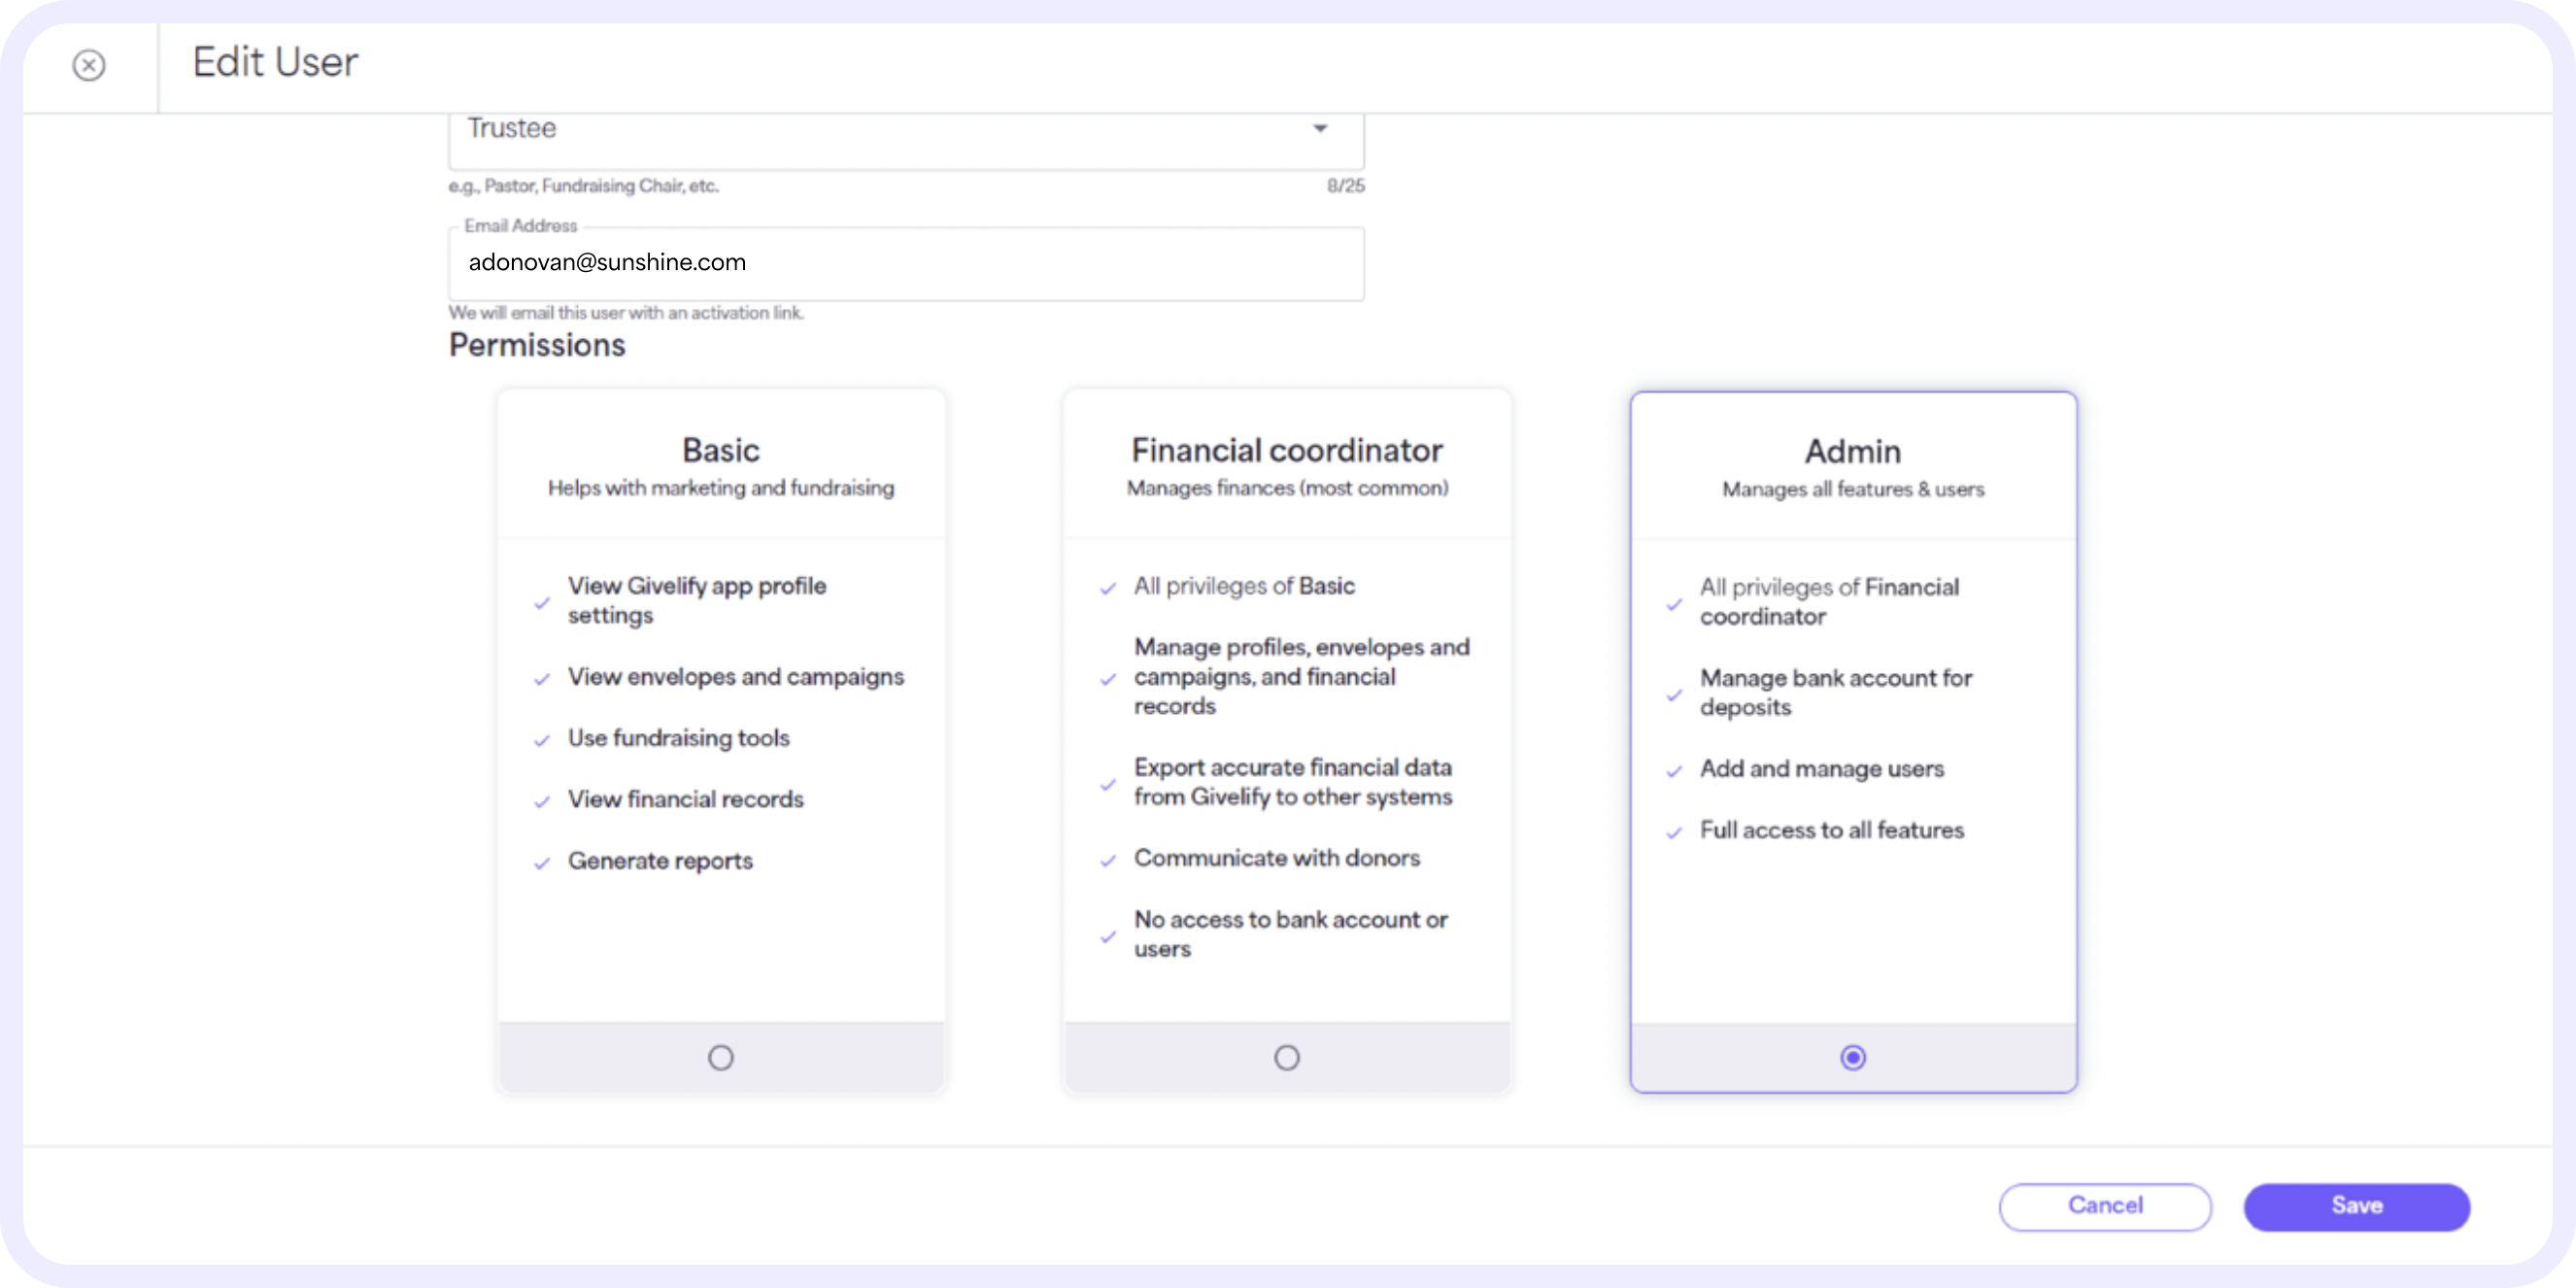
The permission granted determines what the user can see or do in the Analytics Studio:
- Basic – This permission is typically given to users involved with marketing and fundraising activities.
- Financial coordinator – This permission is typically given to users who manage finances for the organization.
- Admin – This permission grants the user full access to all features of the Analytics Studio.
4. Select Save.
Changing your account owner
While you can add as many users as you desire, your Givelify account can only have one account owner.
The person who signed up your organization and created the account is automatically assigned as the account owner. If you are the current account owner, you can transfer ownership to another user in your organization.
The new account owner must have already activated their account.
On your computer, log into your organization’s account at analytics.givelify.com and follow these steps:
1. Log in as the current account owner.
2. Select Settings > Users and find the user who you want to make the new account owner.
3. Select the Actions (...) menu and choose Make Account Owner.

4. Review the information on the Transfer account ownership confirmation screen and select Transfer to change the current account ownership to the new account owner.
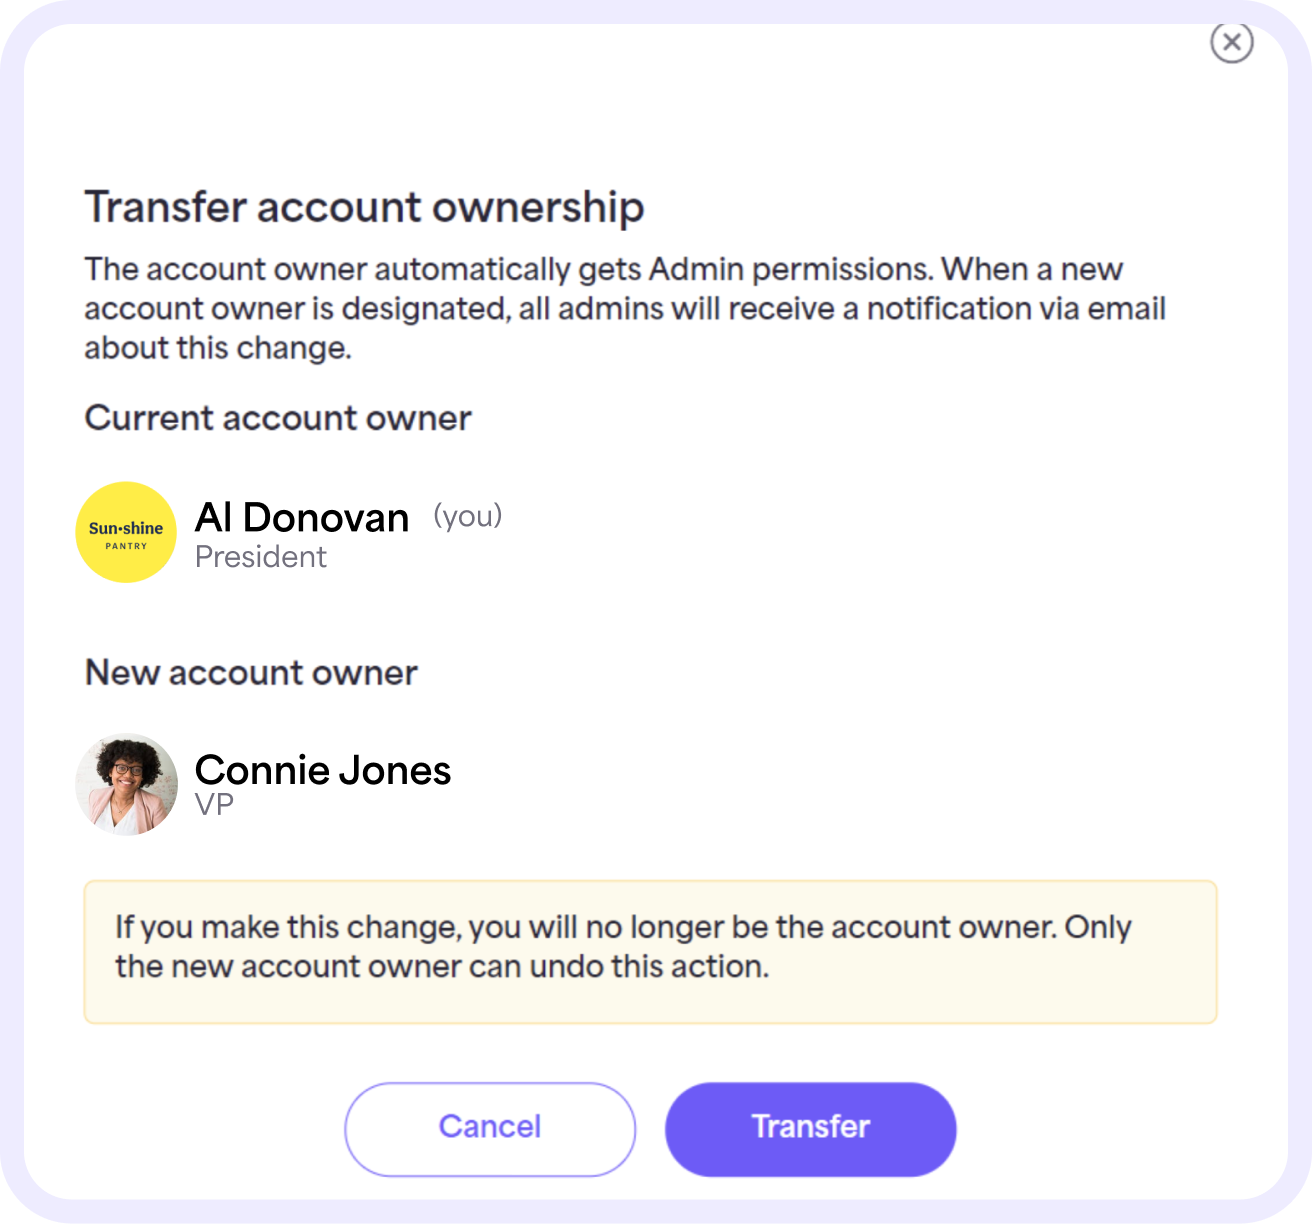
The Account Owner label will be displayed next to the new account owner's name. Their permission will be updated to Admin.
When a new account owner is designated, all admins will receive an email notifying them of this change.
Questions? Contact Customer Support at support@givelify.com or (317) 663-3088. You can also visit the Support Center for answers to frequently asked questions.


