


Is your organization raising money for a special purpose like a building fund or mission trip? Do you have a visiting faith leader you'd like to raise a special offering for, or would you like to raise money to upgrade your technology?
Create custom envelopes for special events or projects such as building funds. Those envelopes will appear on your Givelify profile and your members can contribute to them.
These envelopes can last for any time frame you choose. You can set them up to show indefinitely or for a specified period. You can also highlight the envelope in your profile’s cover photo so members can select the envelope while completing their gift.
Create a new envelope
To create a new giving envelope, follow these steps:
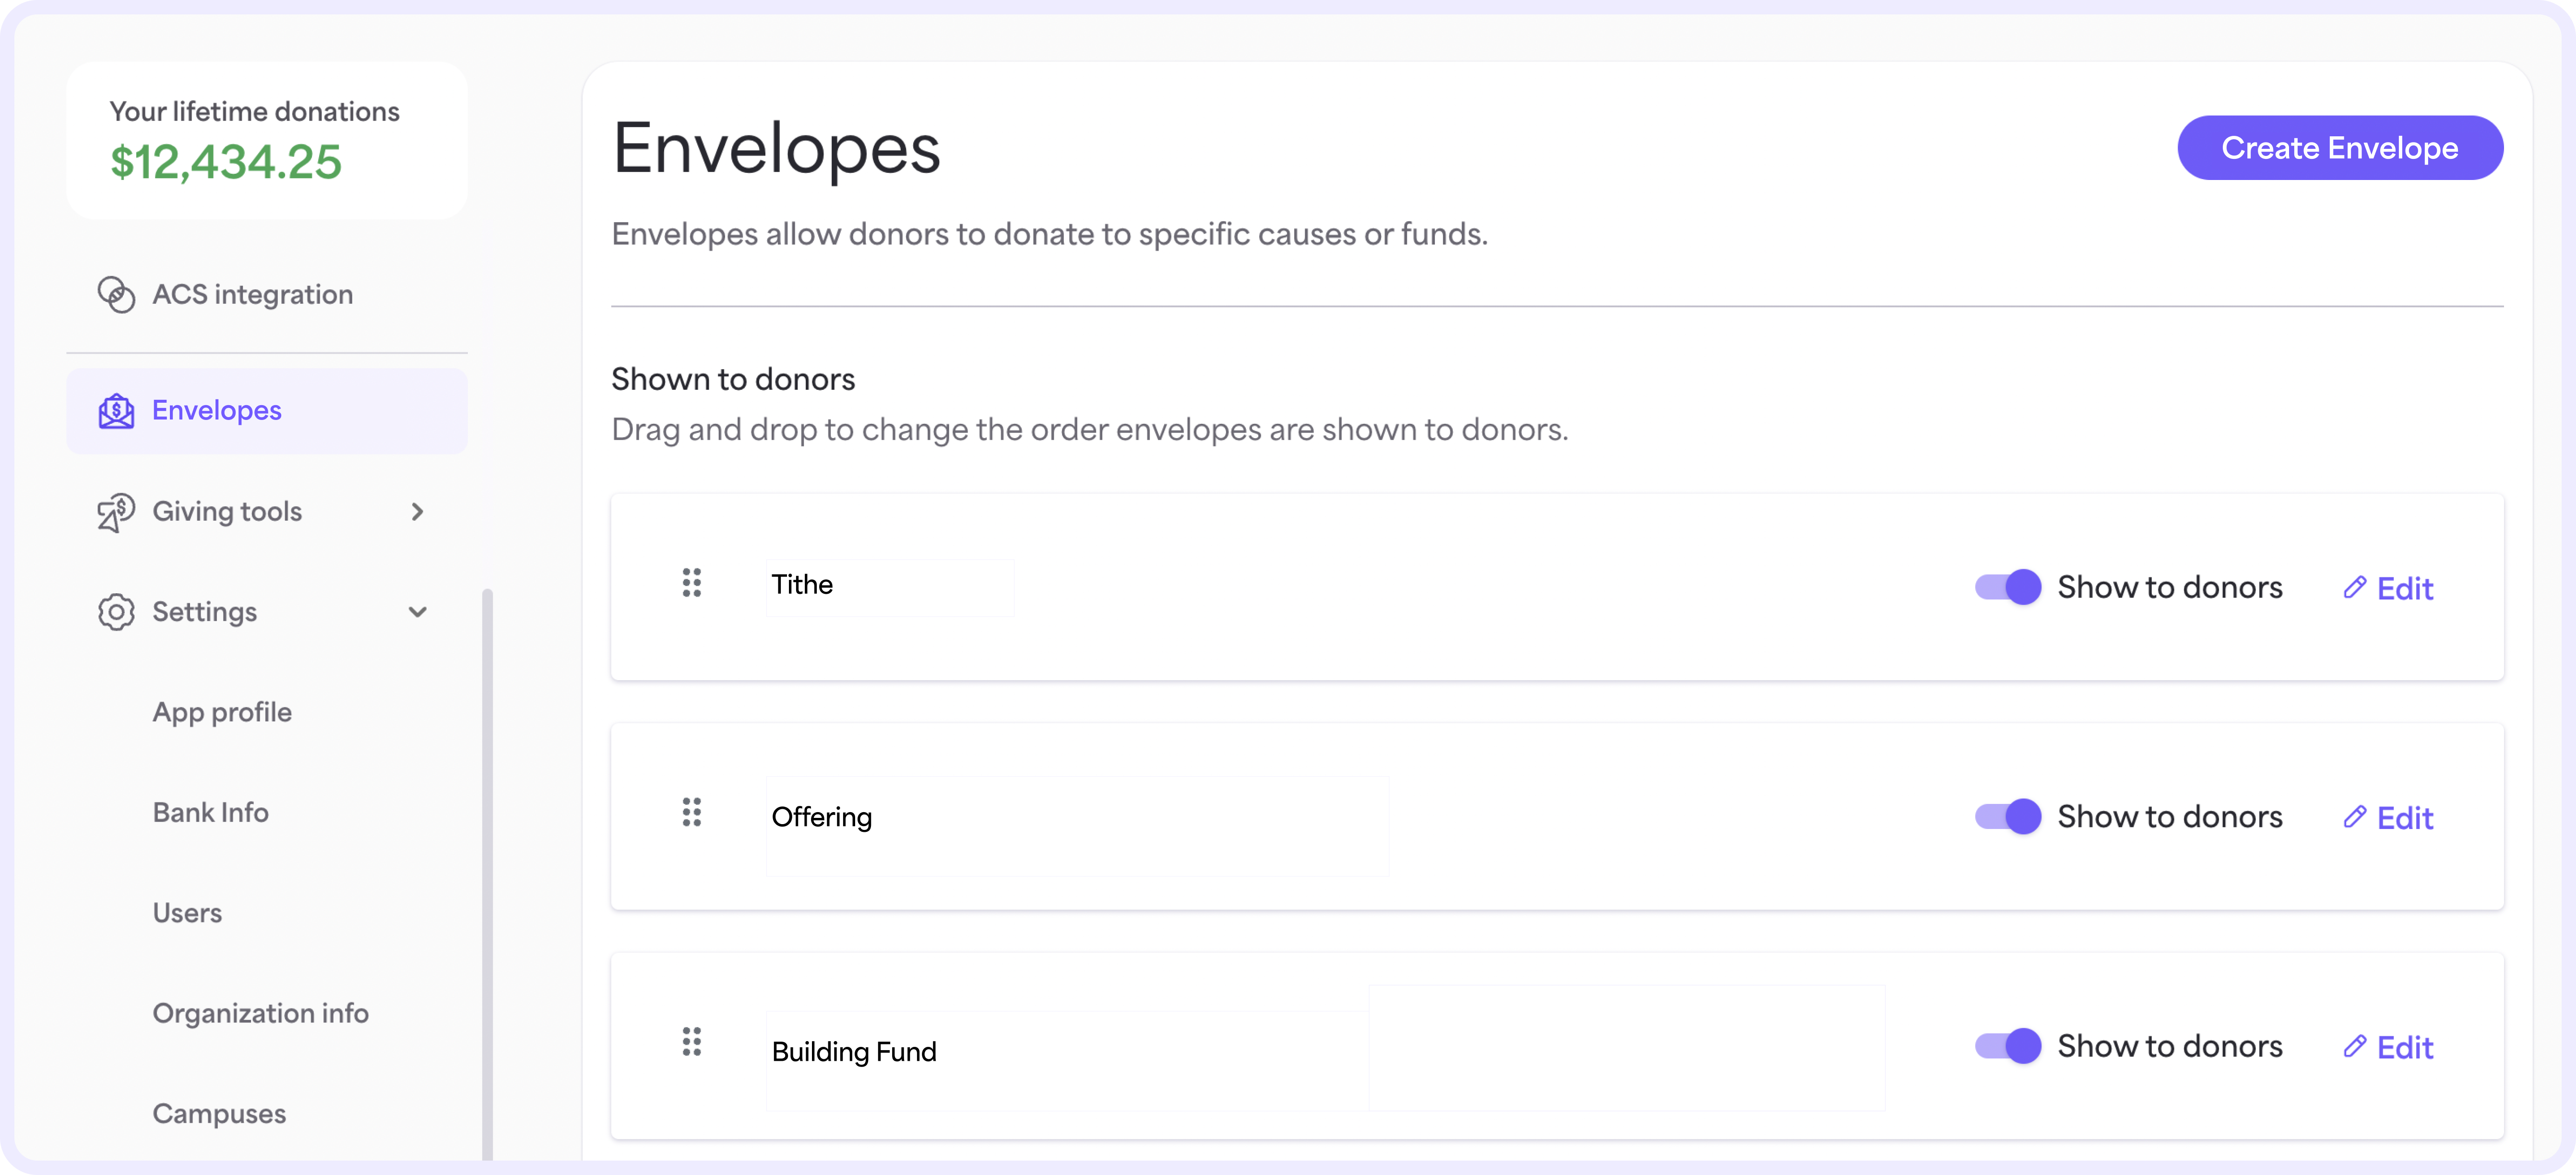
1. On your computer, log into your organization’s account at analytics.givelify.com.
2. Select Envelopes in the left navigation menu.
3. Select Create envelope in the upper right corner.
4. On the Create envelope form, enter the name of the envelope and a description.
5. Select how long you’d like the envelope to show to givers in the Givelify app.
- If you want your envelope to only show for a certain period, select Specific dates and enter your desired date range.
- If you want your envelope to show indefinitely, select Always.
6. If there’s a specific amount you’d like to raise for this envelope, select Yes, set a goal and enter the dollar amount in the text box.
7. Select Save.

Reordering envelopes
To change the order of the envelopes as they appear in the Givelify app, follow these steps:
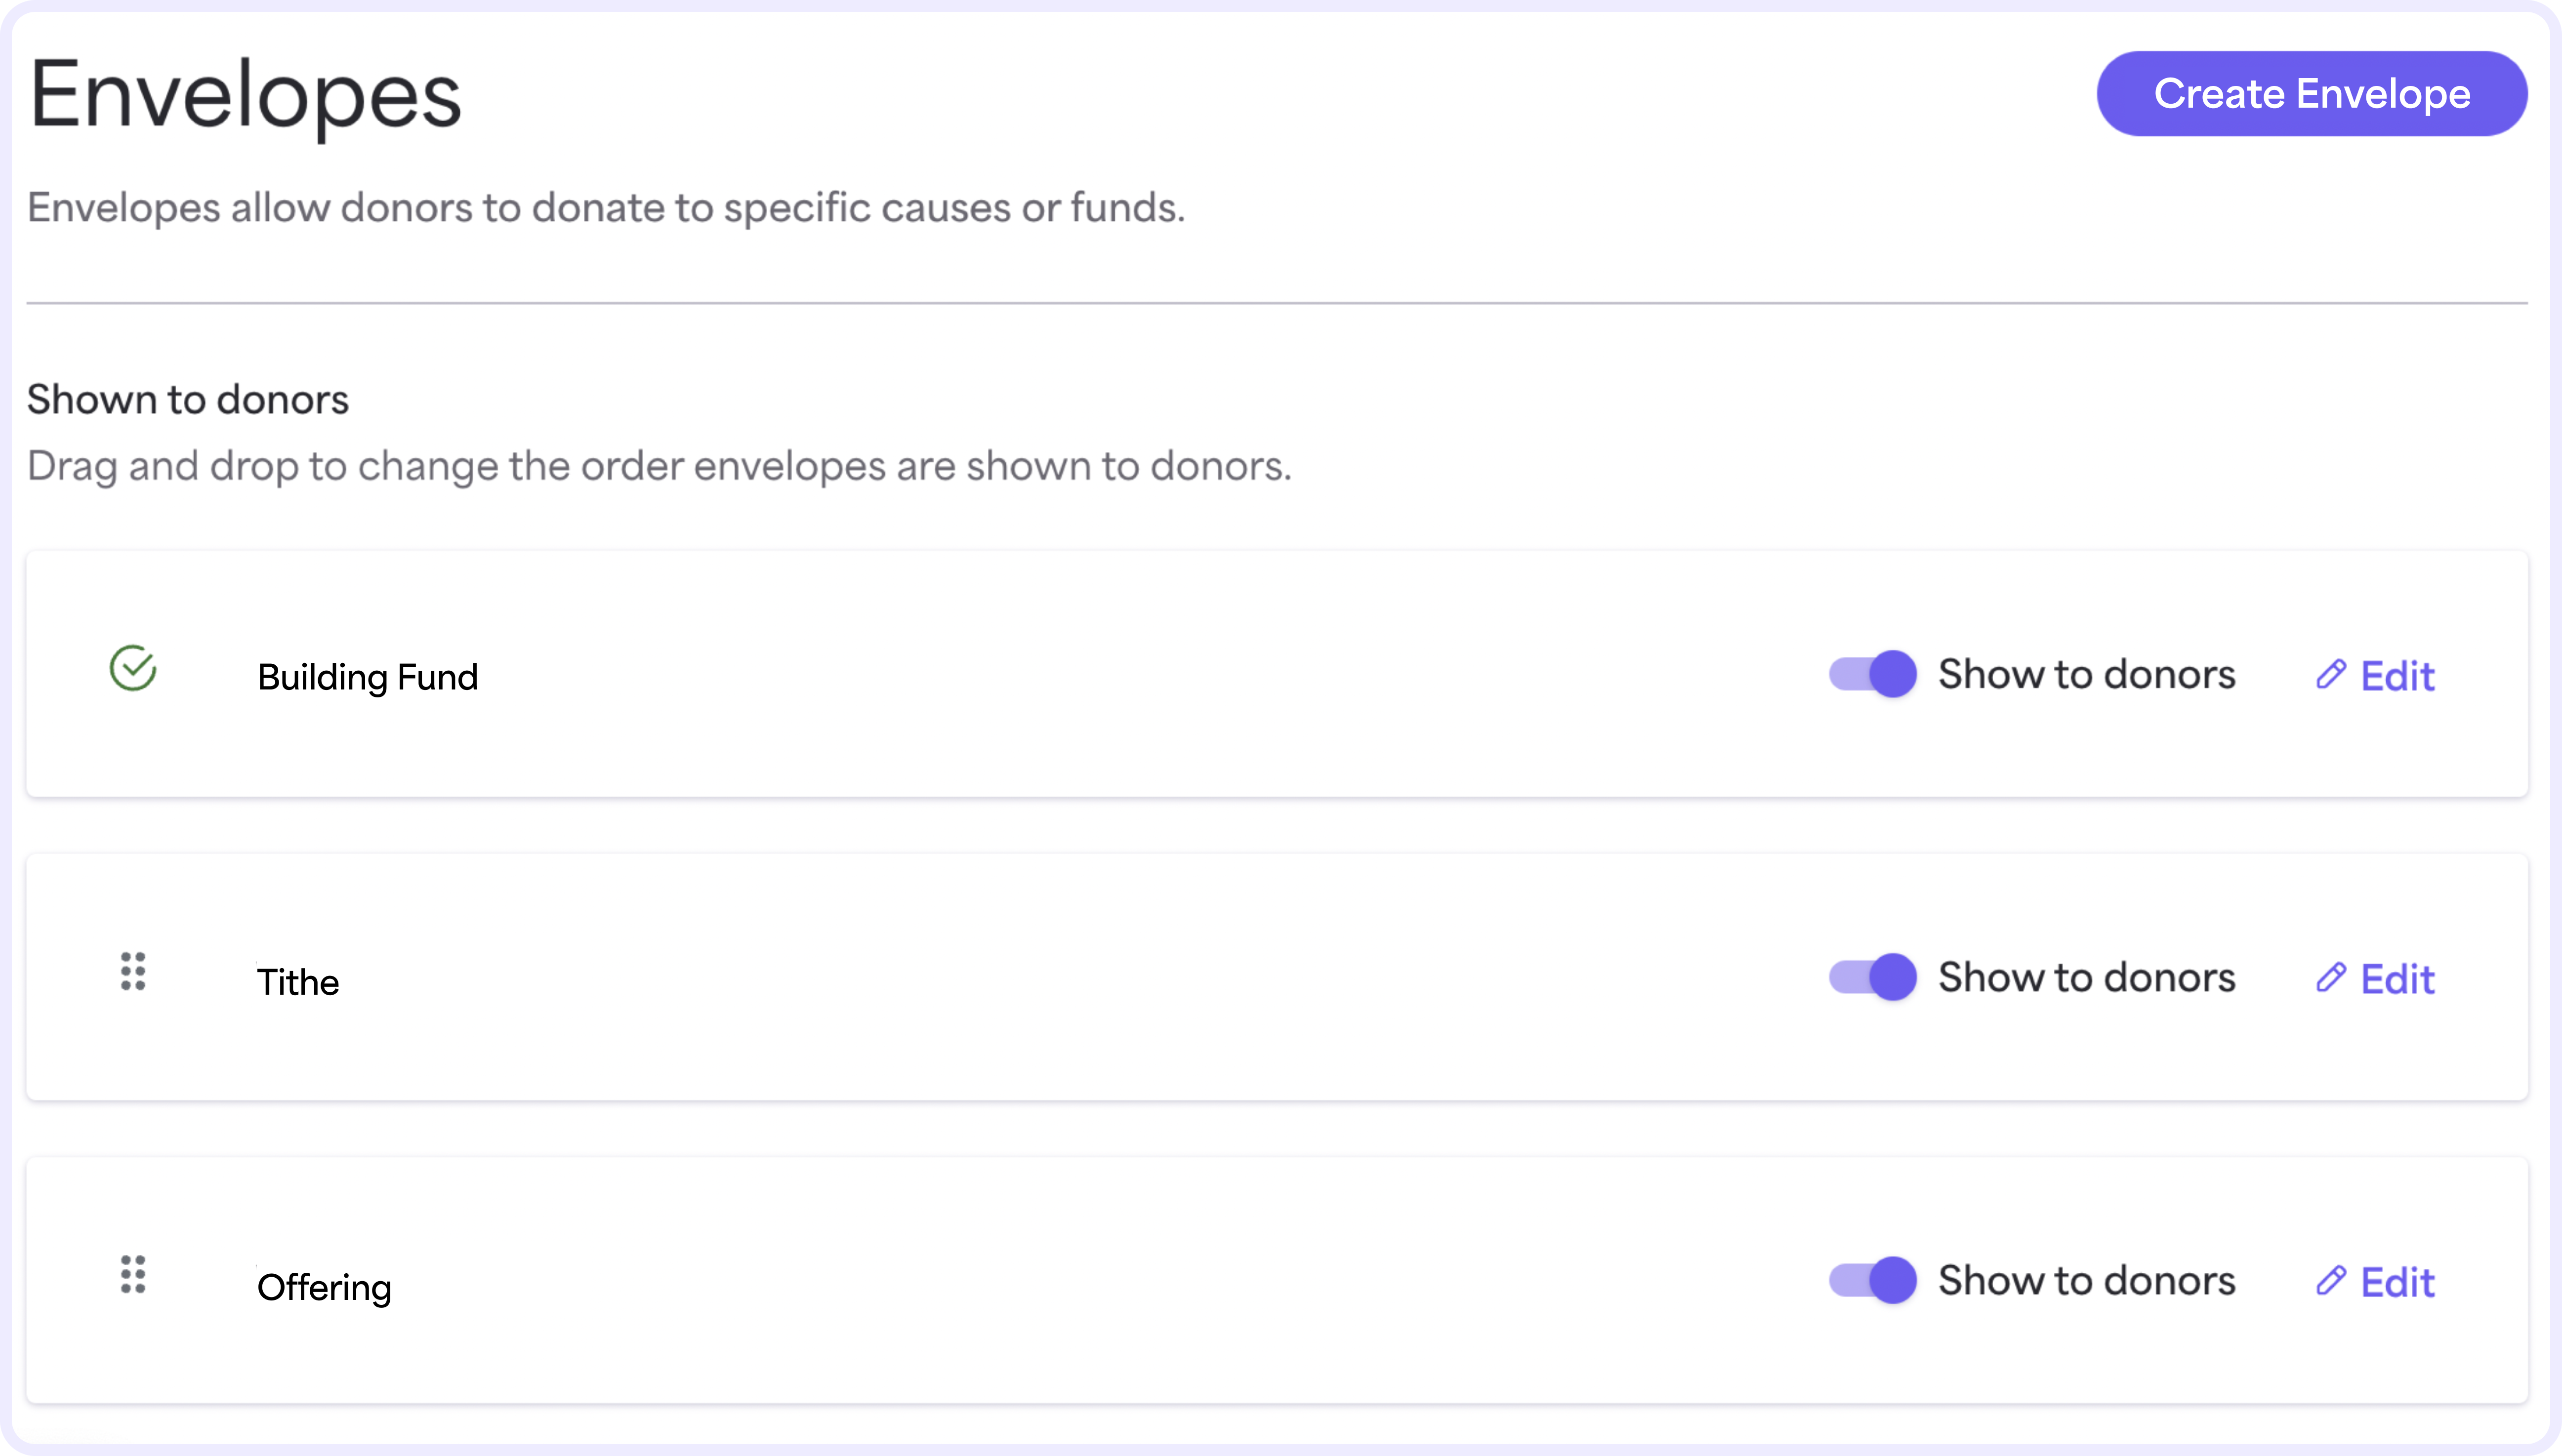
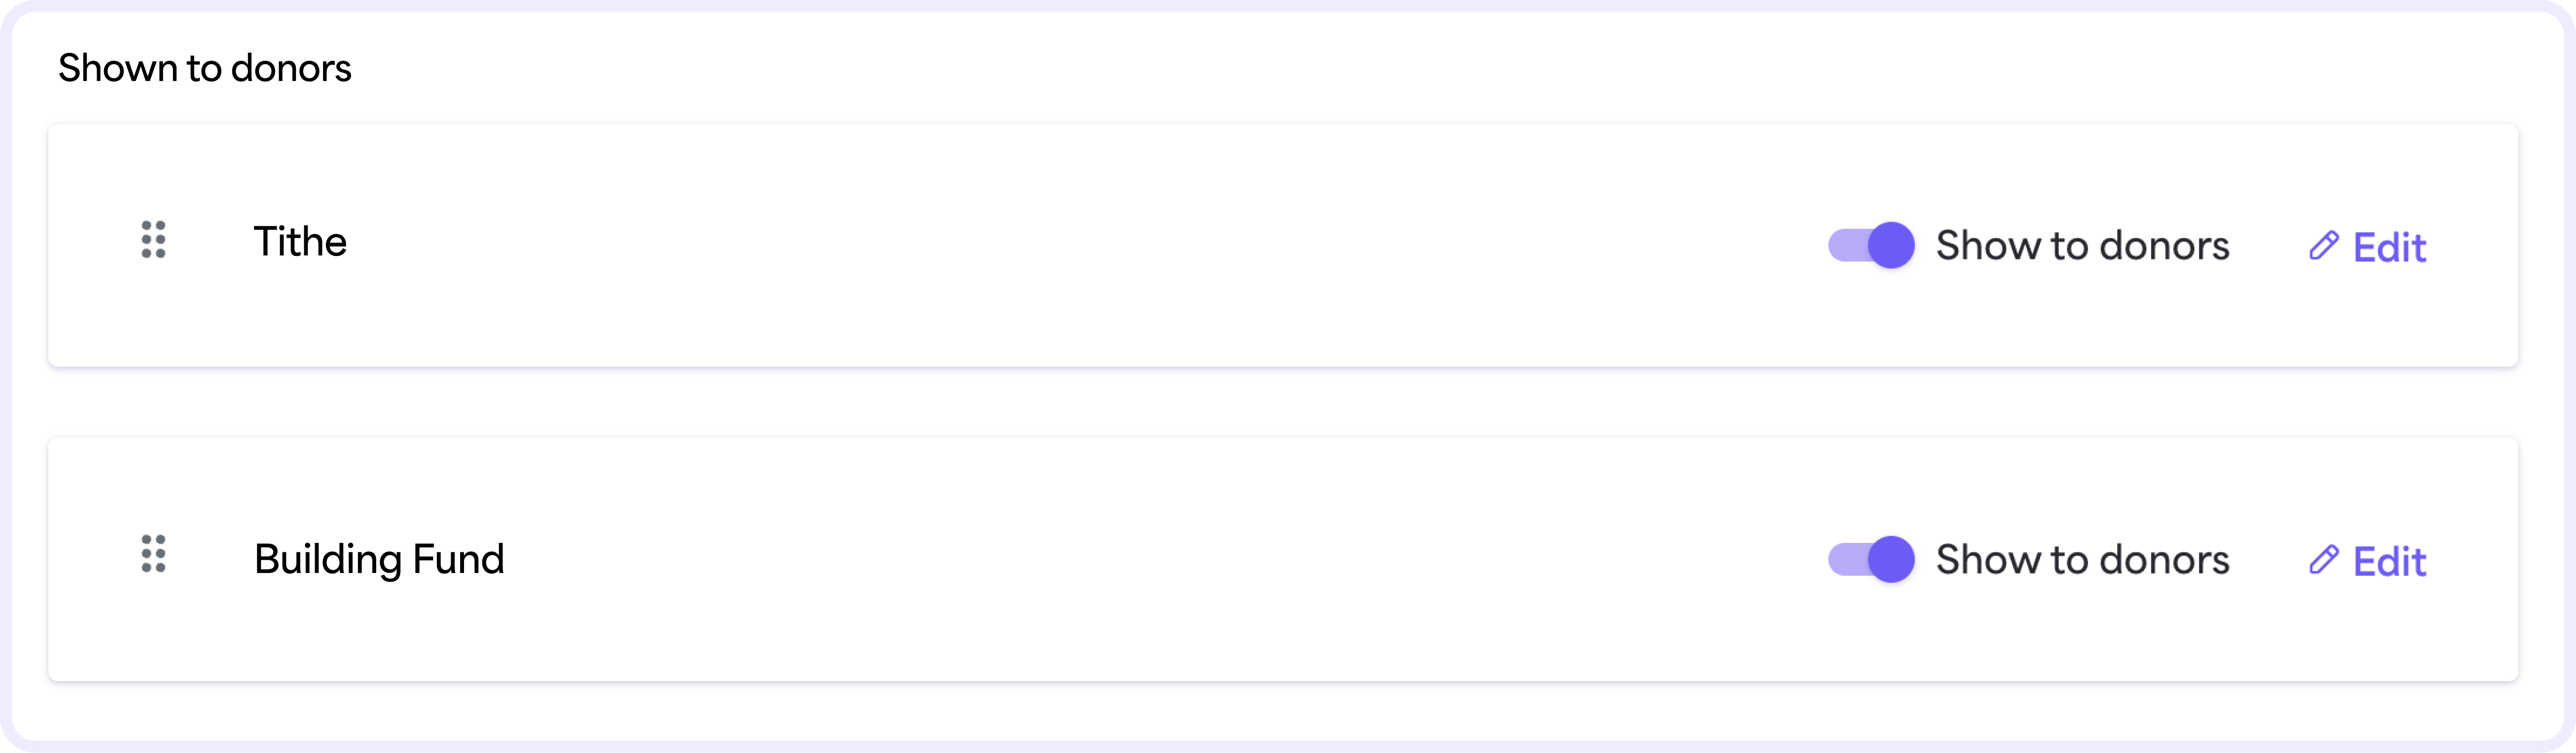
1. In the Shown to donors list, navigate to the envelope you want to move.

2. Select the Move icon to the left of the envelope name. Drag the envelope to the position you want it to appear in the Shown to donors list.
3. A green check will briefly display, indicating the envelope was saved to the new position.
4. To see the change reflected in the Givelify app, you’ll need to sign out of the app and sign back in.
Showing and hiding envelopes
If you don’t want an envelope to appear in the giving app, you can hide it instead of deleting it.
Hiding envelopes can be helpful when you’re collecting gifts for recurring events or causes that you only want to promote for a certain amount of time, such as an envelope for Christmas or Easter giving.
You can toggle the envelope back on when you’re ready to show it again.
To hide an envelope, follow these steps:
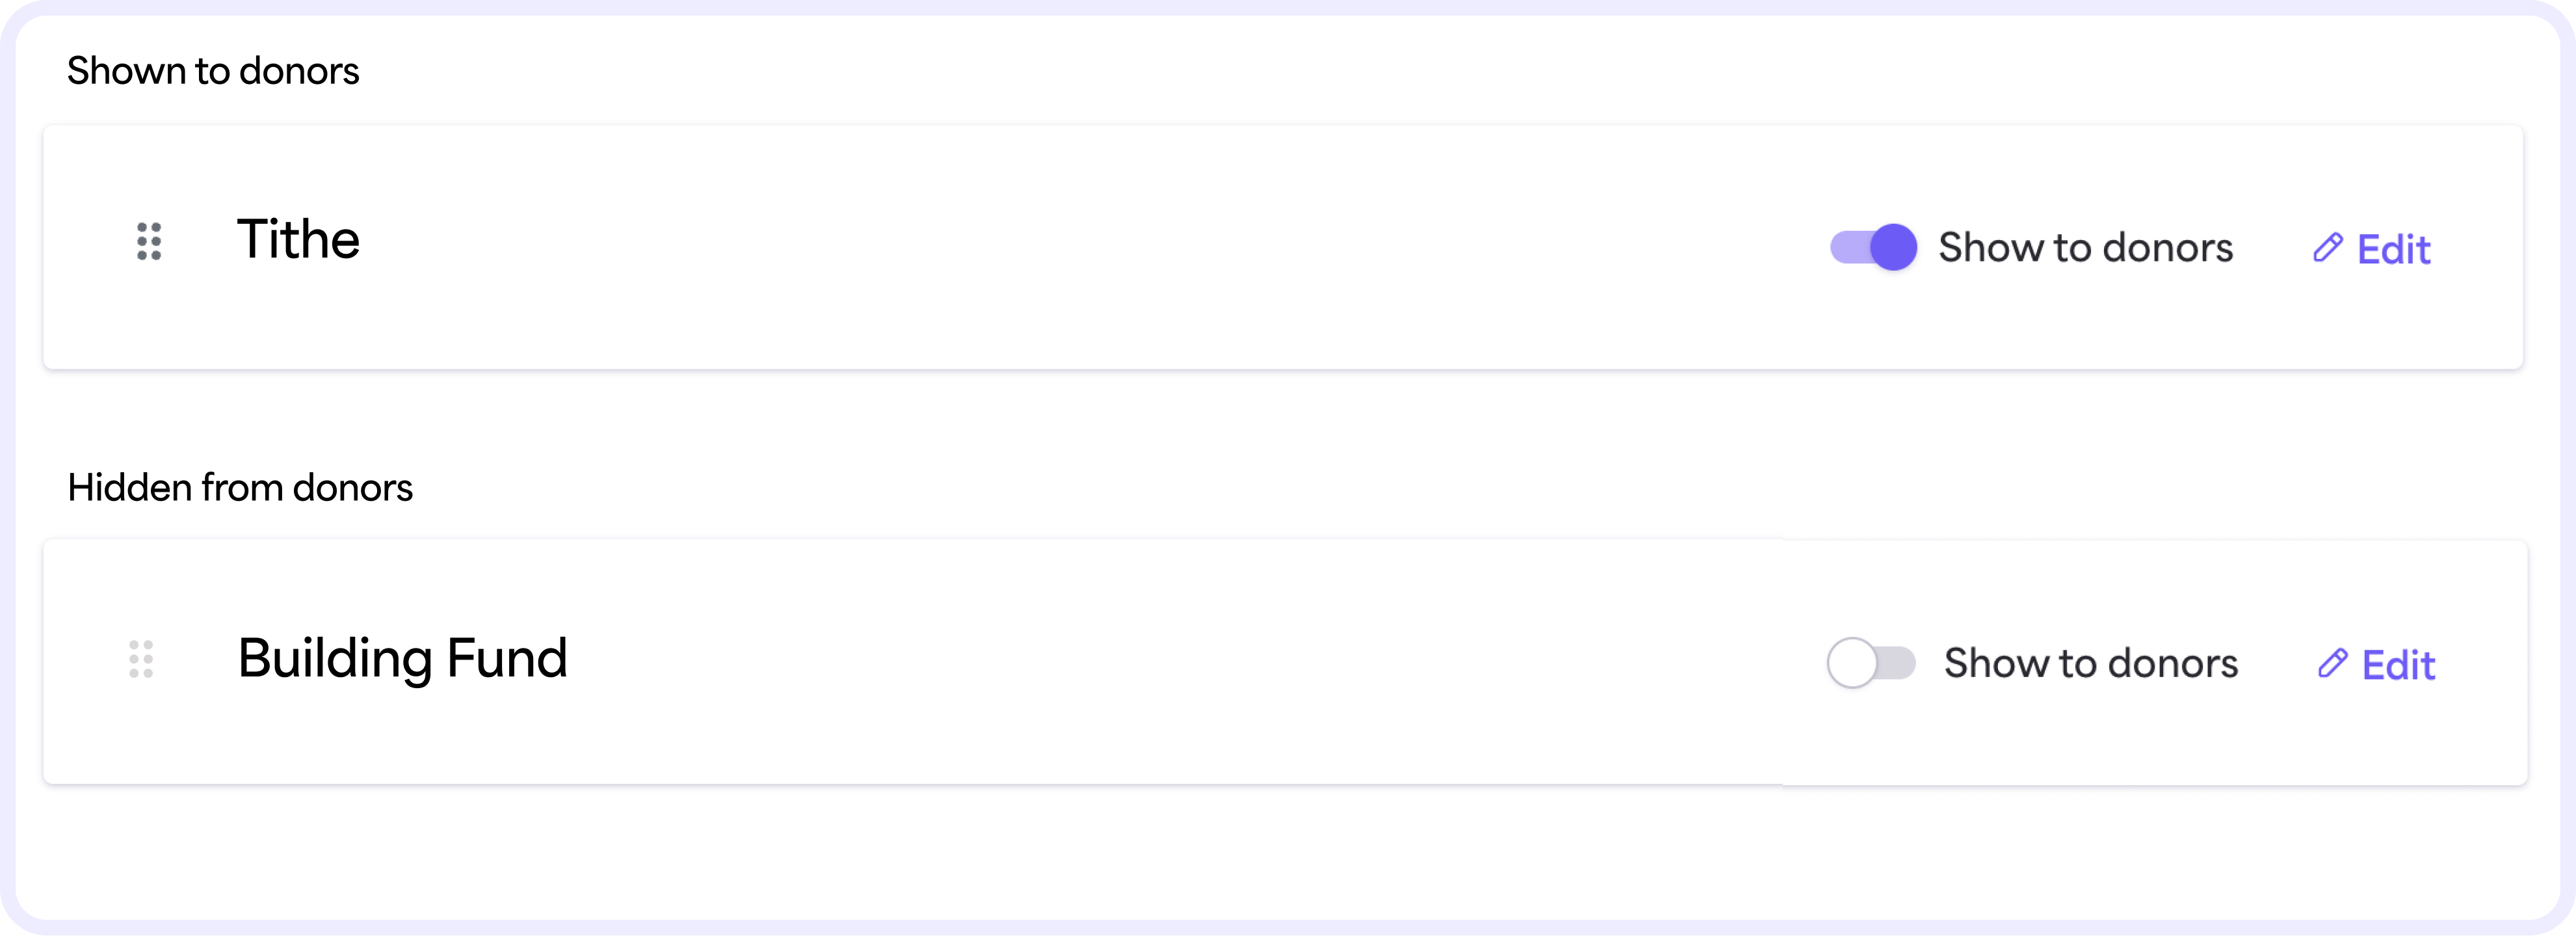
1. On the Envelopes page in the Shown to donors list of envelopes, navigate to the envelope you’d like to hide. Select the Show to donors toggle to disable it.
2. Click Hide envelope on the confirmation dialog.
3. The envelope will move to the Hidden from donors list of envelopes on the lower portion of the page.
To show an envelope that’s been hidden, follow these steps:
1. On the Envelopes page, in the Hidden from donors list of envelopes, navigate to the envelope you’d like to show. Select the Show to donors toggle to enable it.
2. Click Show envelope on the confirmation dialog.
3. The envelope will move to the Shown to donors list of envelopes on the upper portion of the page.


