


Givelify provides donors with a beautiful, personal, and convenient giving experience.
To further enhance this experience and create a deeper connection with your supporters, brand your Givelify profile with:
- An image that represents your organization
- Your organization’s logo
- Your mission statement
Customizing your profile makes it easy for donors to find, recognize, and support your organization.
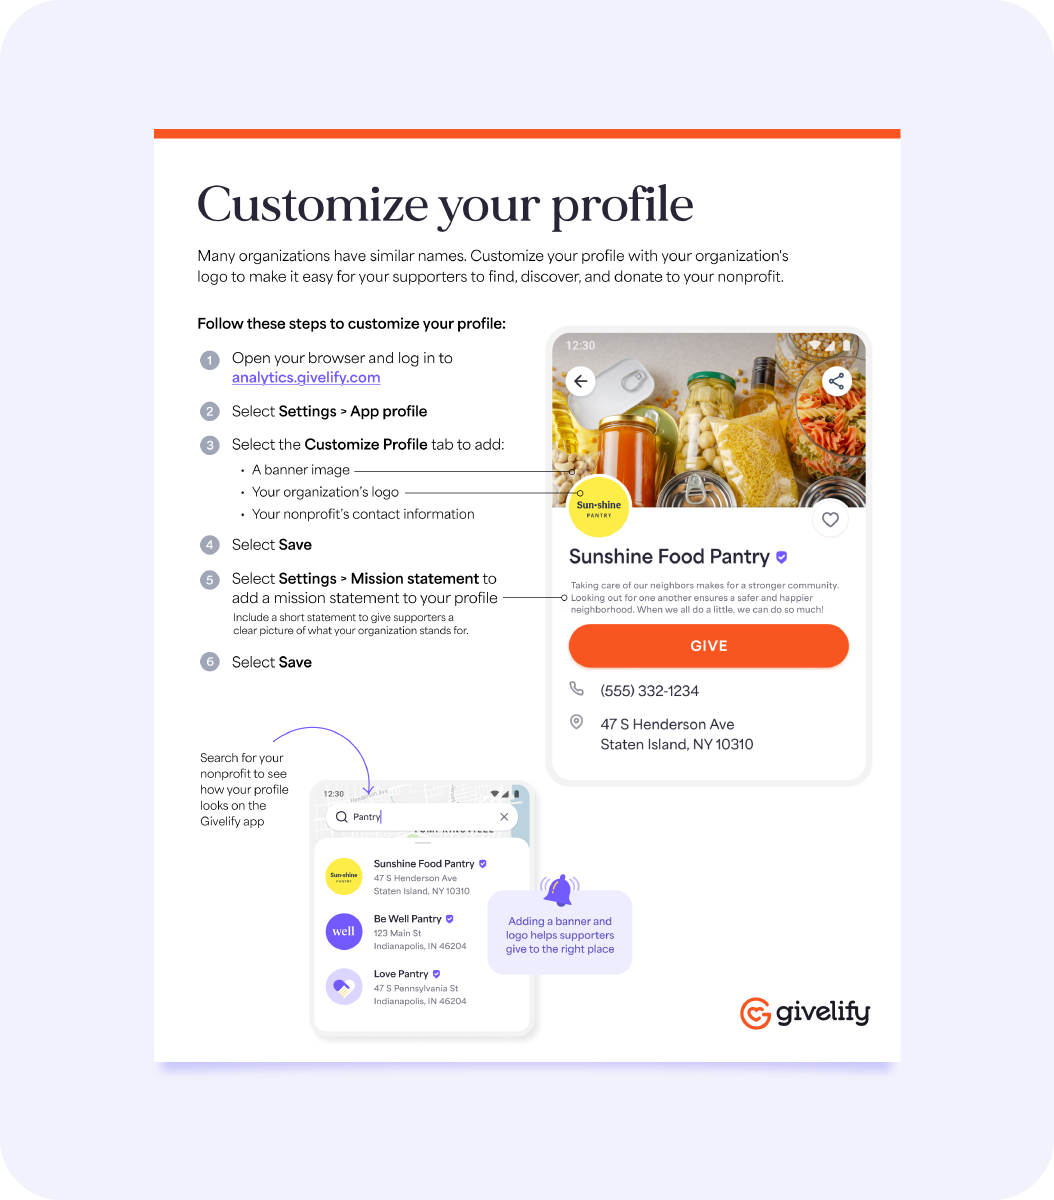

Add images to your profile
To add your organization’s logo and an image to your Givelify profile, follow these steps:
1. On your computer, log into your organization’s account at analytics.givelify.com.
2. Select Settings > App profile.
3. On the App profile page, select the Customize Profile tab and update the following information:
- Banner image - Select Add banner image and choose the photo to be displayed for your organization's cover photo.
- Location – This should be your physical address. It will be shown on the map in the Givelify app. Click Edit if you’d like to make changes to the address shown.
- Organization logo - Select Add logo image and choose the photo to be displayed in the app for your organization's logo.
4. Select Save.
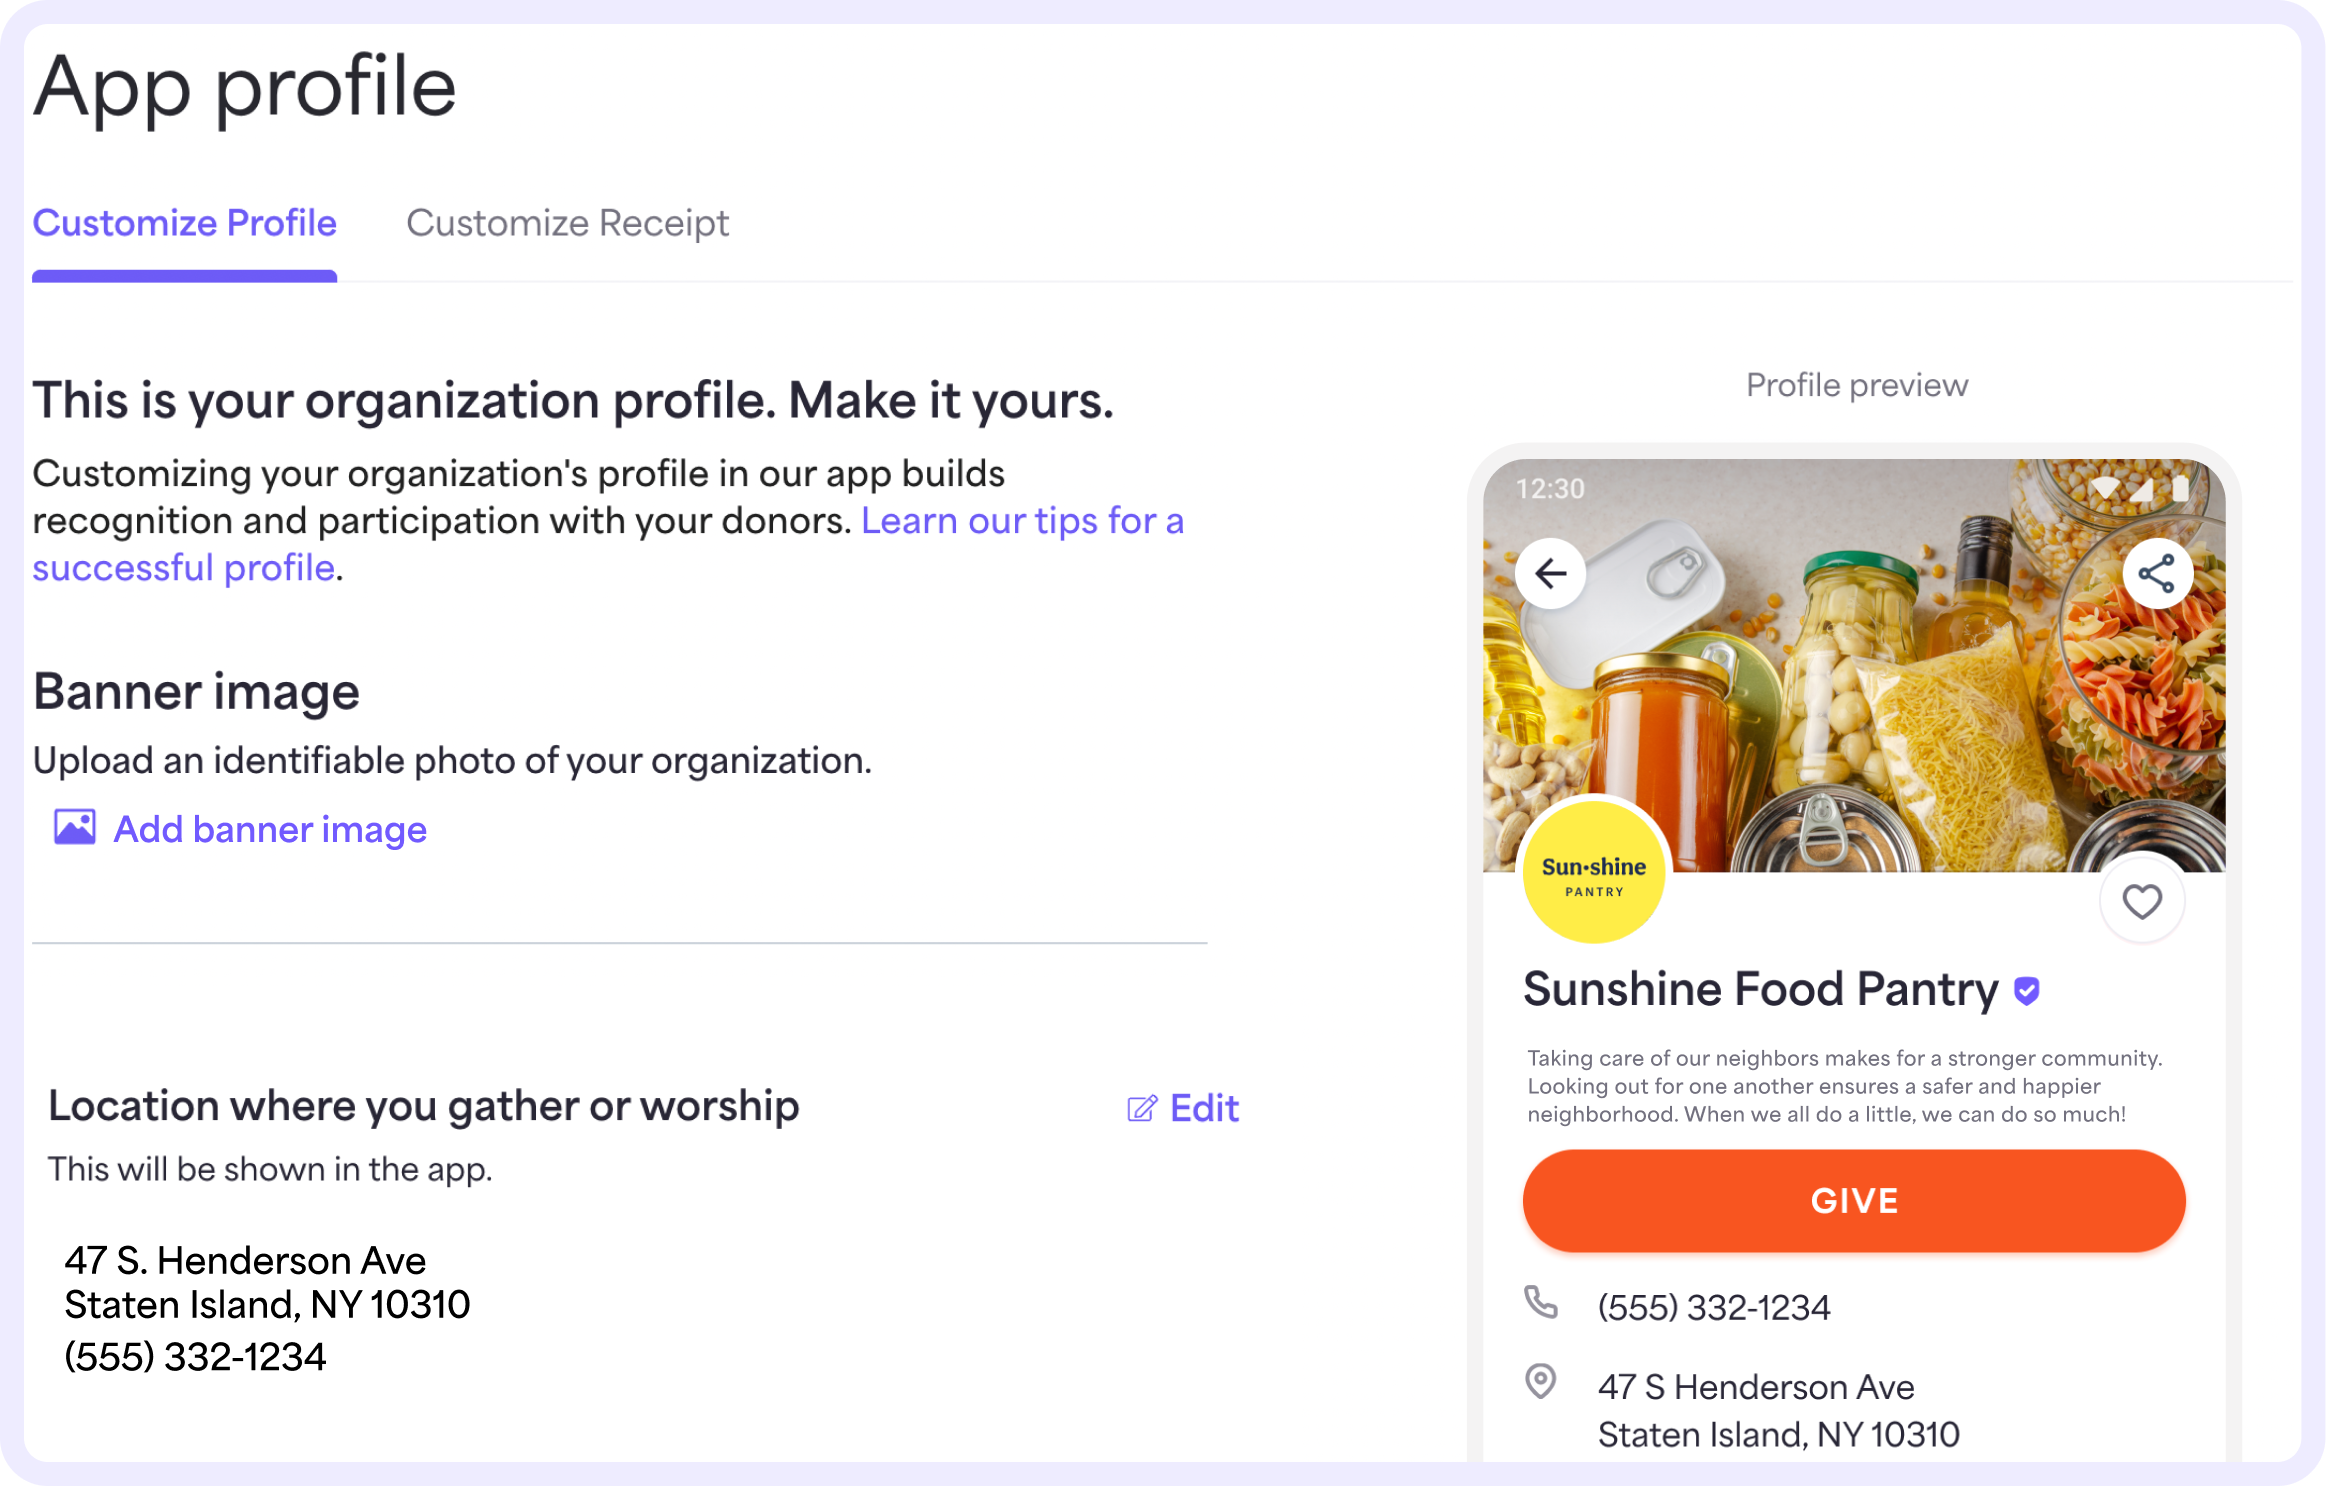
The logo will also appear next to your organization’s name in the search results in the giving app.
Add your mission statement
To add your nonprofit’s mission statement, follow these steps:
1. On your computer, log into your organization’s account at analytics.givelify.com.
2. Select Settings > Mission statement.
3. Select Add/edit.
4. In the text box, enter your mission statement and click Save. There’s a 200-word limit.

When you add the mission statement, it’ll automatically display in the preview to the right before you save. Having a mission statement can help your organization attract new donors on Givelify who want to support your mission.


