


Have a fundraising event on the horizon? Or do you want to draw attention to an ongoing project or cause?
Create custom campaigns for special events or fundraising efforts. Those campaigns will appear on your Givelify profile and donors can contribute to them.
You can even set specific fundraising goals for each campaign so donors can see your progress.
These campaigns can last for any time frame you choose. You can set them up to show indefinitely, for a specified period, or for a certain fundraising event. You can also highlight the campaign in your profile’s cover photo so donors can select the campaign while completing their donation.
Create a new fundraising campaign
To create a new fundraising campaign, follow these steps:
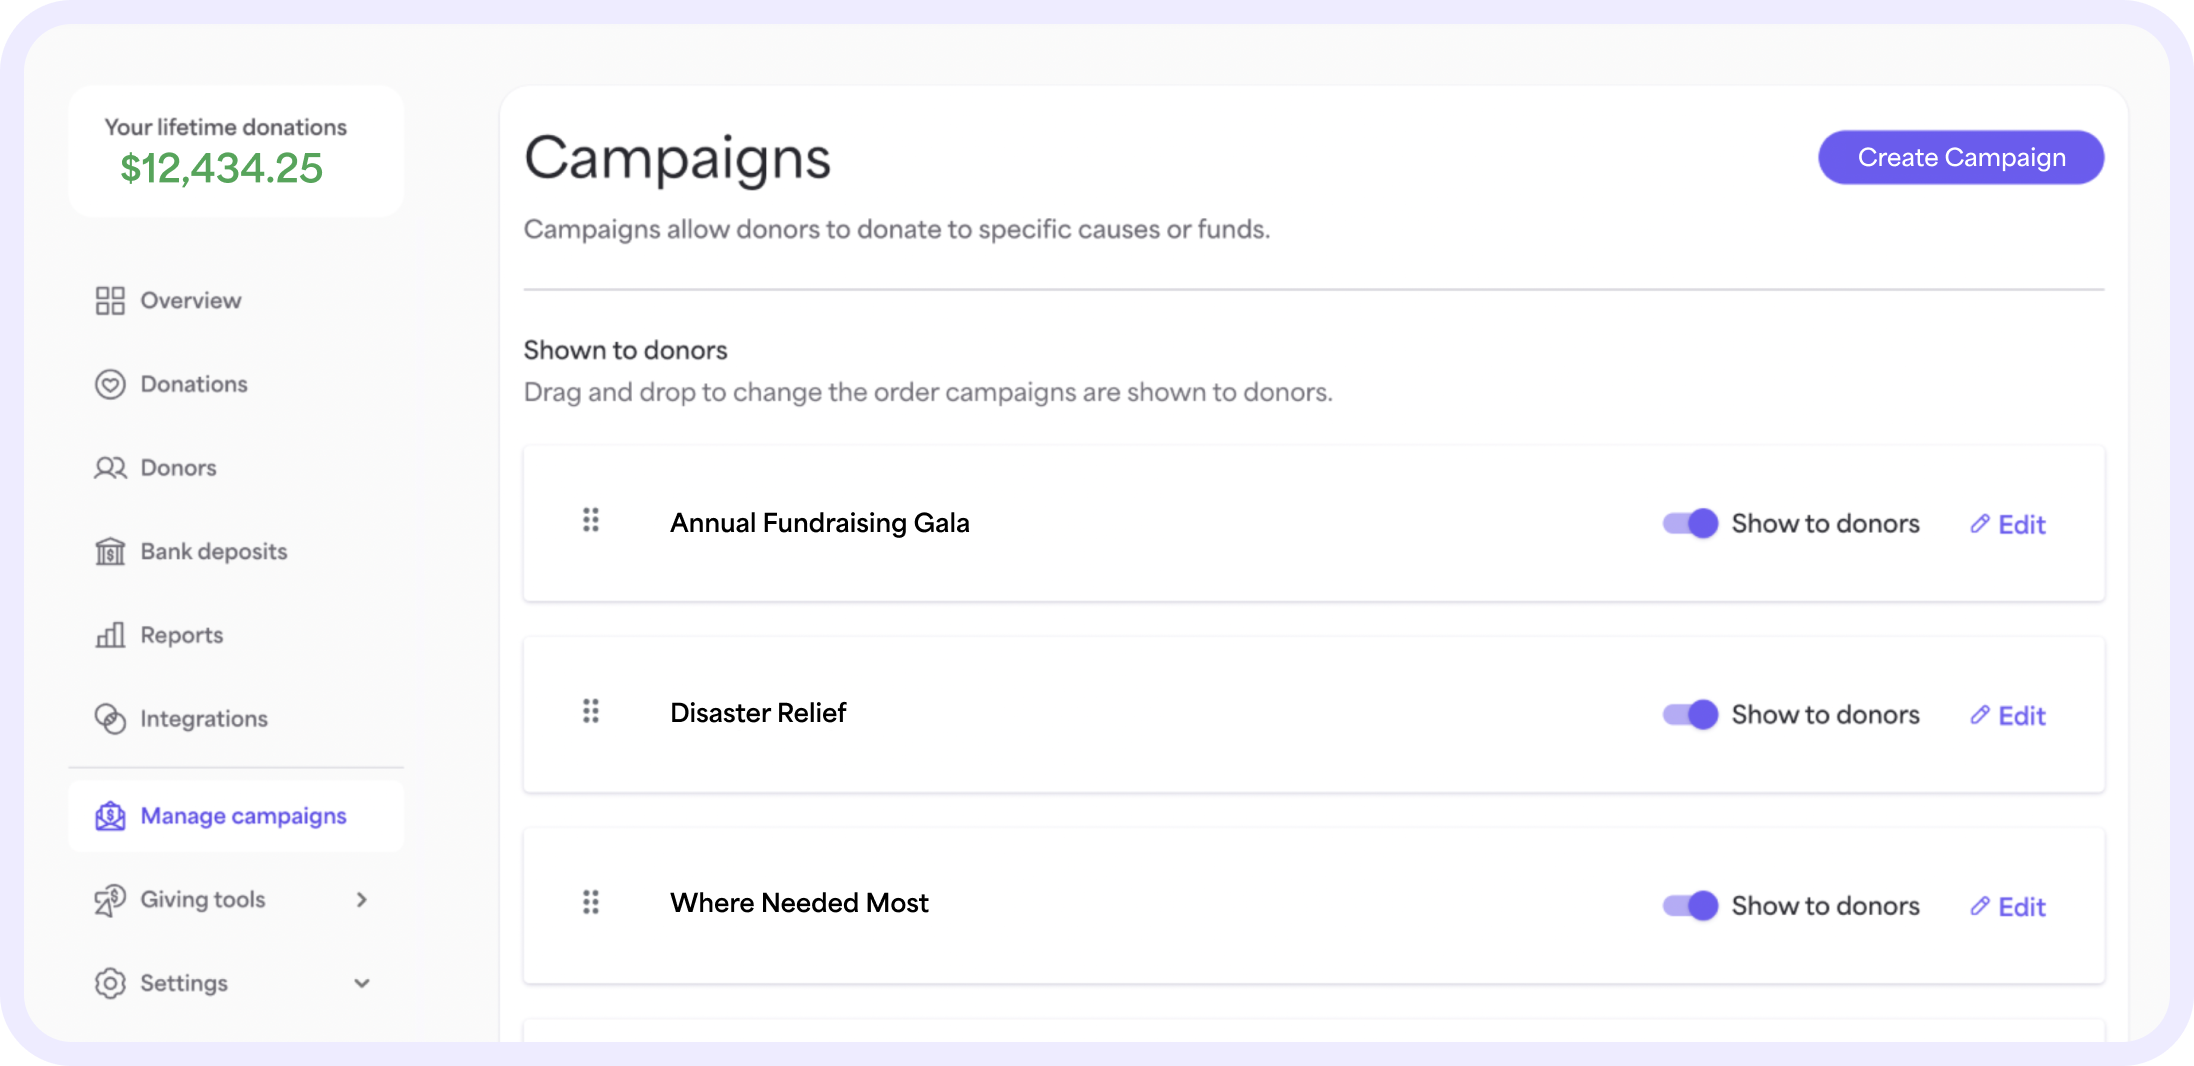
1. On your computer, log into your organization’s account at analytics.givelify.com.
2. Select Manage campaigns in the left navigation menu.
3. Select Create campaign in the upper right corner.
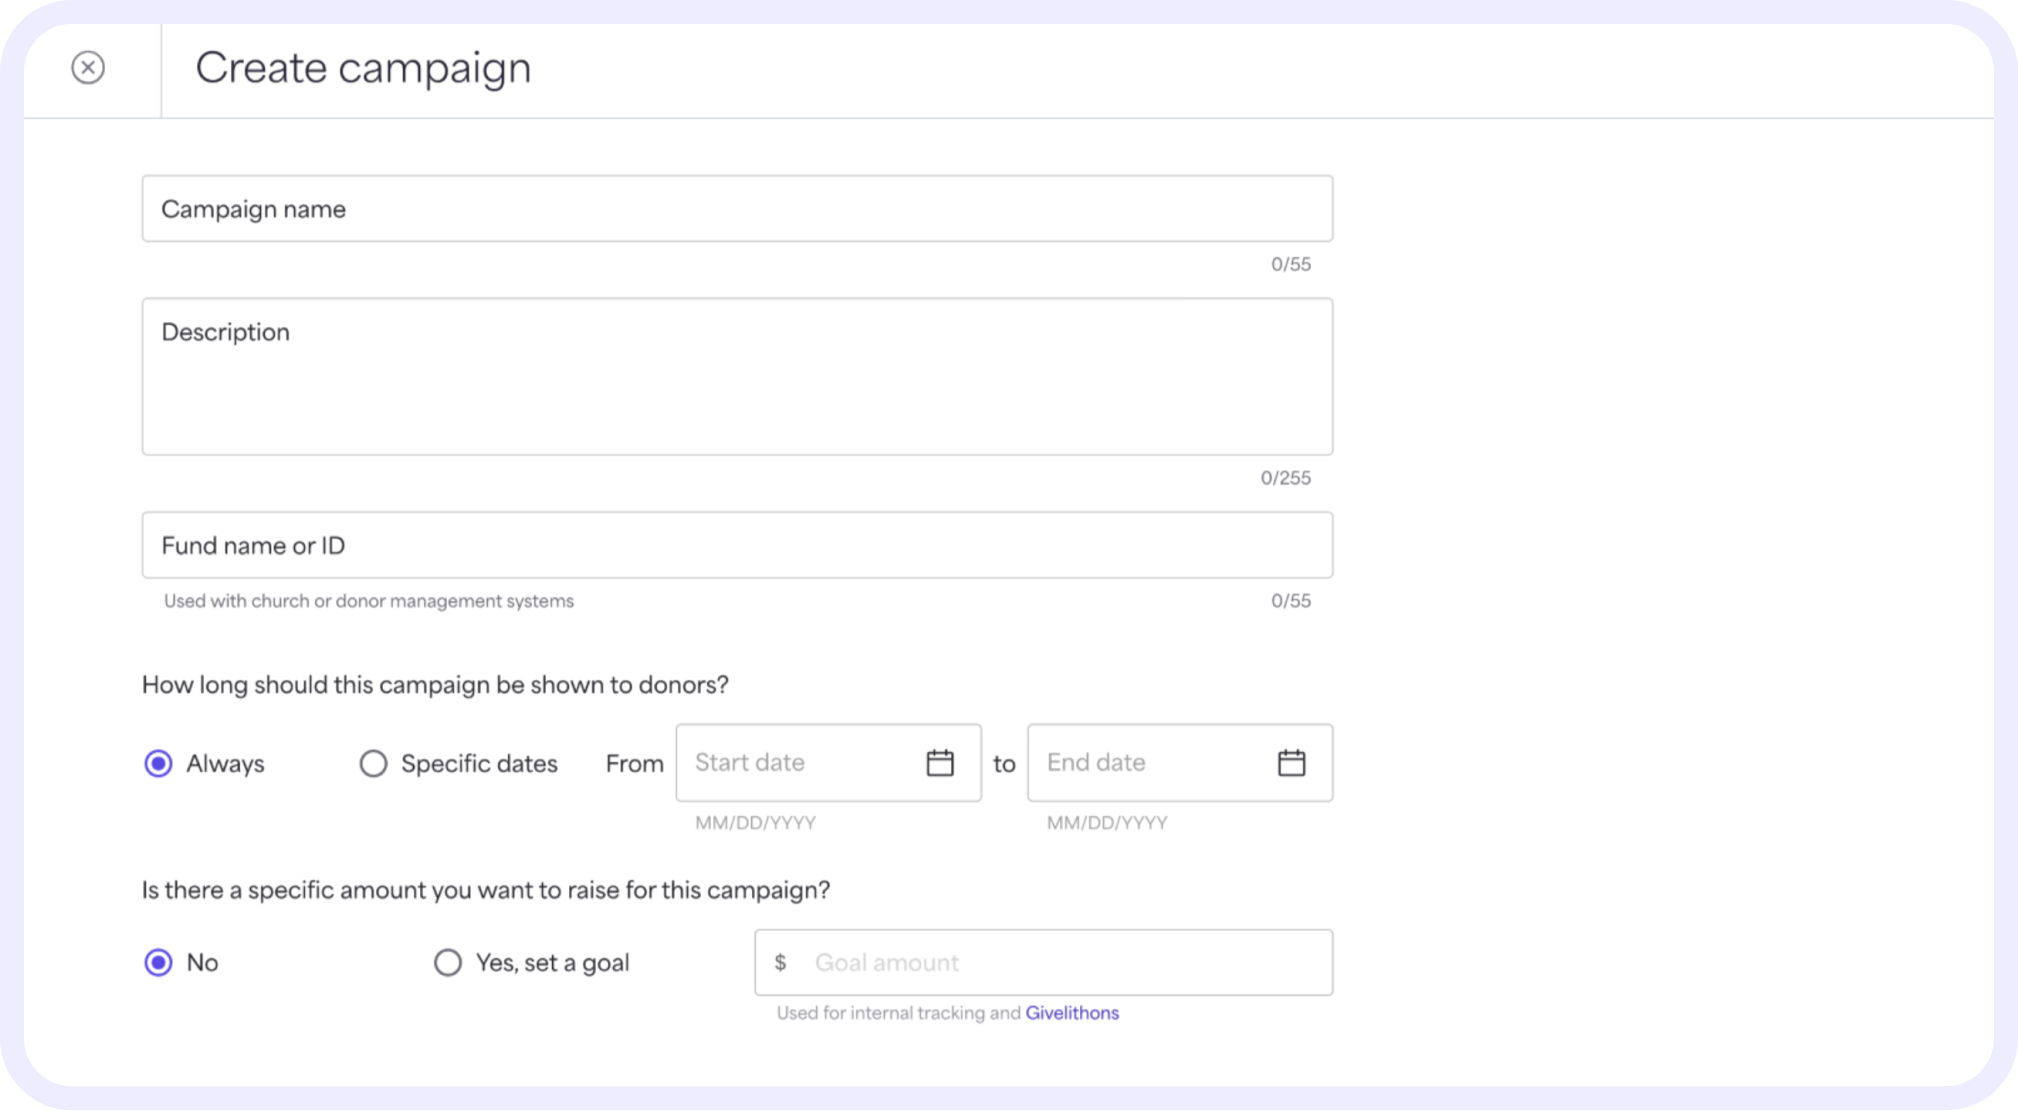
4. On the Create campaign form, enter the name of the campaign and a description.
5. Select how long you’d like the campaign to show to donors in the Givelify app.
- If you want your campaign to only show for a certain period, select Specific dates and enter your desired date range.
- If you want your campaign to show indefinitely, select Always.
6. If there’s a specific amount you’d like to raise for this campaign, select Yes, set a goal and enter the dollar amount in the text box.
7. Select Save.
Reordering campaigns
To change the order of the campaigns as they appear in the Givelify app, follow these steps:
1. In the Shown to donors list, navigate to the campaign you want to move.
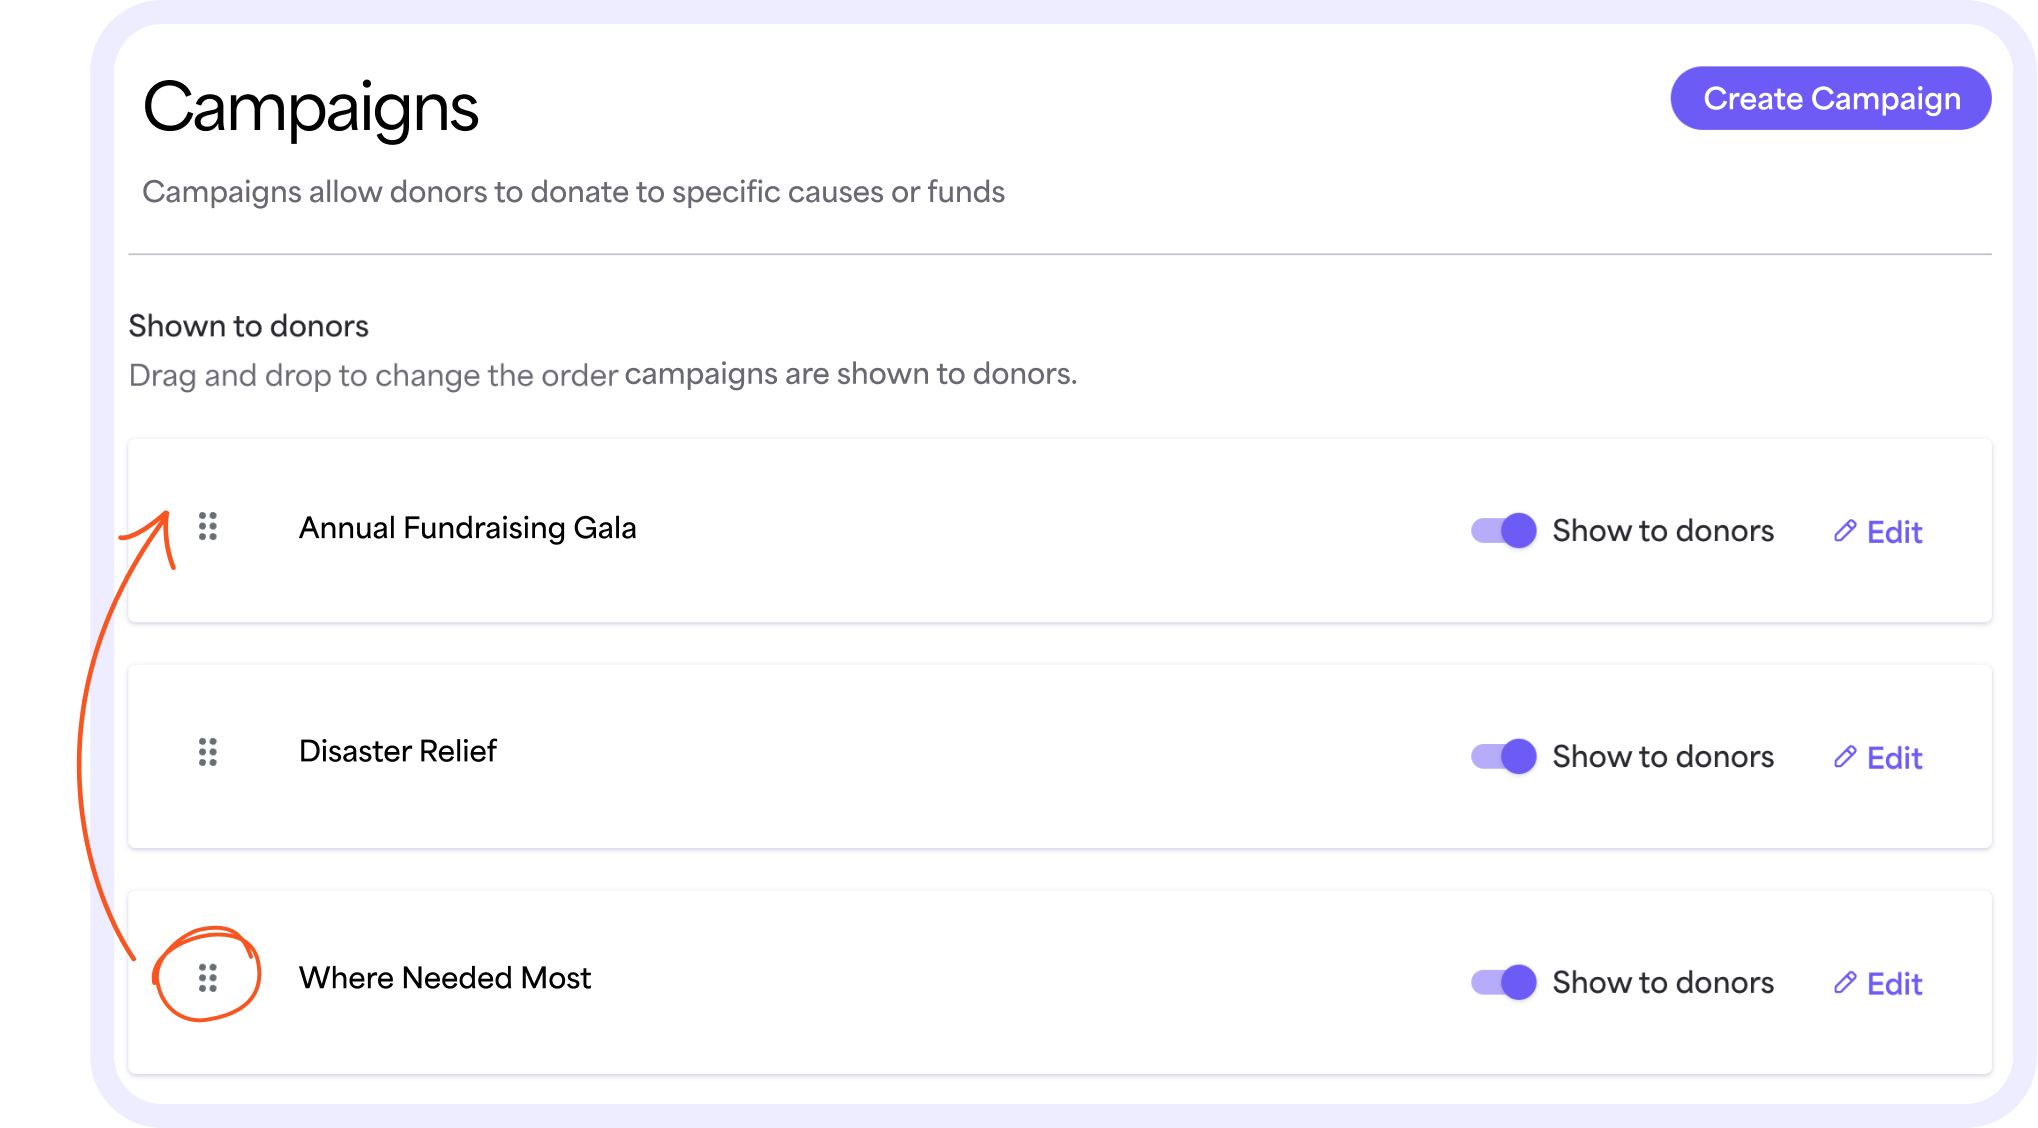
2. Select the Move icon to the left of the campaign name. Drag the campaign to the position you want it to appear in the Shown to donors list.
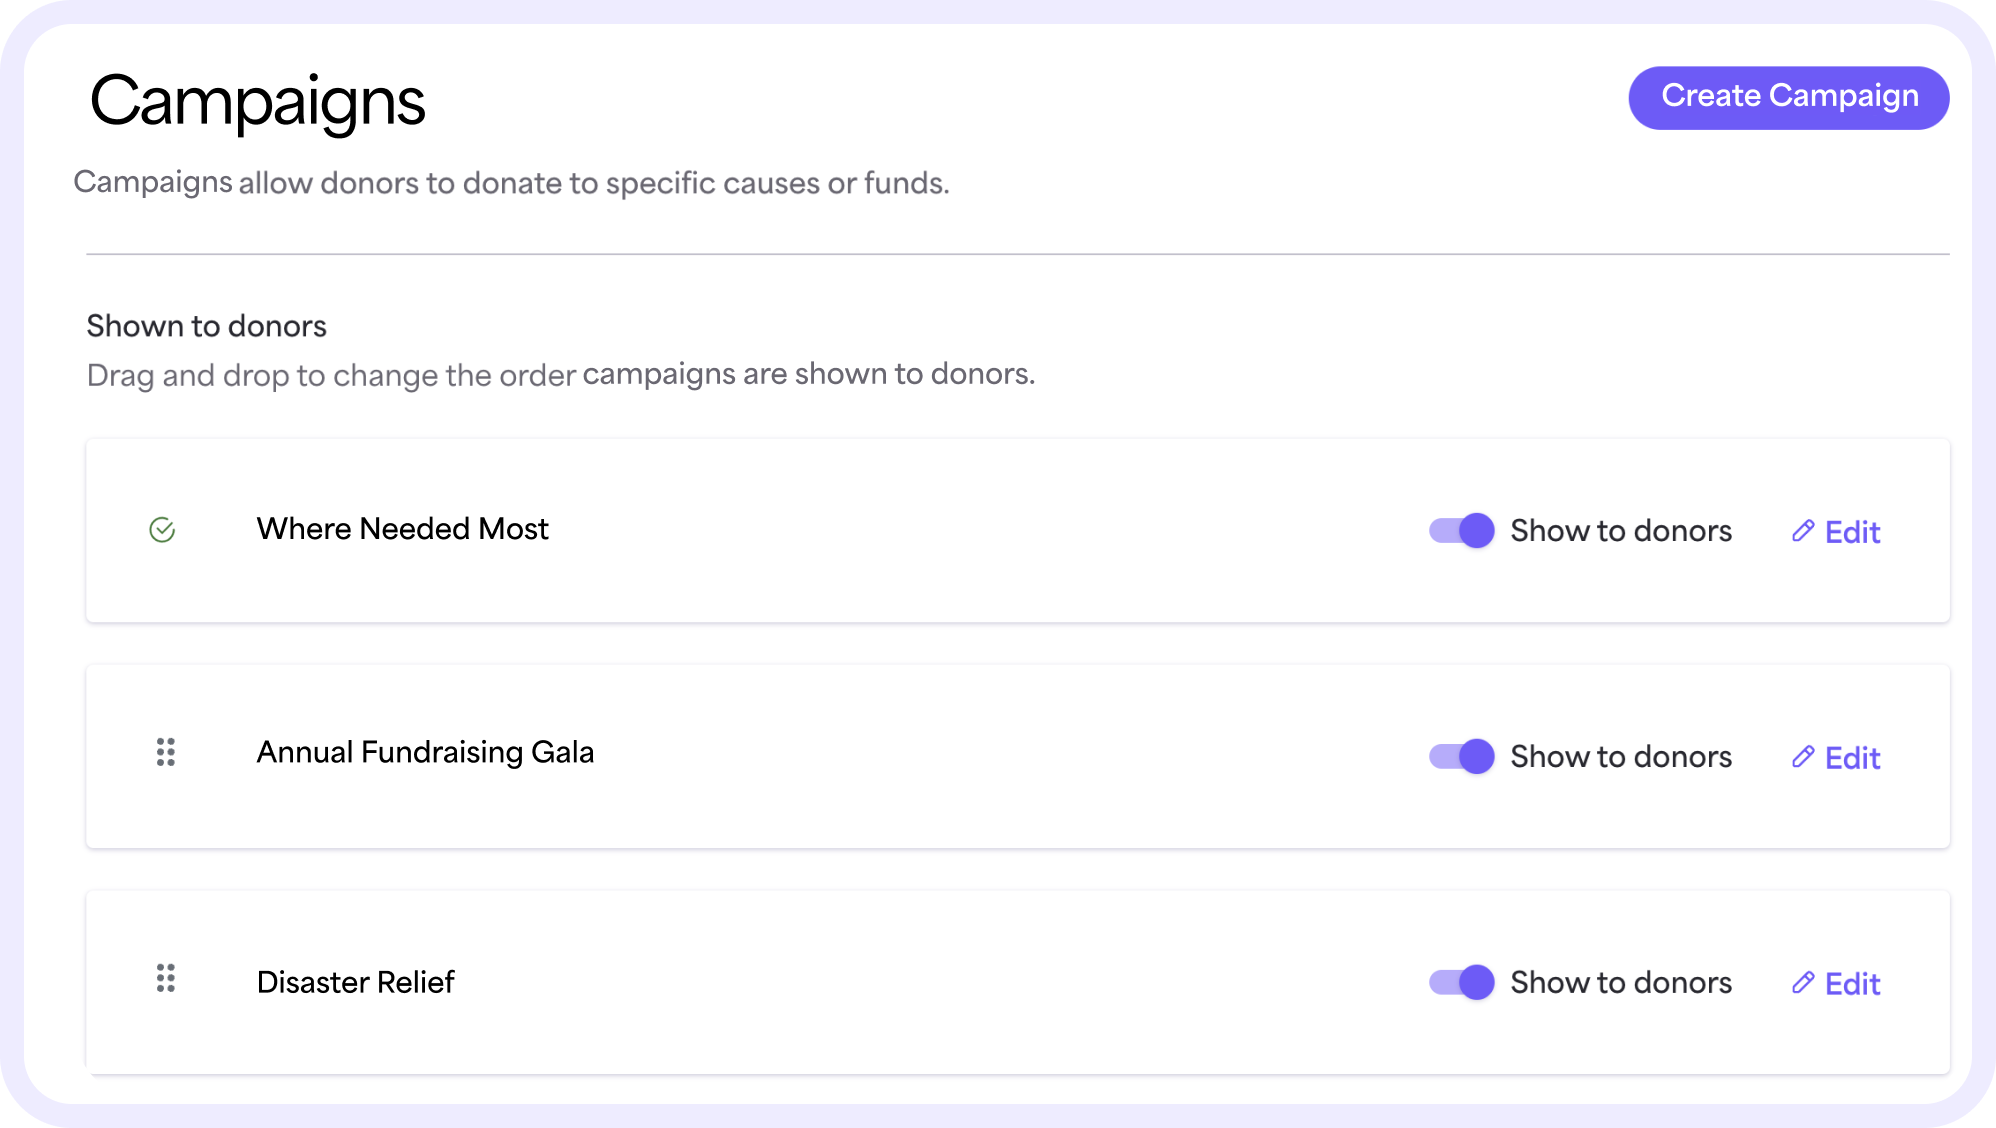
3. A green check will briefly display, indicating the campaign was saved to the new position.
4. To see the change reflected in the Givelify app, you’ll need to sign out of the app and sign back in.
Showing and hiding campaigns
If you don’t want a campaign to appear in the giving app, you can hide it.
Hiding campaigns can be helpful when you’re collecting donations for recurring events or causes that you only want to promote for a certain period, such as a campaign for GivingTuesday or an annual fundraising event.
You can toggle the campaign back on when you’re ready to show it again.
To hide a campaign, follow these steps:
1. On the Campaigns page, in the Shown to donors list of campaigns, navigate to the campaign you’d like to hide. Select the Show to donors toggle to disable it.
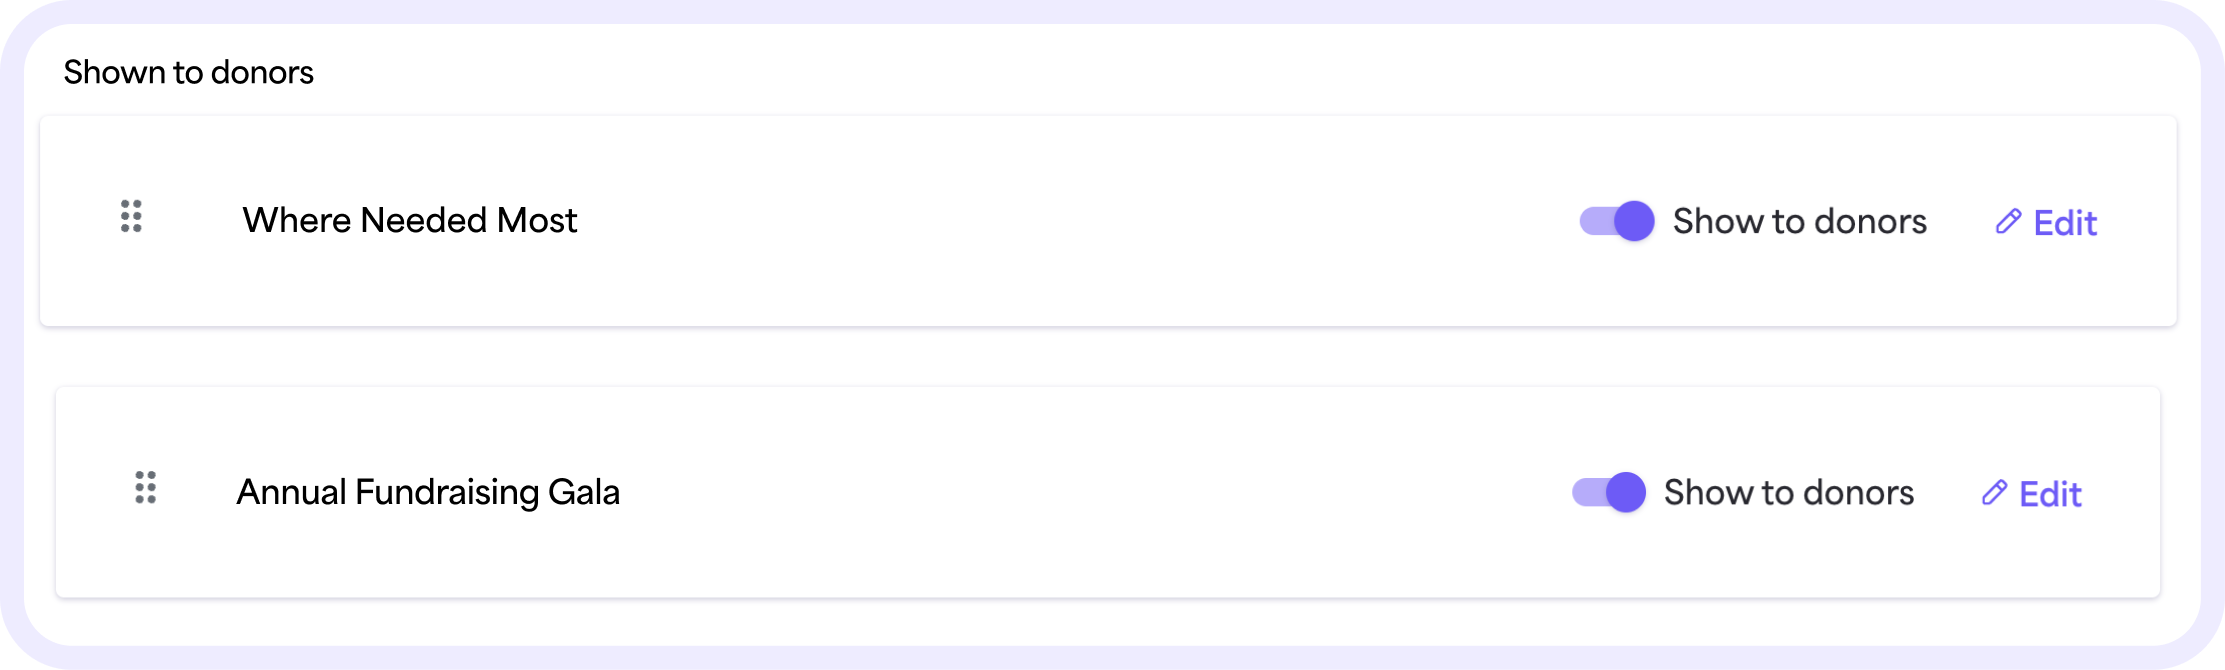
2. Click Hide campaign on the confirmation dialog.
3. The campaign will move to the Hidden from donors list of campaigns on the lower portion of the page.
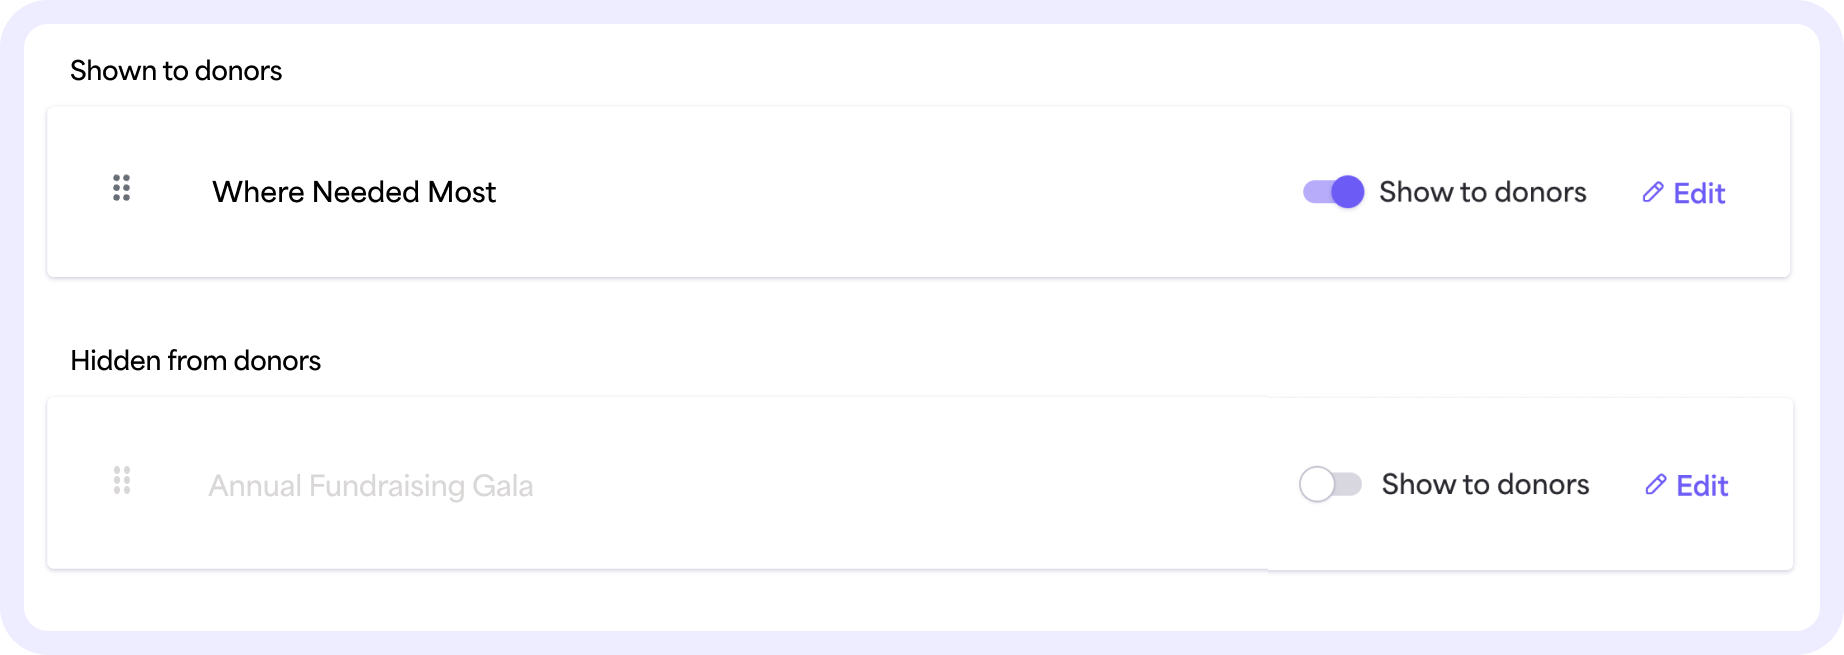
To show a campaign that’s been hidden, follow these steps:
1. On the Campaigns page, in the Hidden from donors list of campaigns, navigate to the campaign you’d like to show. Select the Show to donors toggle to enable it.
2. Click Show campaign on the confirmation dialog.
3. The campaign will move to the Shown to donors list of campaigns on the upper portion of the page.


