


Does your place of worship have multiple locations in the same city or in other cities? Do you want gifts from all locations to go to one centralized bank account?
With Givelify, there's no need to maintain multiple accounts for each location. Instead, you can have one account designated as the headquarters and add other locations as campuses.
When your organization manages all campuses from one Givelify account, you can ensure all gifts go to the same bank account. And each campus will appear as a separate profile on the giving app so members can easily find and give to the right place.
You can also assign a faith leader, set up the campus profile, invite additional users, and create envelopes for each campus.
How to add additional campuses
Note: Only users with admin permissions can add campuses for their organization.
To add a campus to your Givelify account, follow these steps:
1. On your computer, log into your organization’s account at analytics.givelify.com.
2. In the left navigation menu, select Settings > Campuses.
The Campuses option will not display in the left navigation menu if you are signed into one of your organization’s campuses instead of the headquarters.
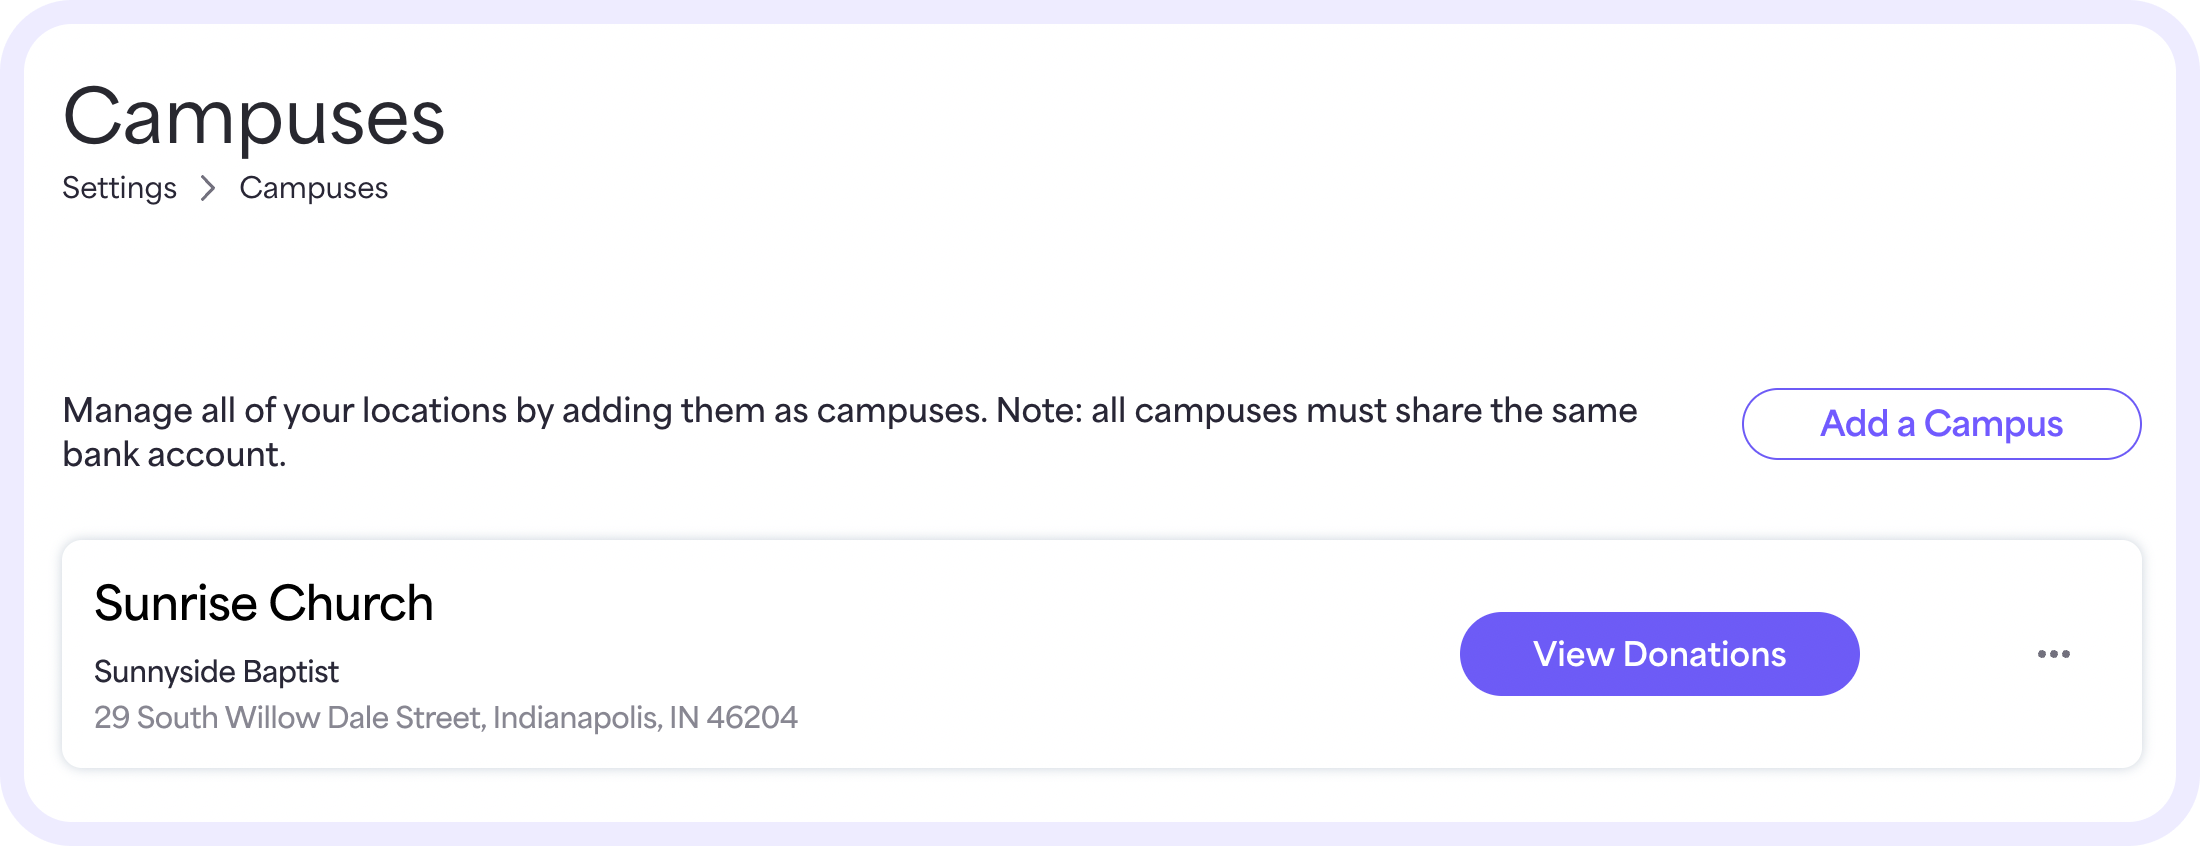
The campuses that have been added are displayed on the Campuses page. If no campuses have been added, you will be prompted to add one.
3. Select the Add a Campus button.
Your place of worship’s name and location will automatically populate in the search fields. You can also enter your place of worship’s name or phone number in the search field and select the Search icon to search for your organization.
4. The search results will be displayed on the lower portion of the page.
- If a campus has already been linked to your headquarters, it will show Your campus in the lower right corner.
- If a location has already been registered with Givelify as a headquarters account, it will show Account claimed in the lower right corner of the search results. If you need to add an account that has already been claimed on Givelify, contact Customer Support at support@givelify.com or call (317) 663-3088.
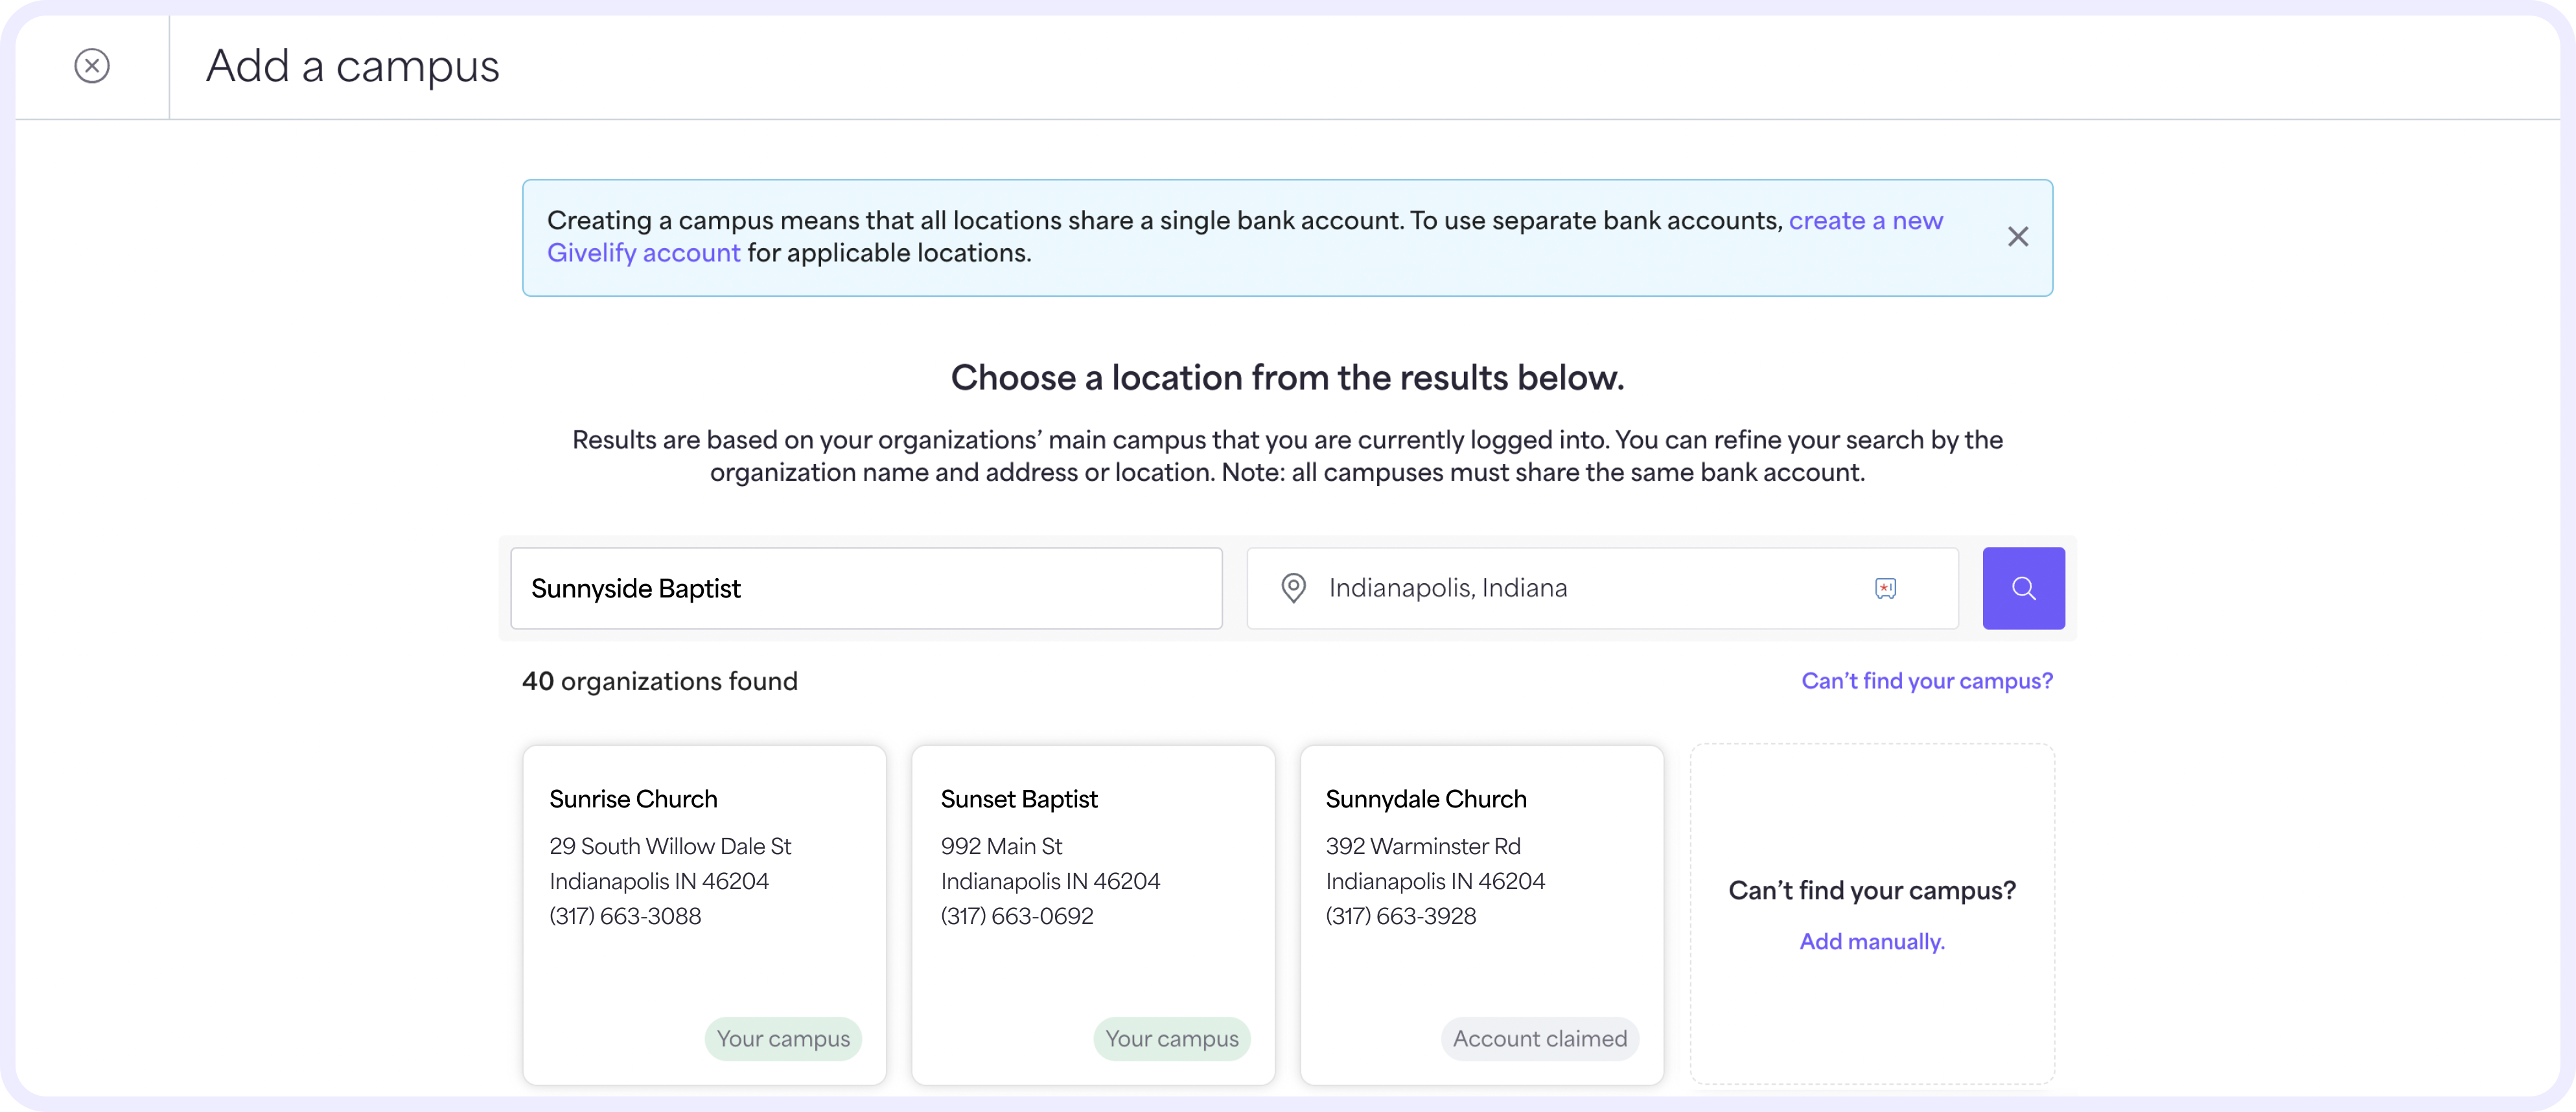
5. Find the campus you want to associate with your account in the search results. Select Add campus and continue to Step 7.
6. If you cannot find your campus, select the Can't find your campus? link or select Add manually. Then, under Campus details, enter the following:
- Official campus name – Enter the name as you would like it to be shown in the Givelify app to givers.
- Internal name – Enter a name for the campus that your organization uses to identify the campus internally. This will not be visible to the public.
- Campus location – Enter the street address, ZIP code, city, state, and phone number for the campus.
- Check the box to confirm you have the authority to sign up and execute contracts on behalf of this organization and campus and that you agree to Givelify's terms and conditions.
- Skip to Step 9.
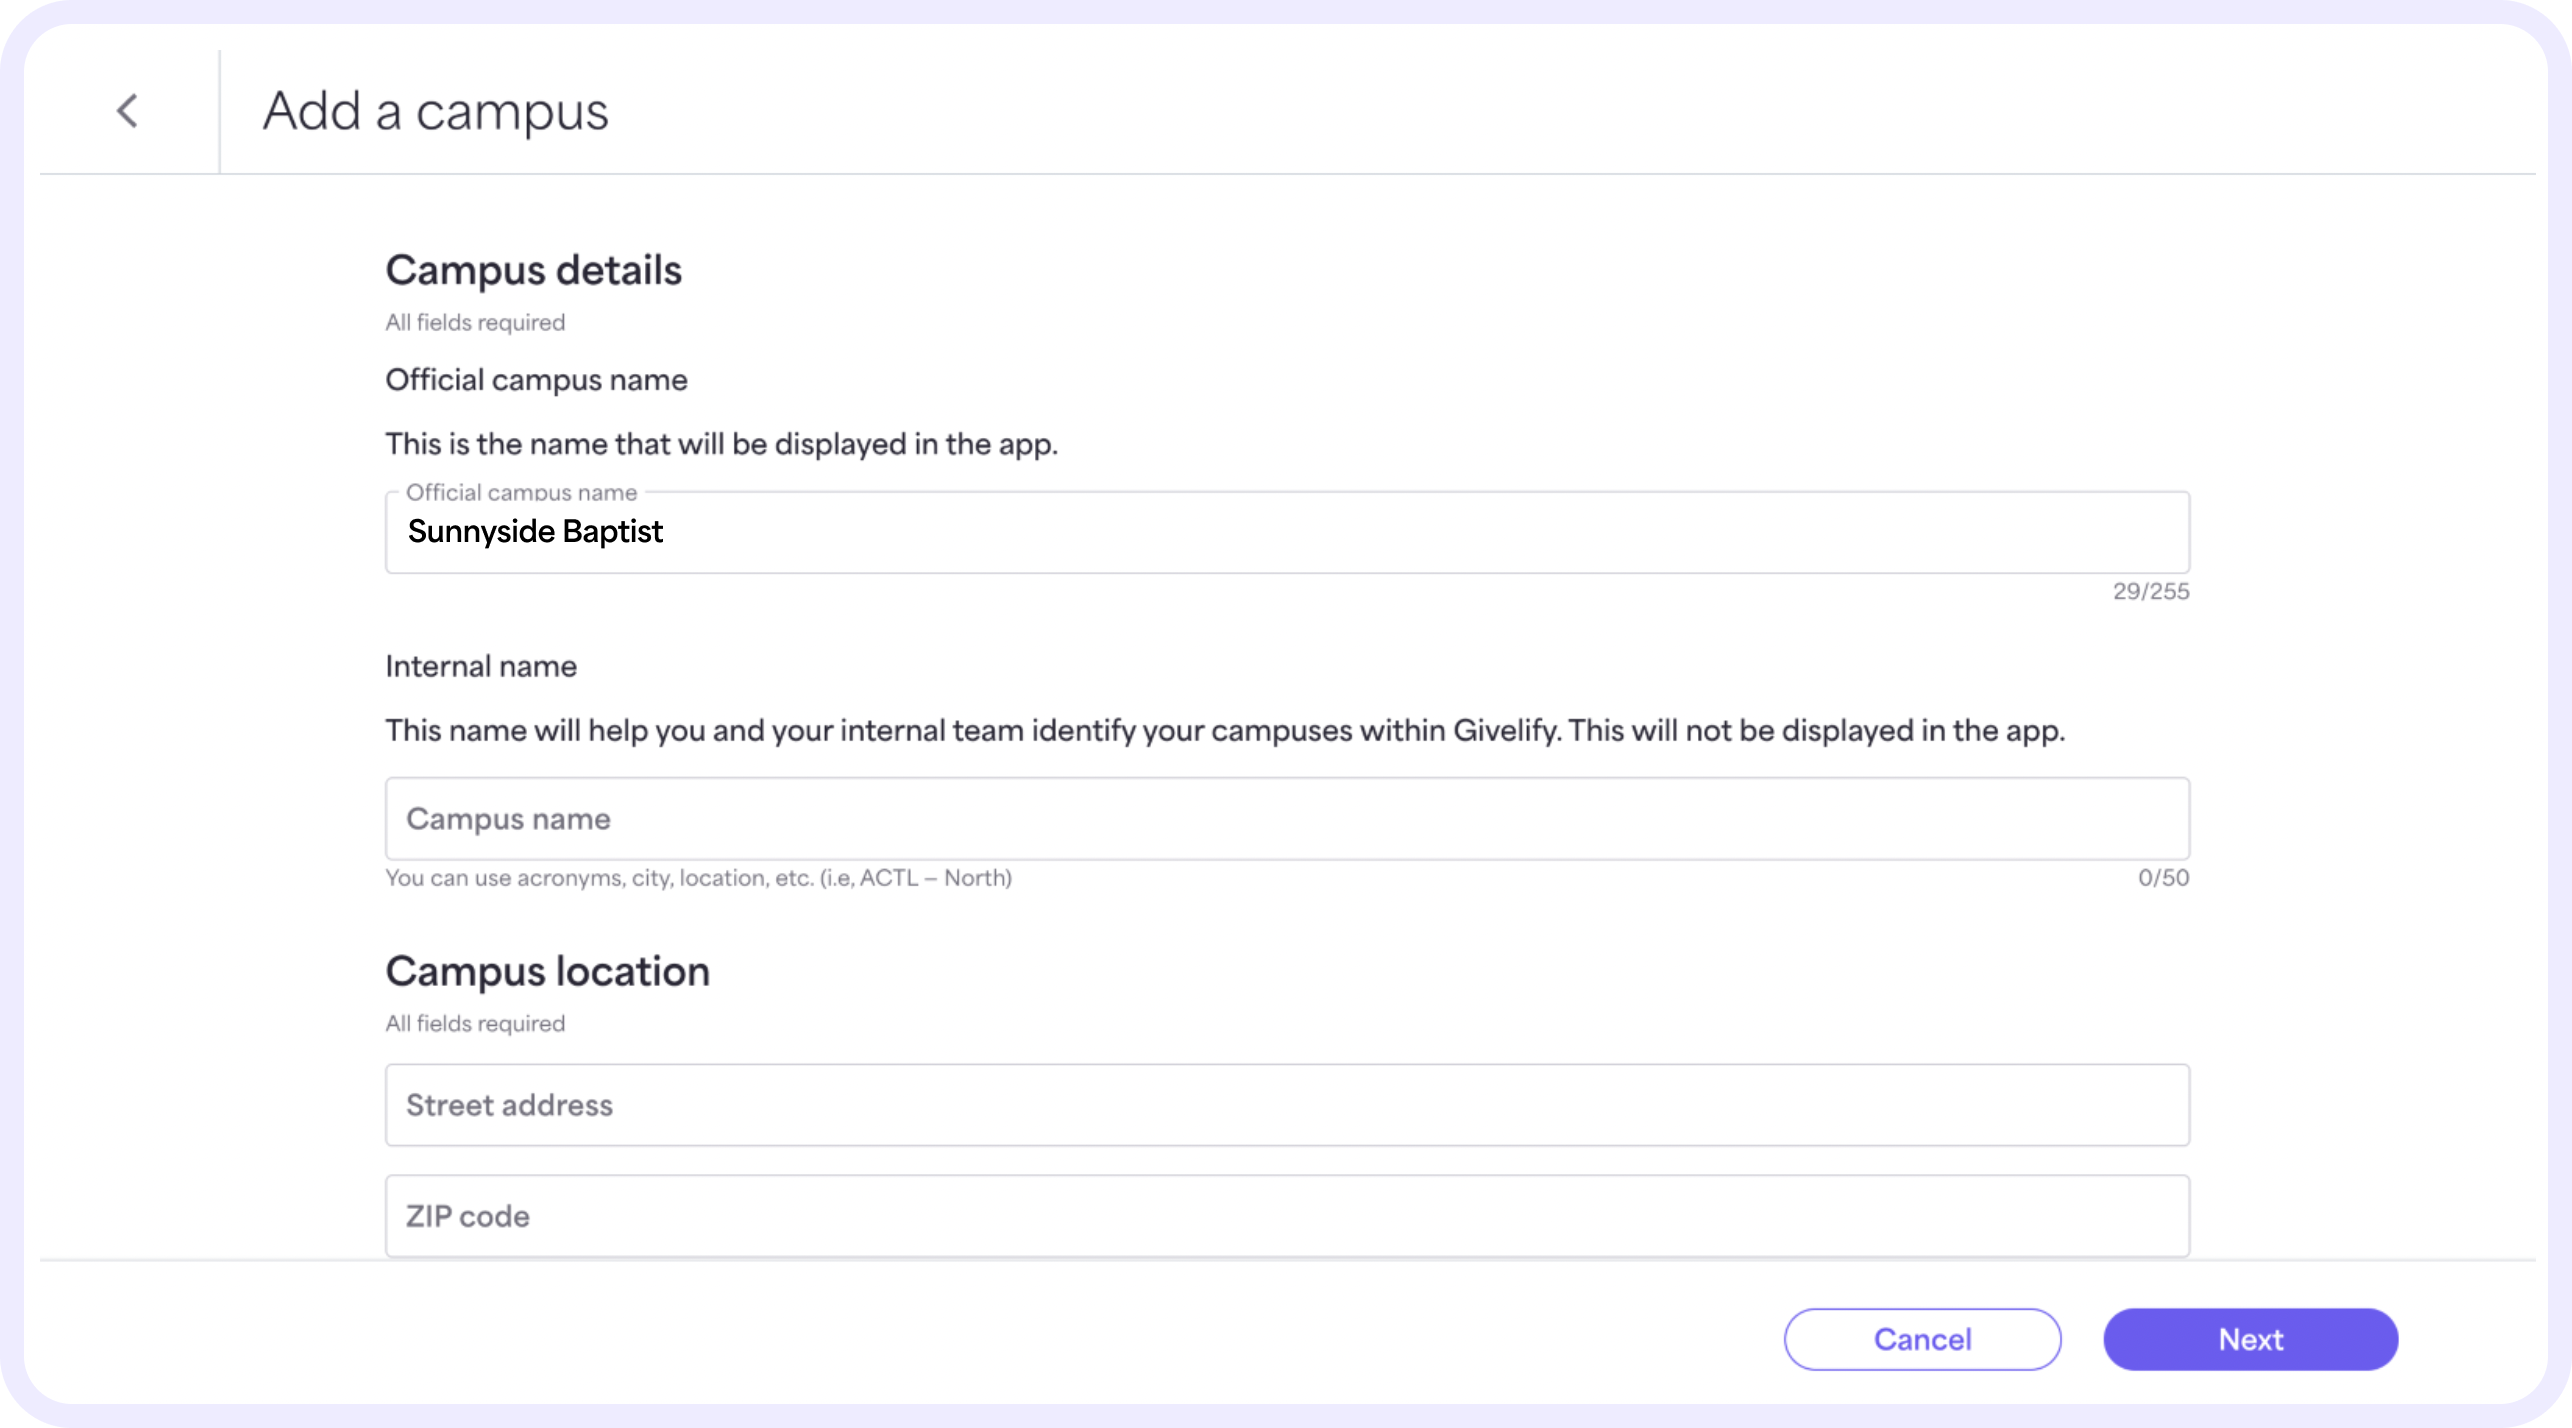
7. On the Campus details page enter your Campus name. Then, check the box to confirm you have the authority to sign up and execute contracts on behalf of this organization and campus and that you agree to Givelify’s terms and conditions.
8. Select Next.
9. On the Confirm new campus dialog, select I understand to acknowledge that this location will share the same bank account for gifts received across multiple locations.
- If you would like to use separate bank accounts, select Cancel and create a new Givelify account for the location.
10. Your request will be submitted. The campus will appear as Pending Approval until your request is verified and approved by the Givelify team. During this time, you may receive an email or a phone call from a Givelify team member. You’ll be notified when the campus is approved within 1 to 3 business days.
- If you’ve added a new campus that has not yet been approved, it will be displayed at the top of the list with a Pending approval status. Once the campus is approved, the campuses will appear in alphabetical order.
- If you’ve submitted a request to delete a campus that has not yet been approved, it will be displayed with a Pending deletion label.
Once approved, all gifts to these campuses will be disbursed to the same bank account. You can also set up your campus profile, add custom giving envelopes, and invite additional users.
To add another campus, repeat the above steps.
Questions? Contact Customer Support at support@givelify.com or (317) 663-3088. You can also visit the Support Center for answers to frequently asked questions.
Merging duplicate accounts
If your organization appears more than once in the Givelify app, and you’d like to merge these accounts into one, contact Customer Support at support@givelify.com or (317) 663-3088.


